3. Trust Group Administration Activities
This chapter serves as a training guide for people who will be administering and managing trust groups using a Trident portal system. It includes activities such as setting trust group policies for vetting, vouching, and idle timeouts, resetting user passwords, adding users manually, and more. Only trust group administrator members are allowed to view or manage these tasks.
3.1. Admin Password Reset
There is one user-related activity that only a trust group
administrator can manage: initiating the reset of a password
for another user (Figure Admin password reset for user). Make sure
to confirm via the toggle before clicking the Request
Password reset button.
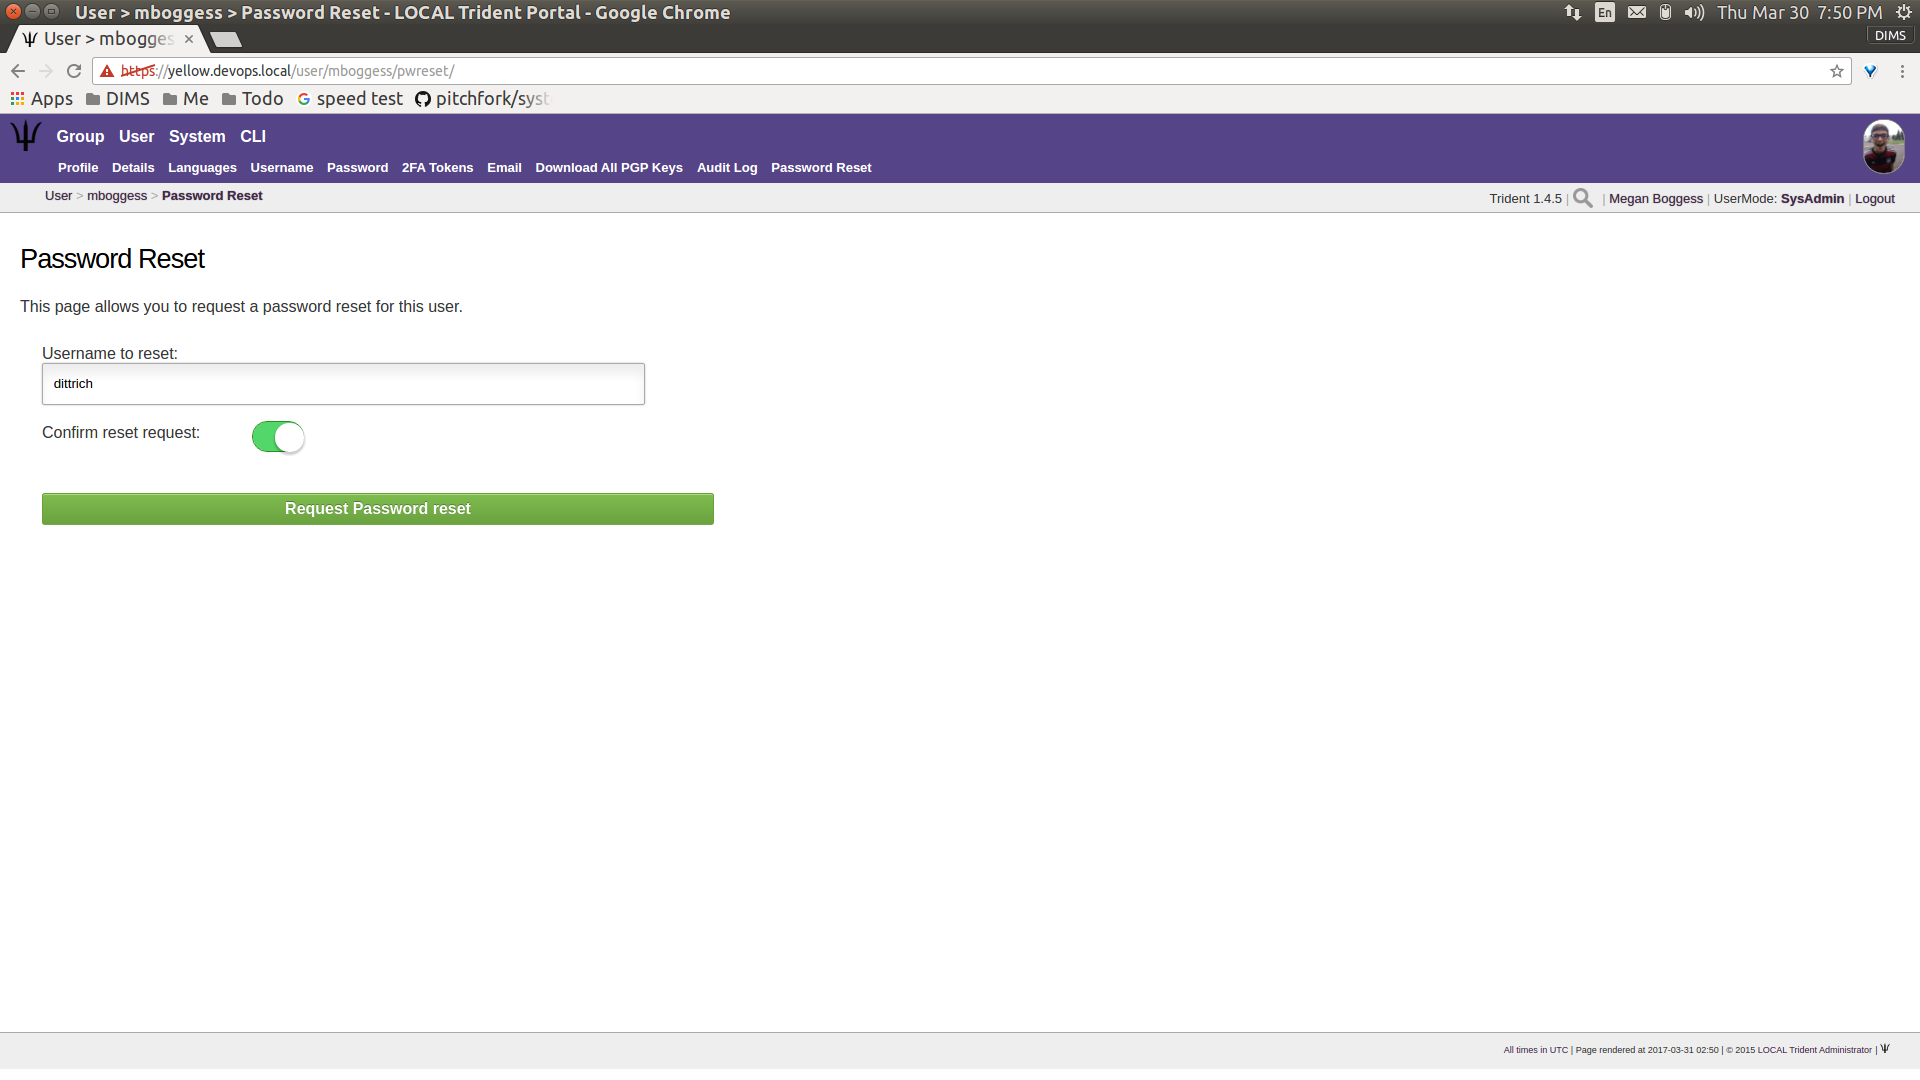
Admin password reset for user
An admin can only begin the process for resetting a user’s password, she cannot do it directly. Each user was initially nominated to the trust group before being allowed membership in the trust group. The nominator of a user is part of the process to reset a user’s password. As such, because none of the users in our example group were nominated (nor have any of the users uploaded PGP keys), this activities fails (Figure Admin password reset fail). Once all members have uploaded keys and there are members who have been nominated, this activity can continue.
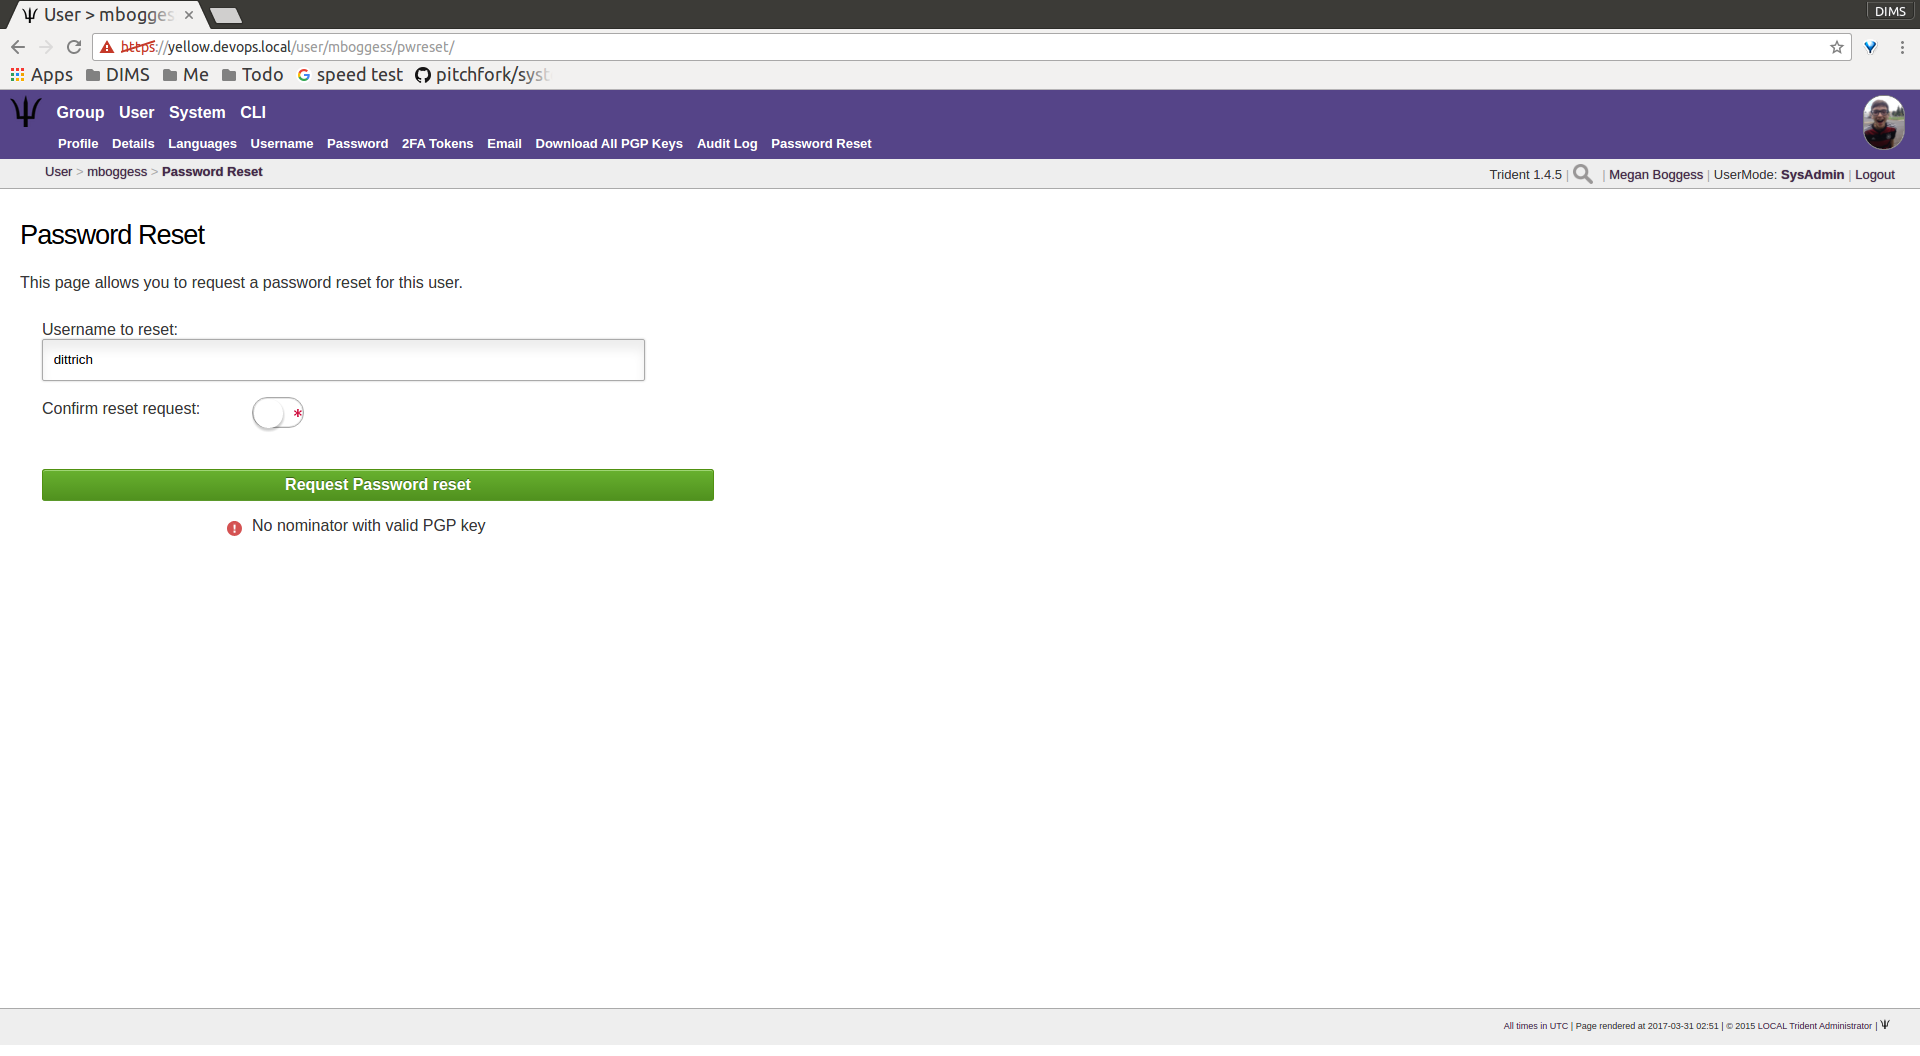
Admin password reset fail
3.2. Group Admin Activities
This section describes the group-related activities manageable only by trust group administrators. These activities include adding new mailing lists to a trust group, adding a new trust group, updating the group’s settings and adding modules to the group, and a couple member-related actions.
When logged in as a trust group administrator, the Group
home page looks like what is shown in Figure Group home, sysadmin).
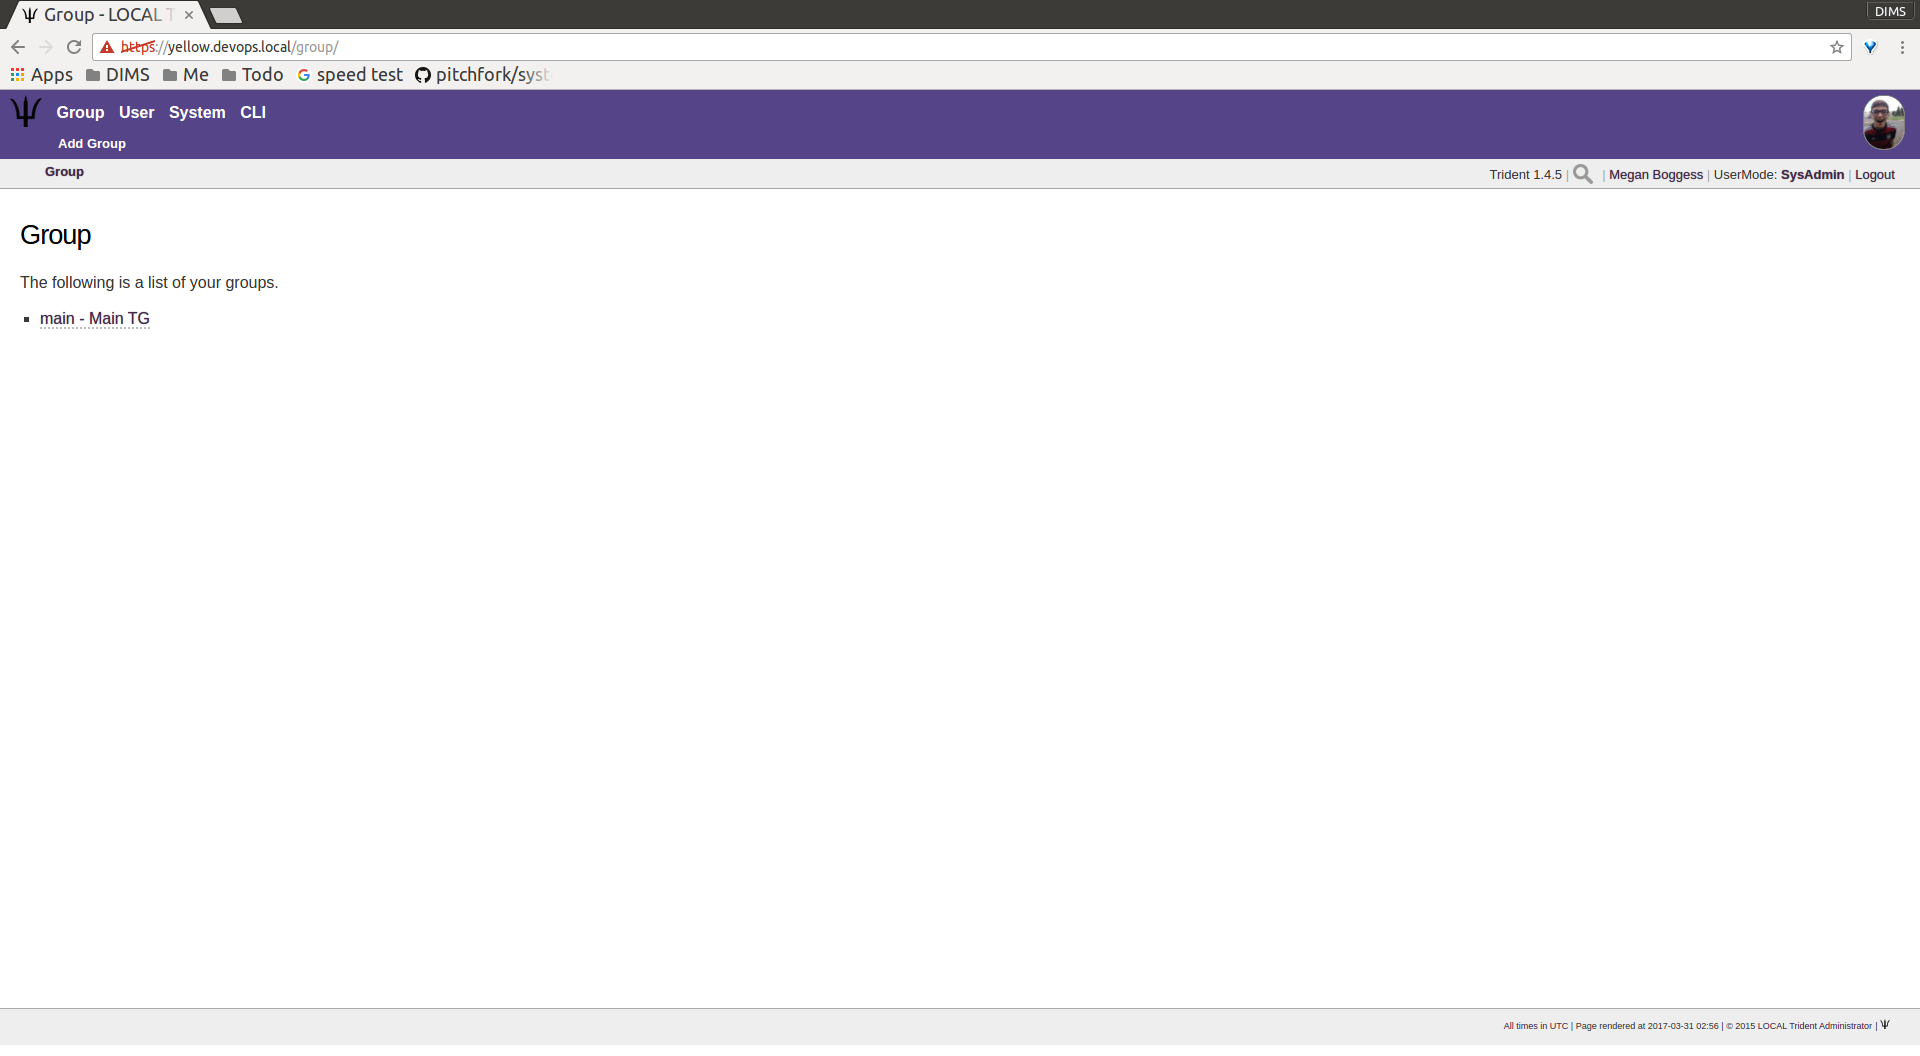
Group home, sysadmin
To add a new trust group, click the Add Group link in
the second row at the top of the page
(Figure Add group). This opens a new page with a field
for the new trust group’s name. Fill in the field, then click
the Create button.
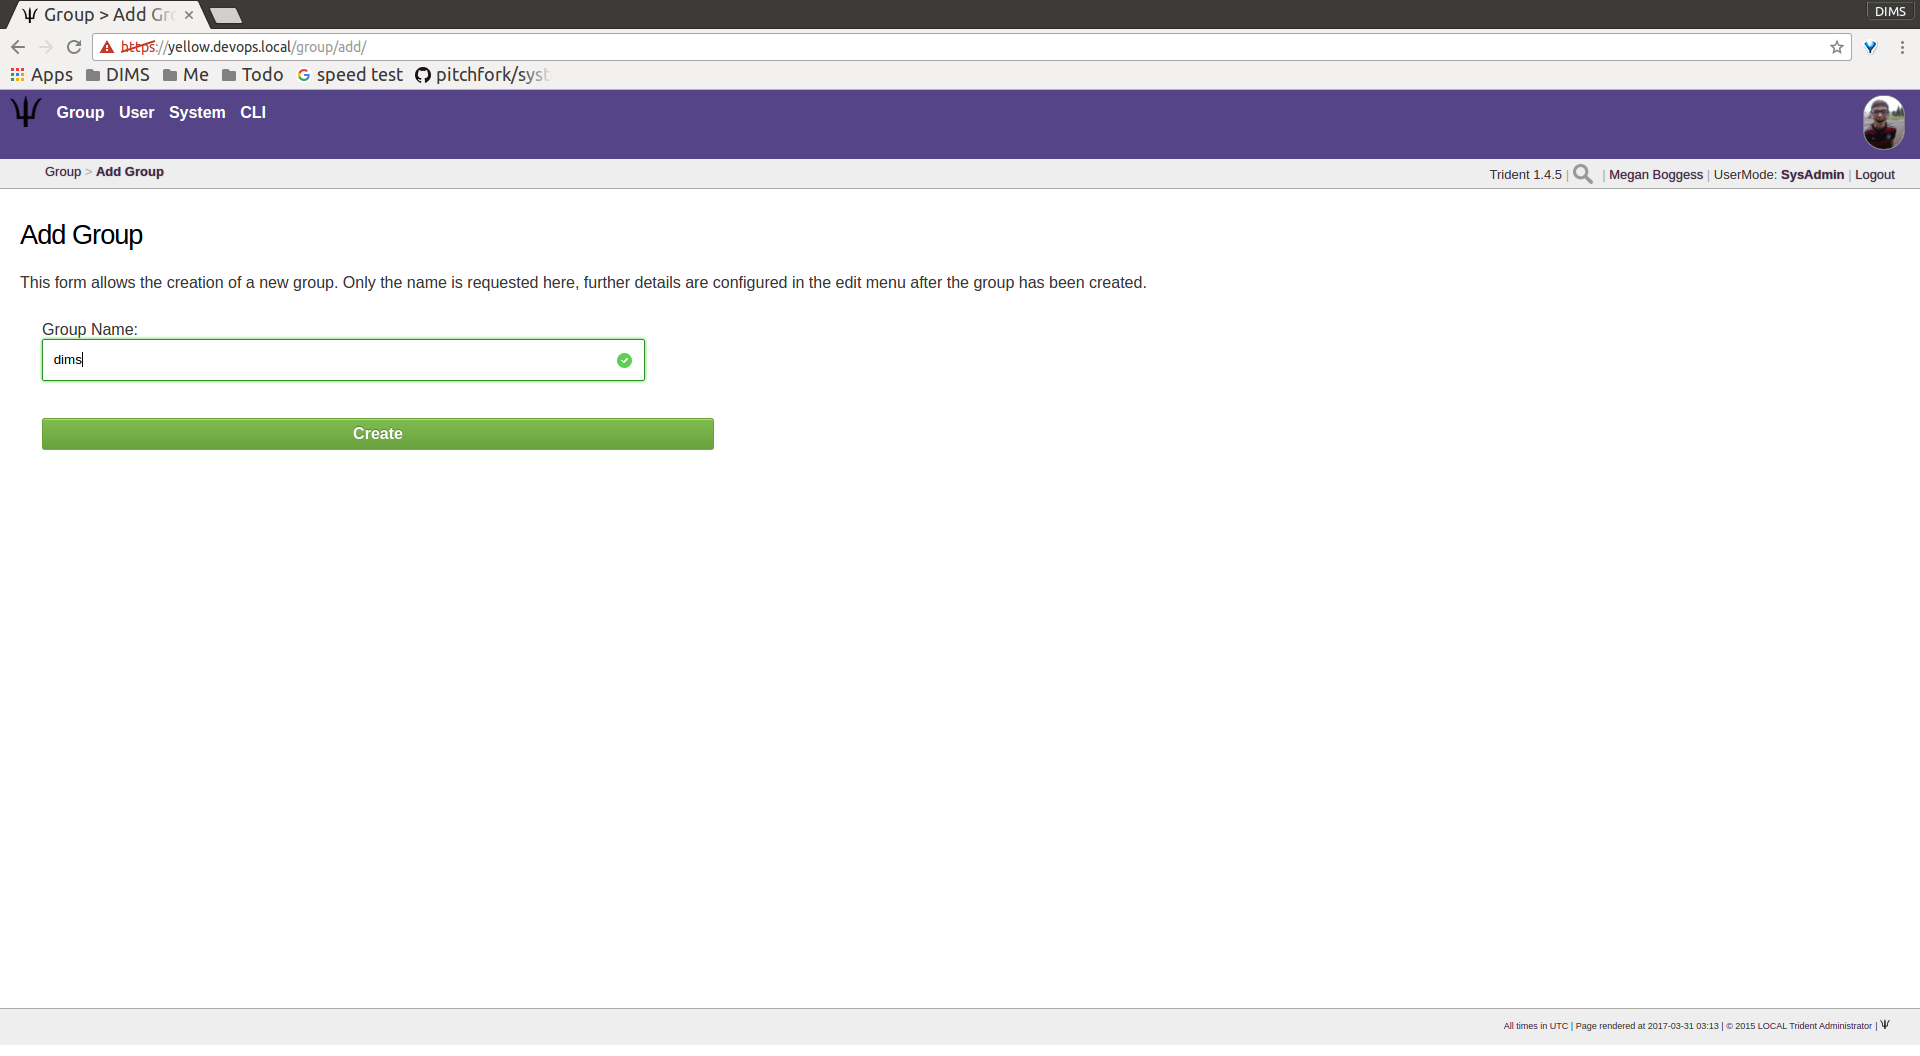
Add group
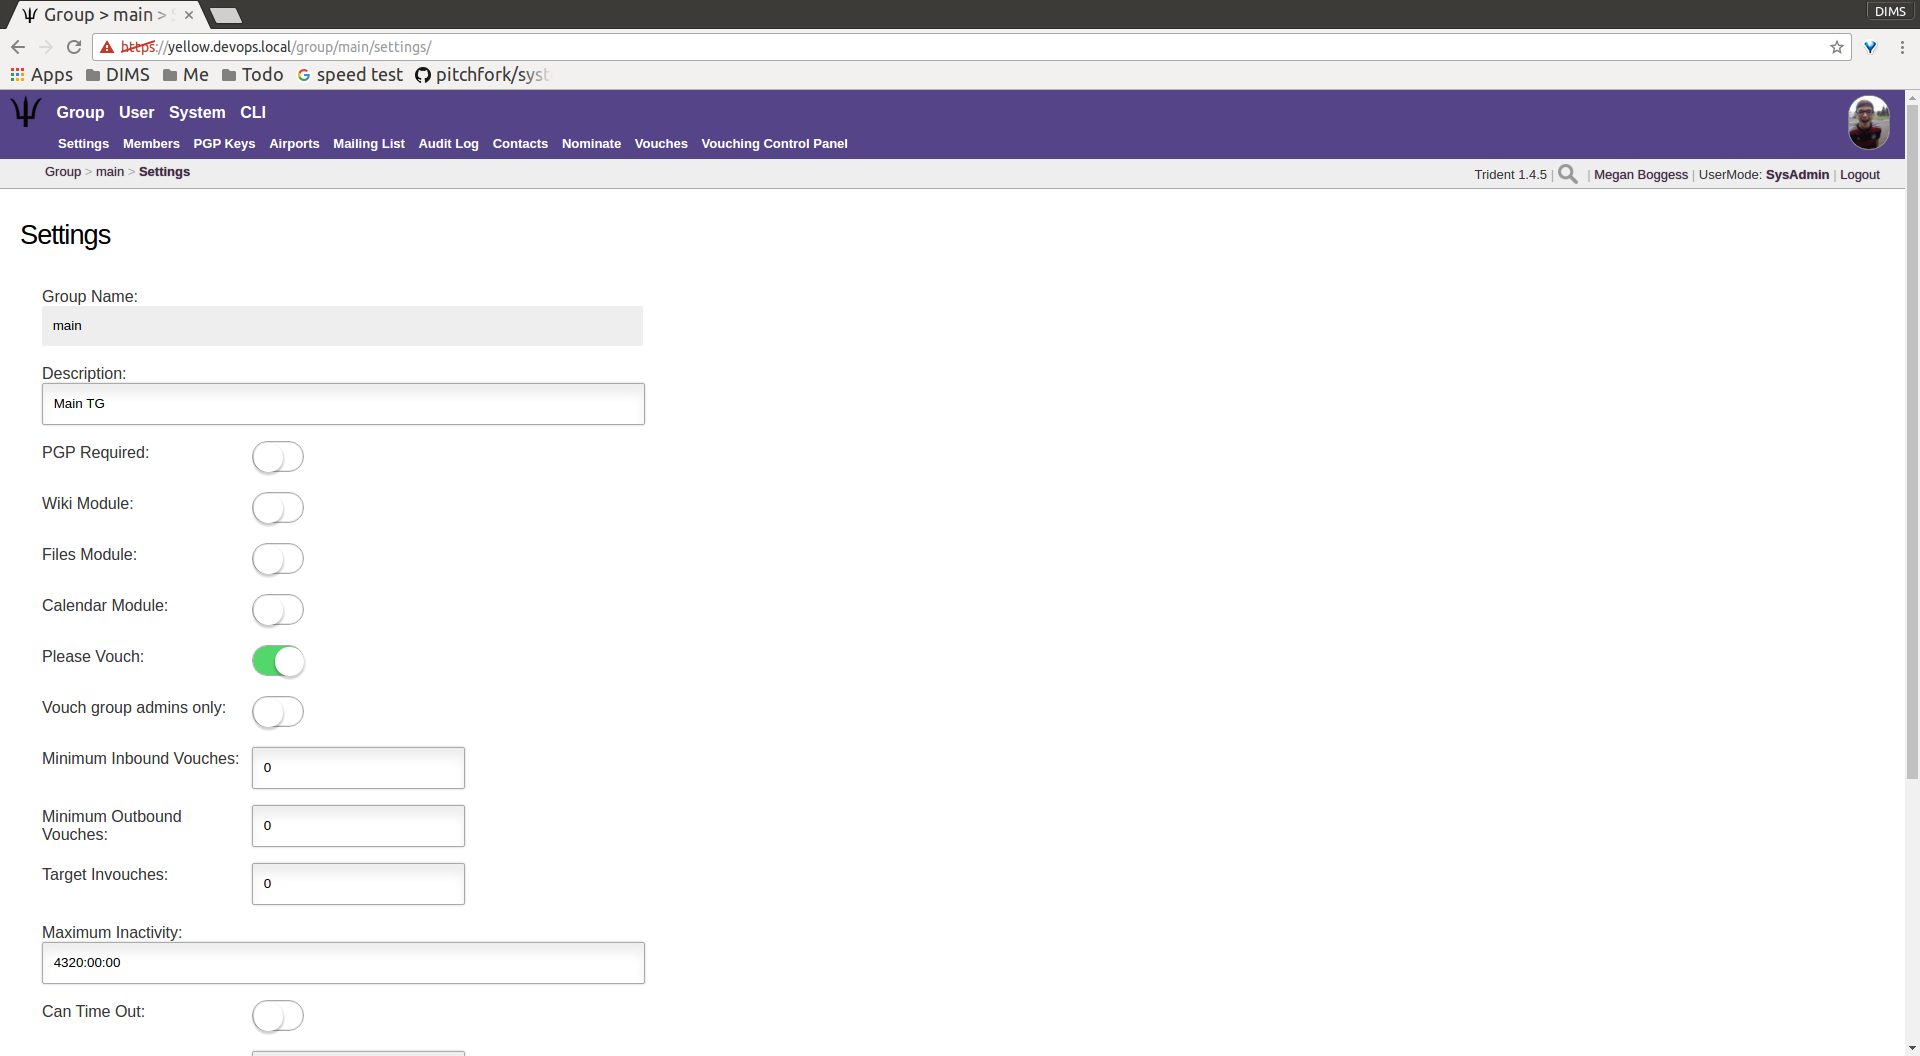
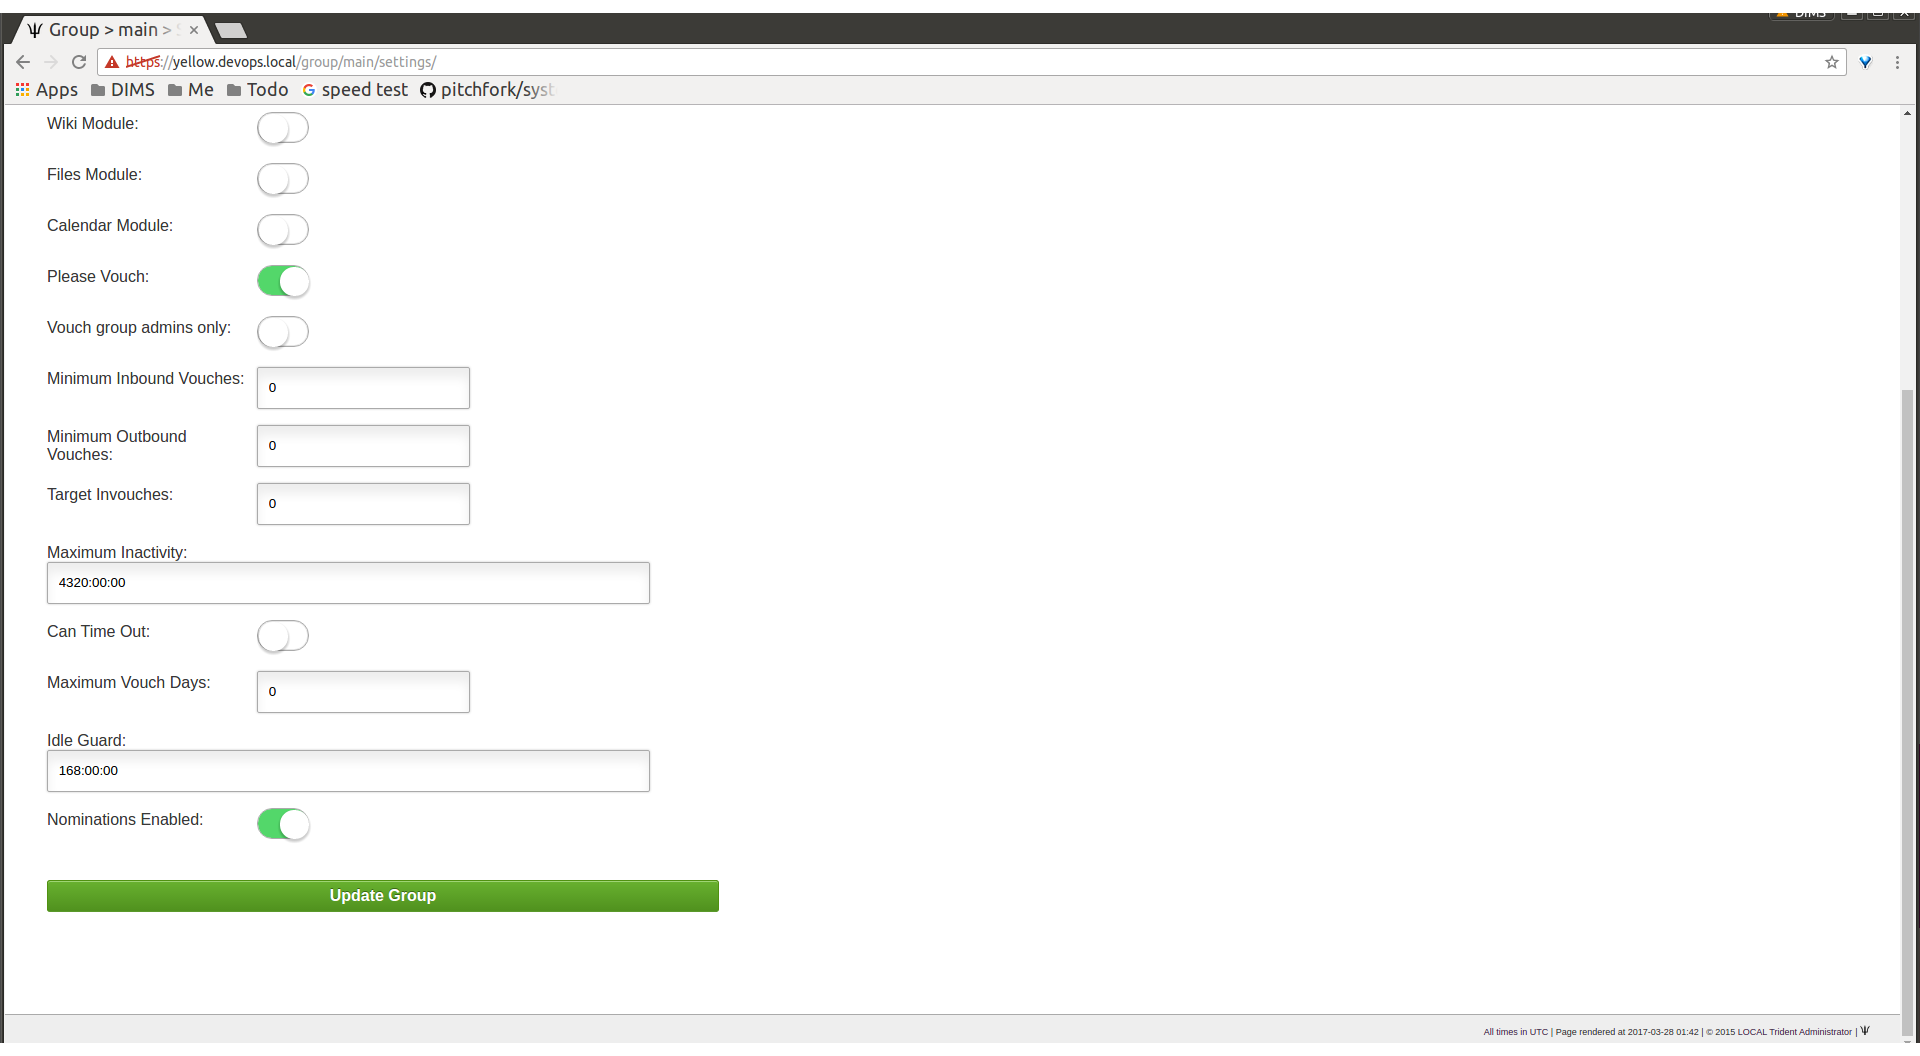
This opens a new page with settings for the new group
(Figure New group settings, top). Configure these settings
as needed and, if any modifications are made, click the
Update Group button at the bottom of the page
(Figure New group settings, bottom).
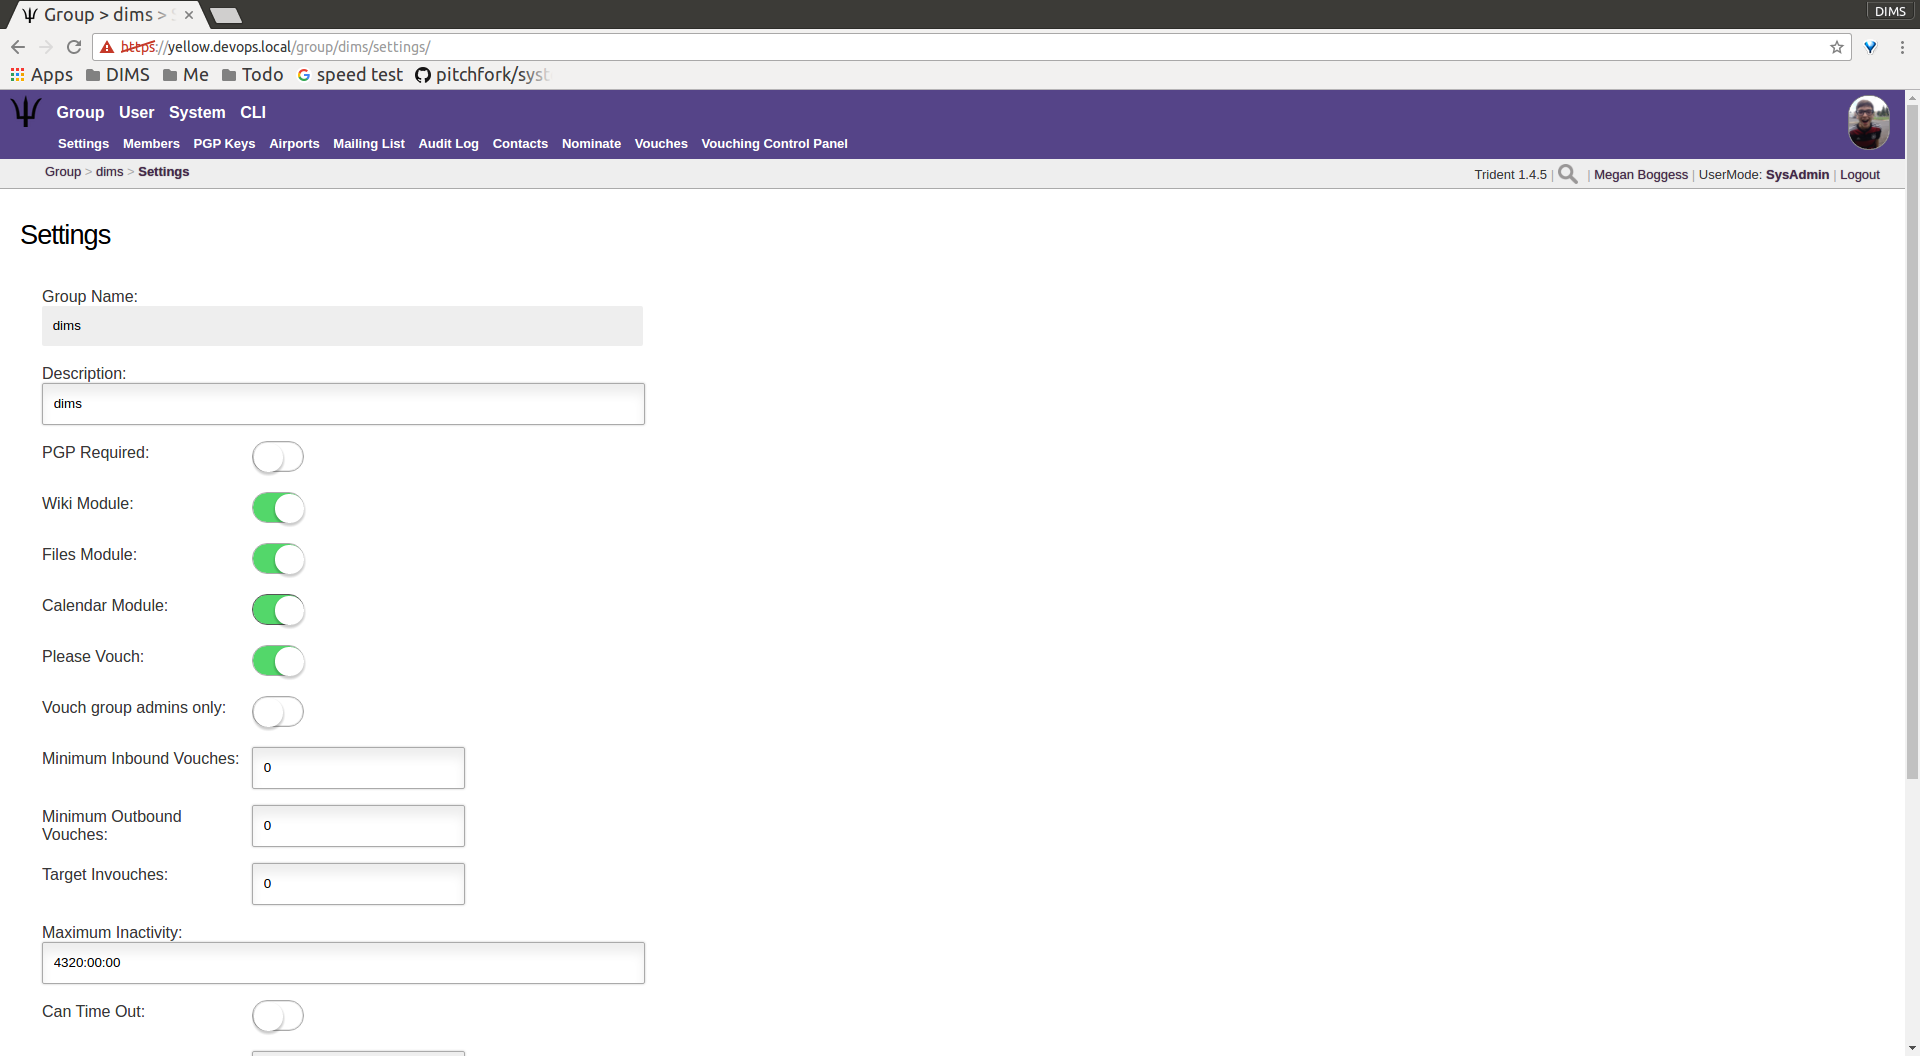
New group settings, top
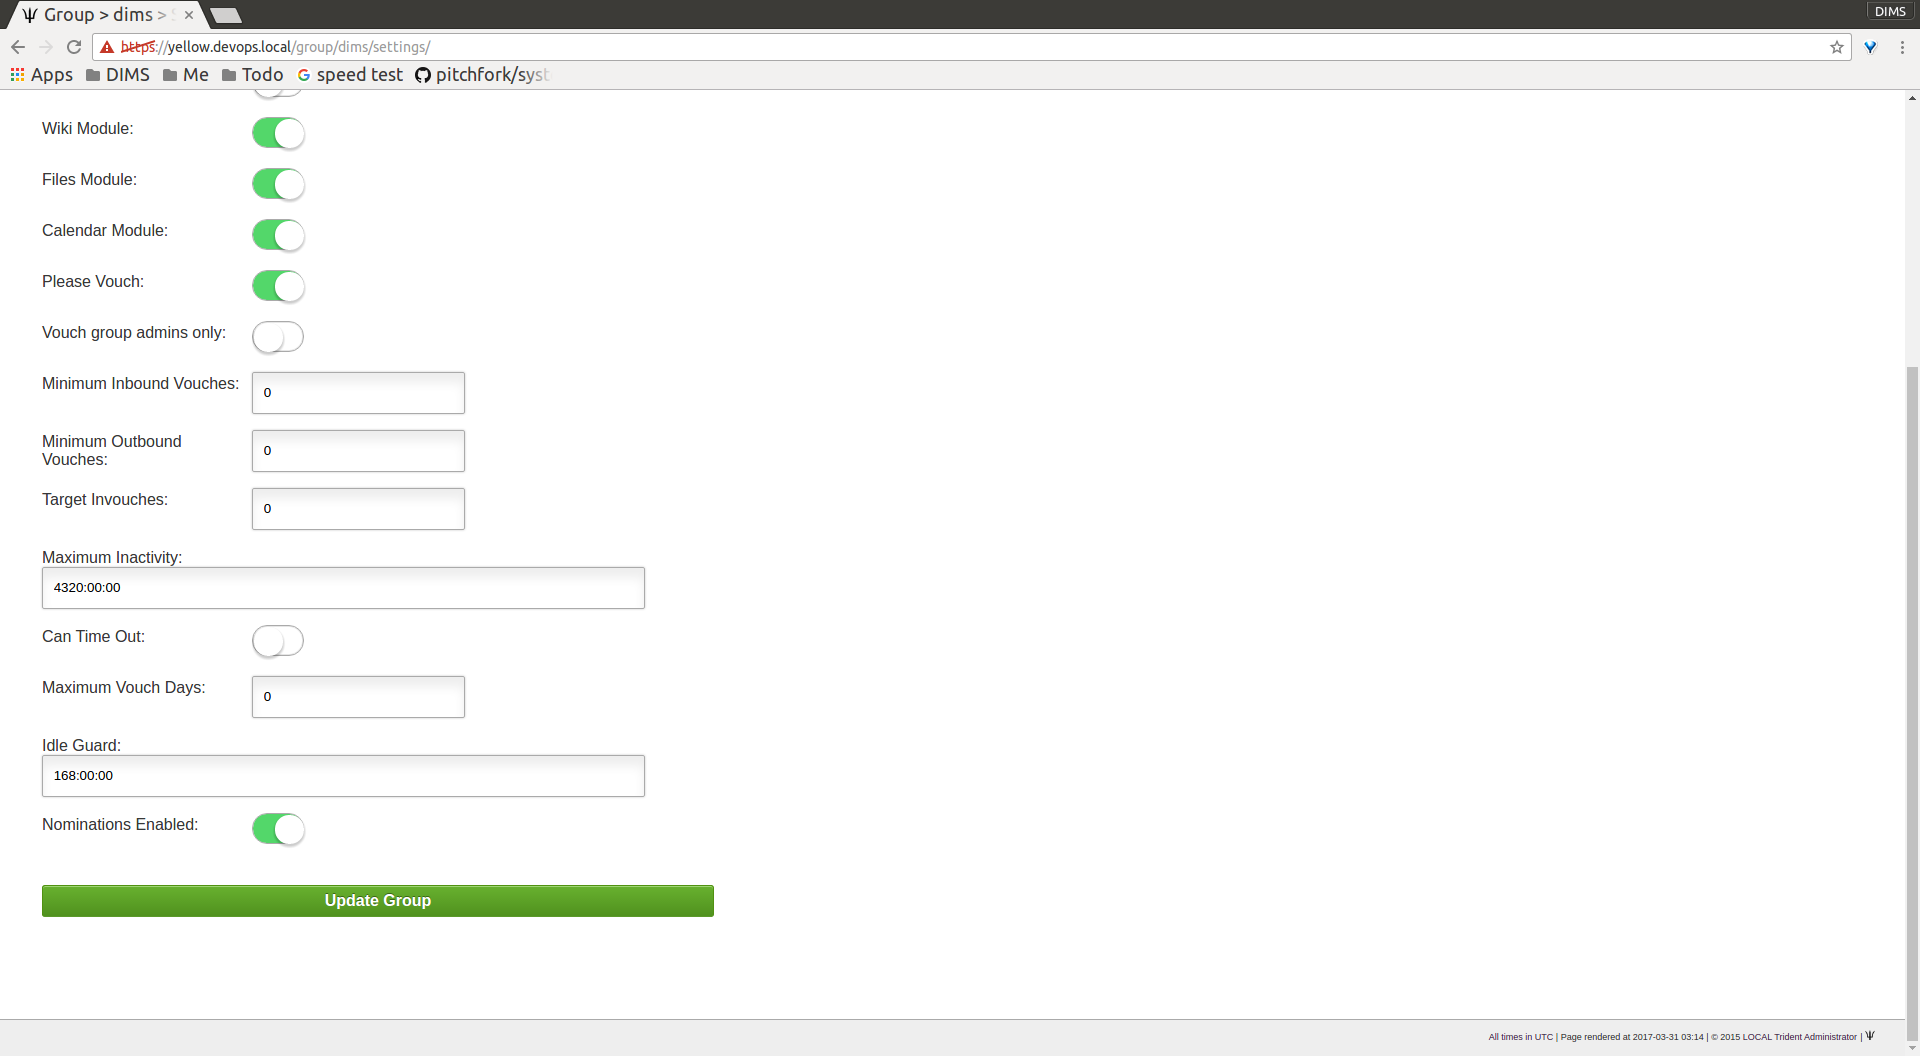
New group settings, bottom
Returning to the Group home page, the new group will be
added in the list of links to current trust groups of which
the current user is a member (Figure Group home page, updated).
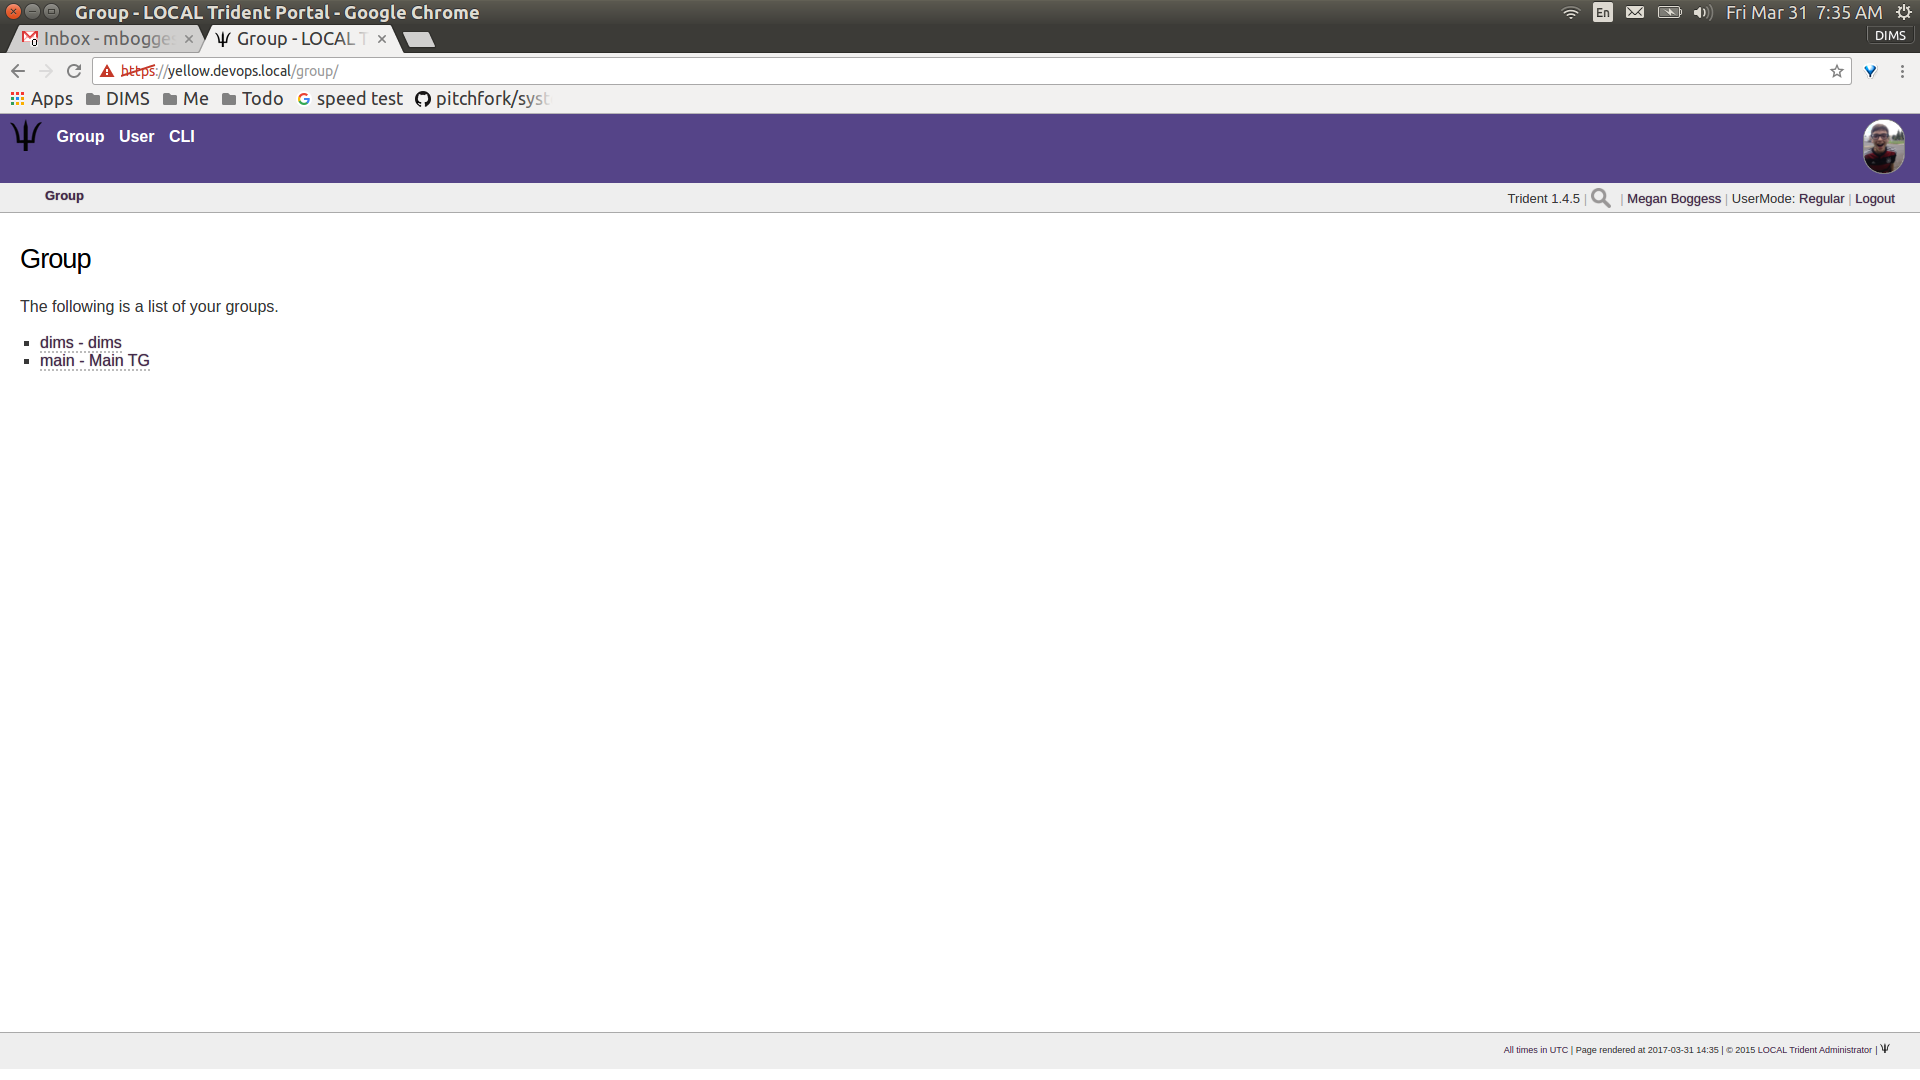
Group home page, updated
Once a trust group exists, changes can be made to it or to its members. A specific group’s home page might look like the page shown in Figure “Main” group’s home page.
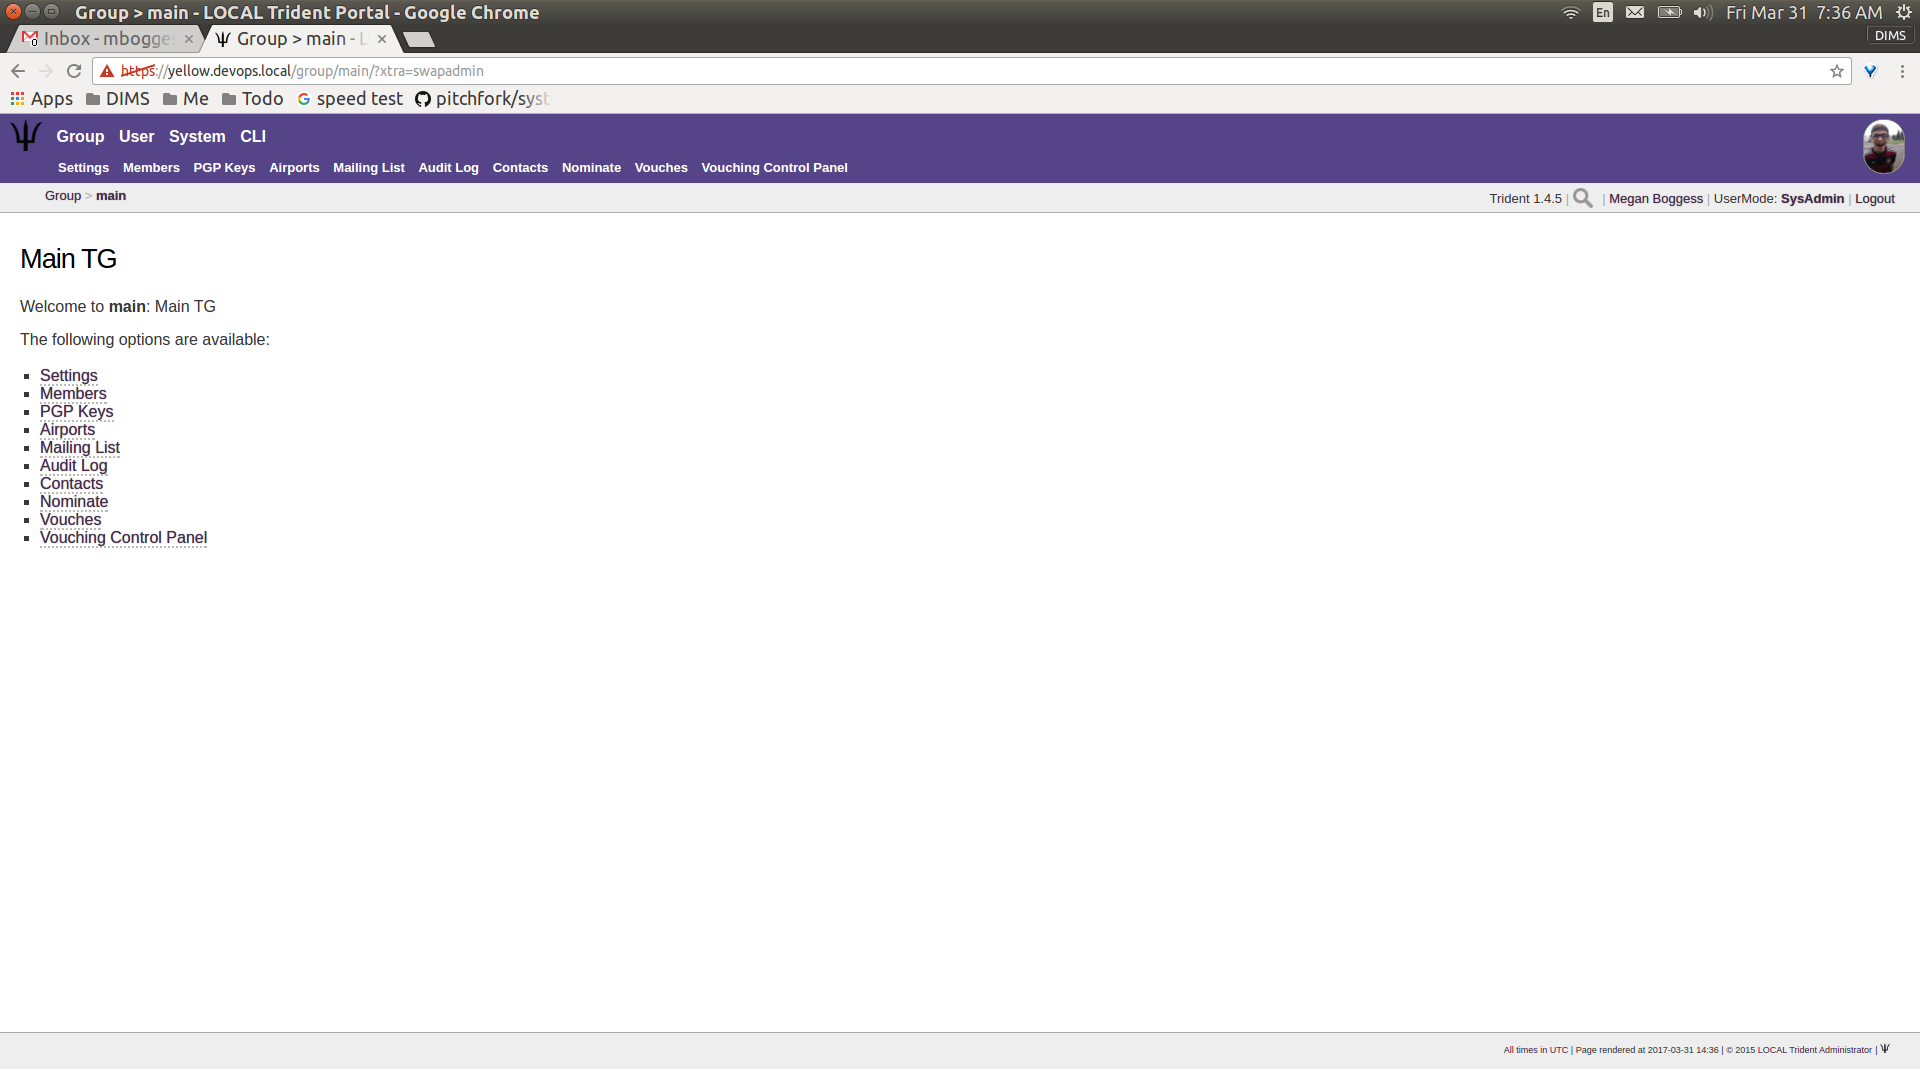
“Main” group’s home page
This page contains almost exactly the same set of links on
the page itself or tabs in the second row at the top of the
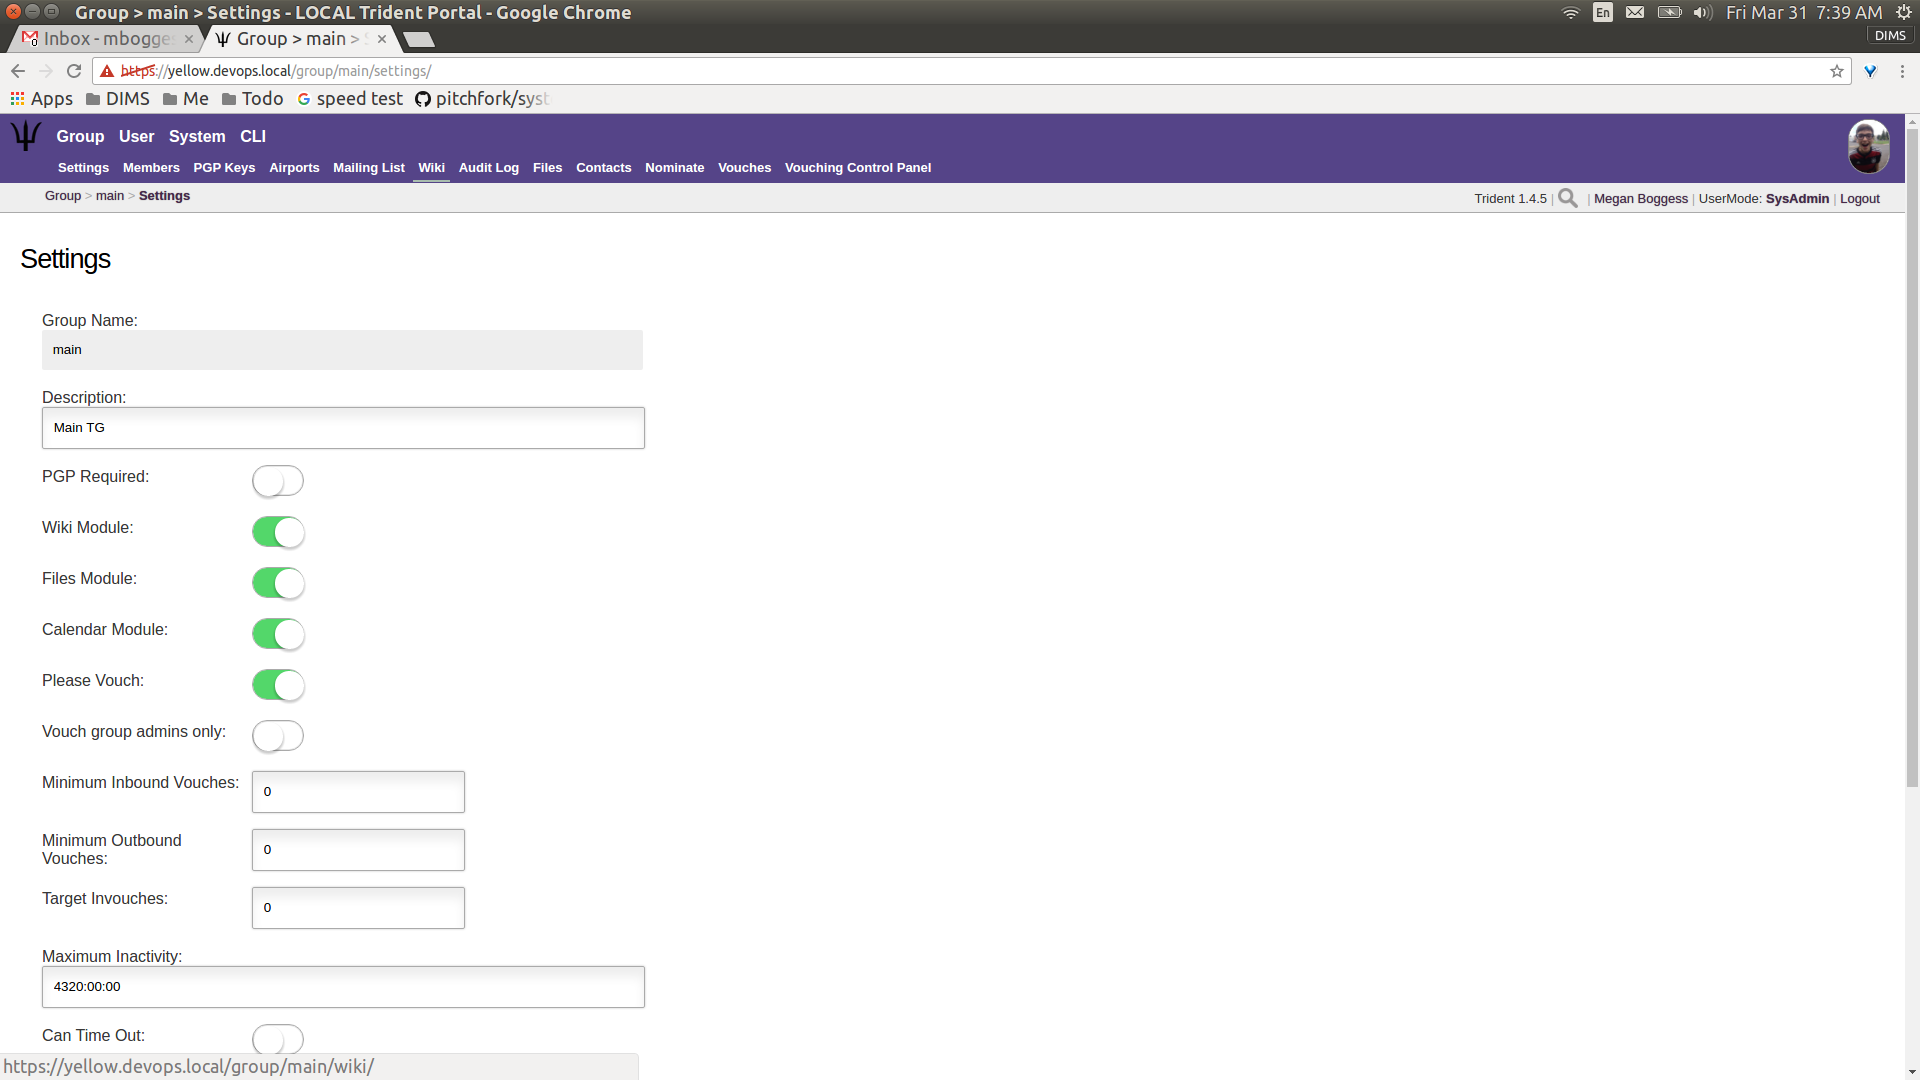
page. The Settings link and tab can now be seen. Group
settings include vouching policies, timeout policies, idle
policies, PGP requirement policy, and including additional
modules (not yet added in Figure Group settings, top).
Group settings, top
Group settings, bottom
There are three additional modules that are option to the use of a Trident portal system and may be added at any time: the Wiki module, the Files module, and the Calendar module.
Note
At this time, the Calendar module seems to still be under development. Toggling “on” the Calendar module in group settings does not add a Calendar link or tab. We are reporting this to the Trident developers.
To view potential modules to add, go to the current trust
group’s Settings page. If a module has not been added,
its toggle will not be in the “on” position (highlighted and
the toggle moved to the right), as can be seen in the page
shown in Figure Group modules off.
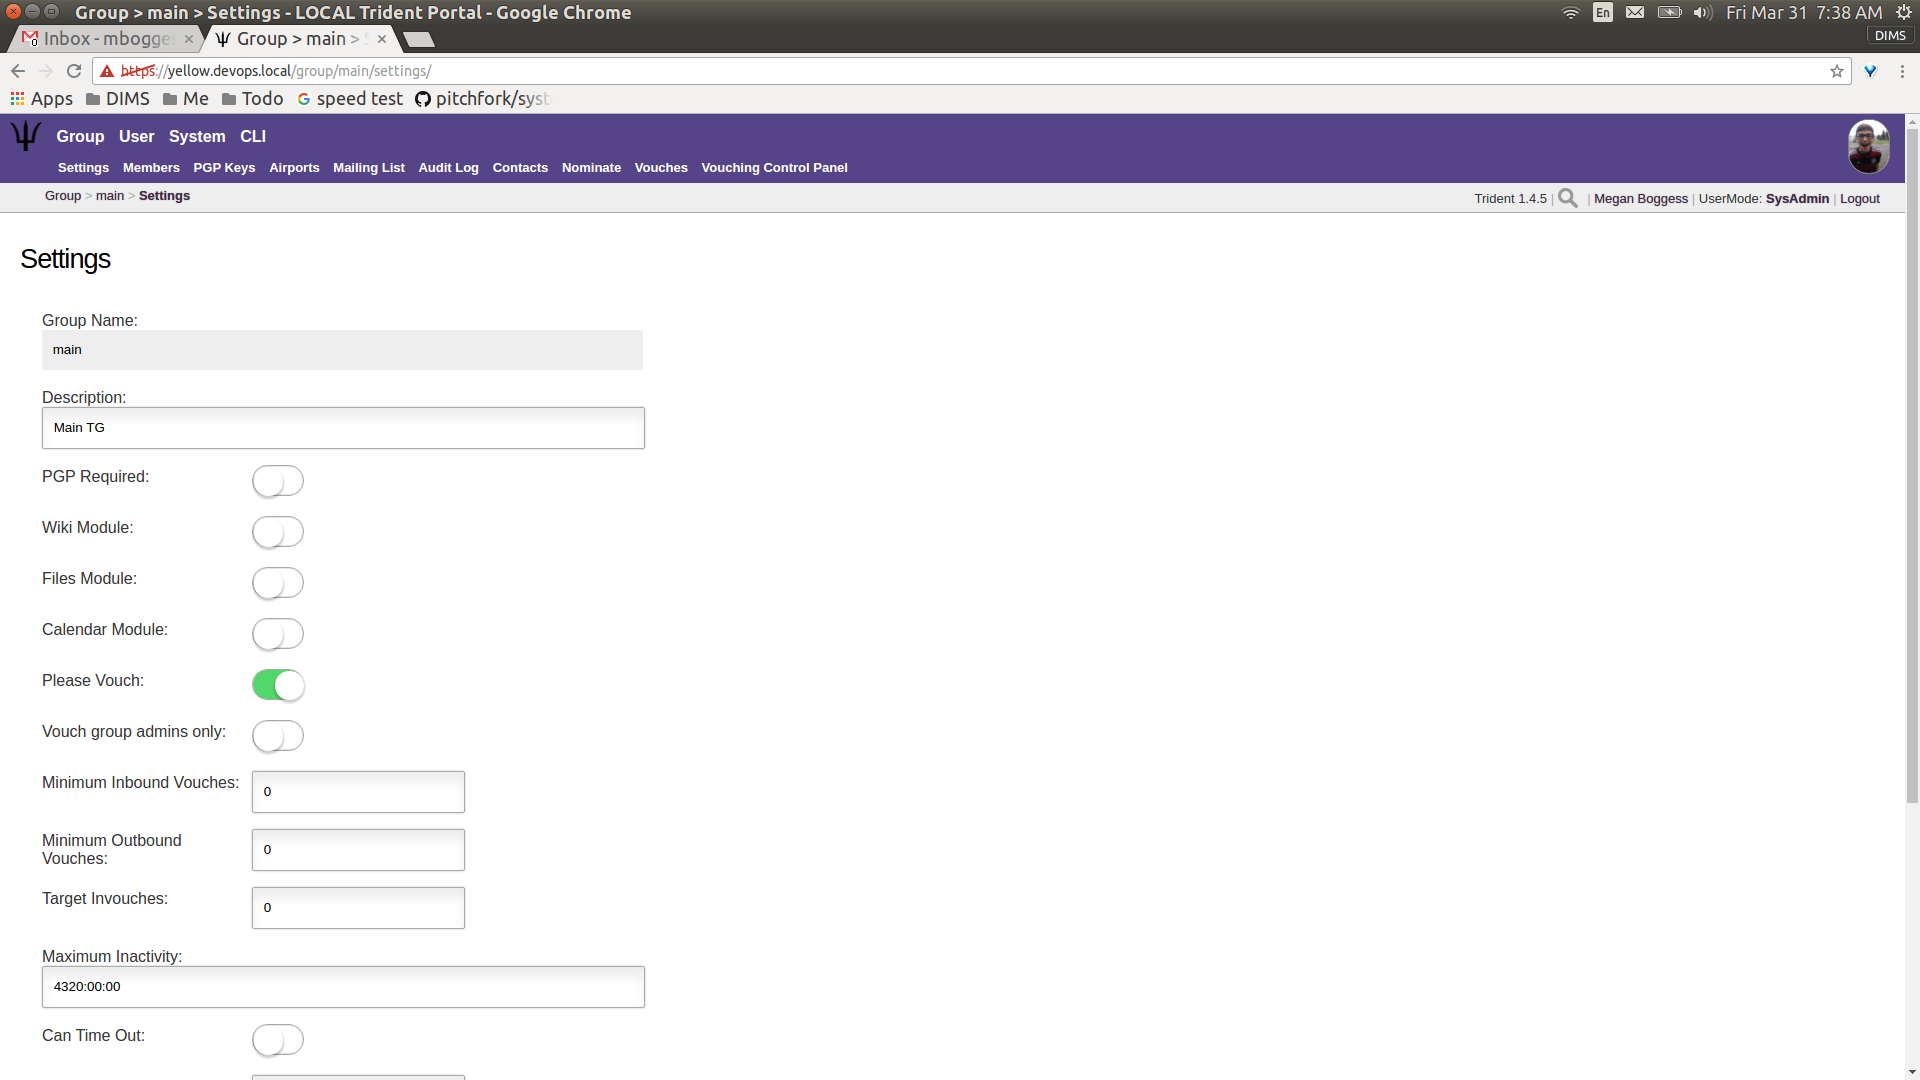
Group modules off
To add modules, toggle each desired module to the “on” position as shown in Figure Group modules on.
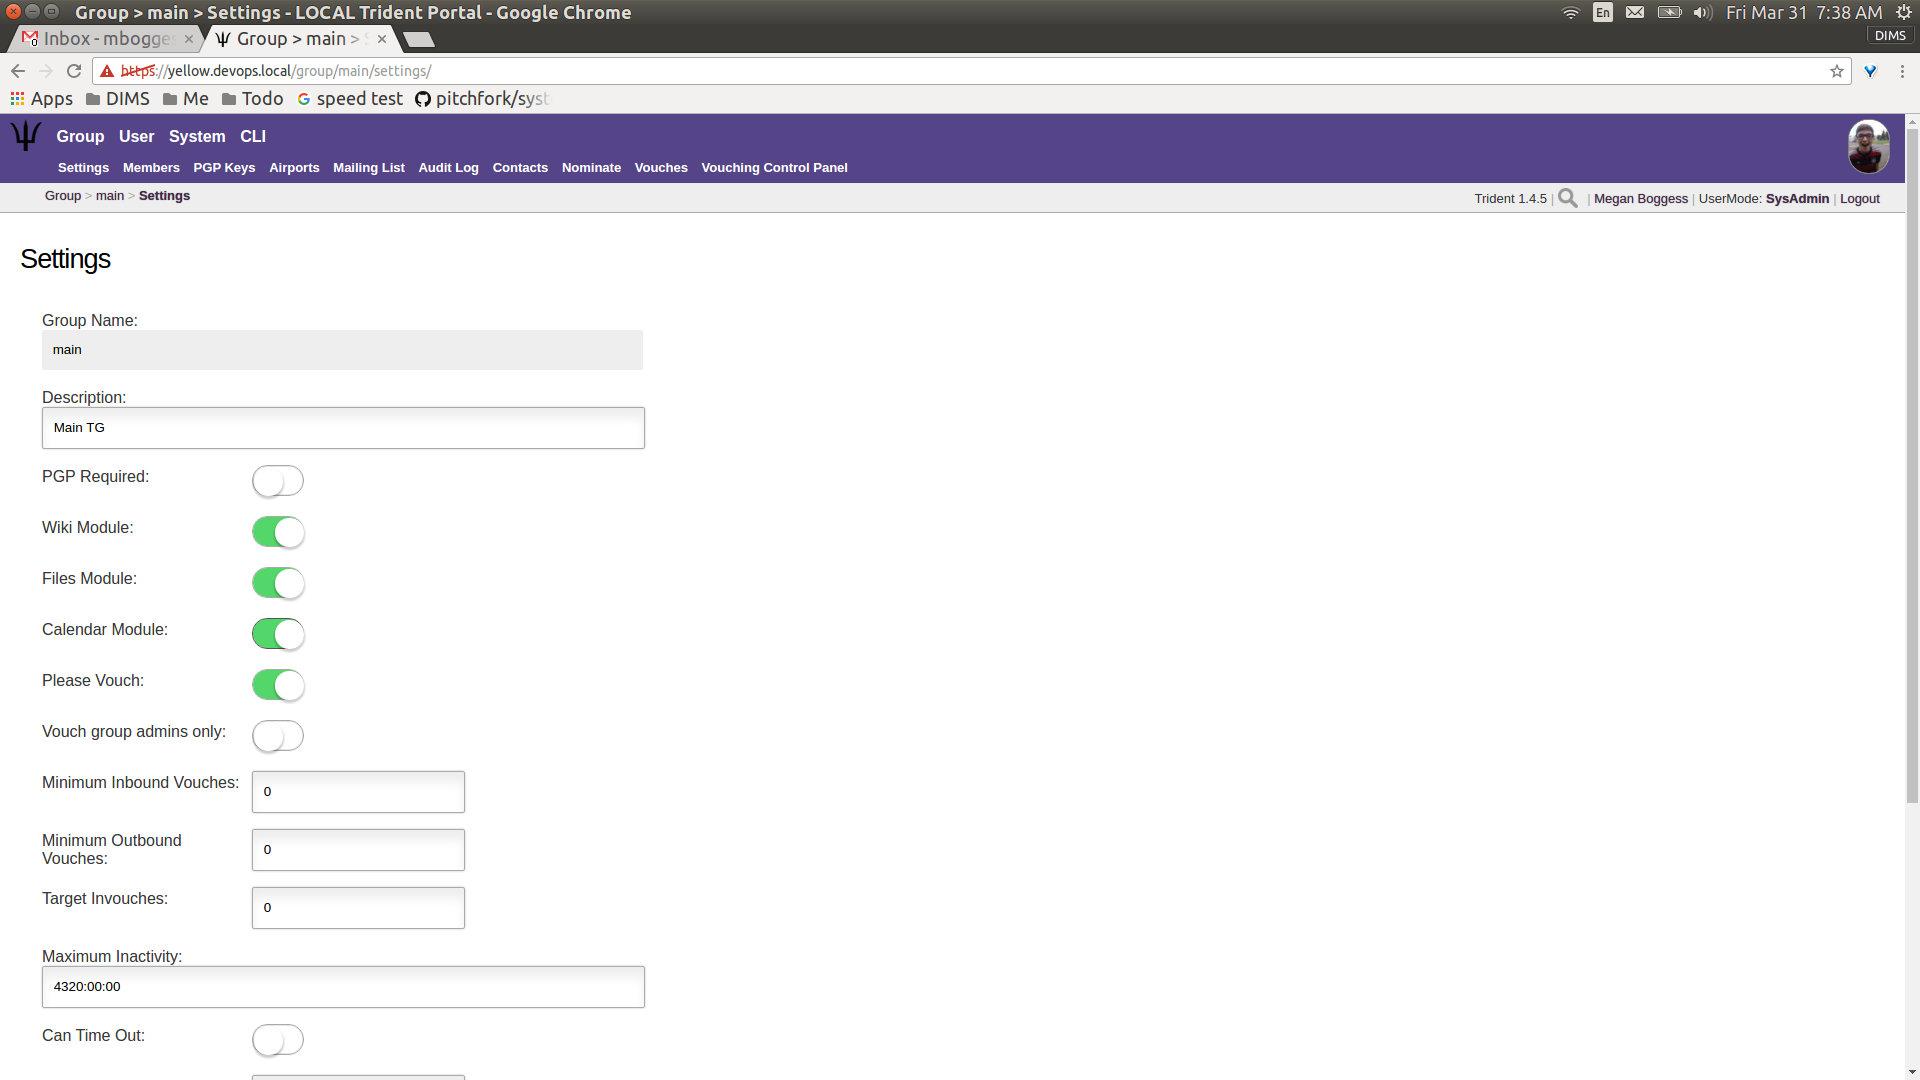
Group modules on
Make sure to click the Update Group button at the bottom
of the Settings page. From the Settings page, links
for the newly-added modules will appear in the second row of
links at the top of the page, as can be seen in the page
shown in Figure Group modules added. Returning to the
group’s home page would show links for the modules in the
list of links.
Group modules added
The Member page changes slightly when a user has trust
group administration privileges (Figure
Group member admin actions). A new column is added,
Actions, to the list of trust group members and
information. These actions allow the administrator to block
or unblock a member and demote or promote a group
administrator. These are accomplished through the buttons
found in the Actions column.
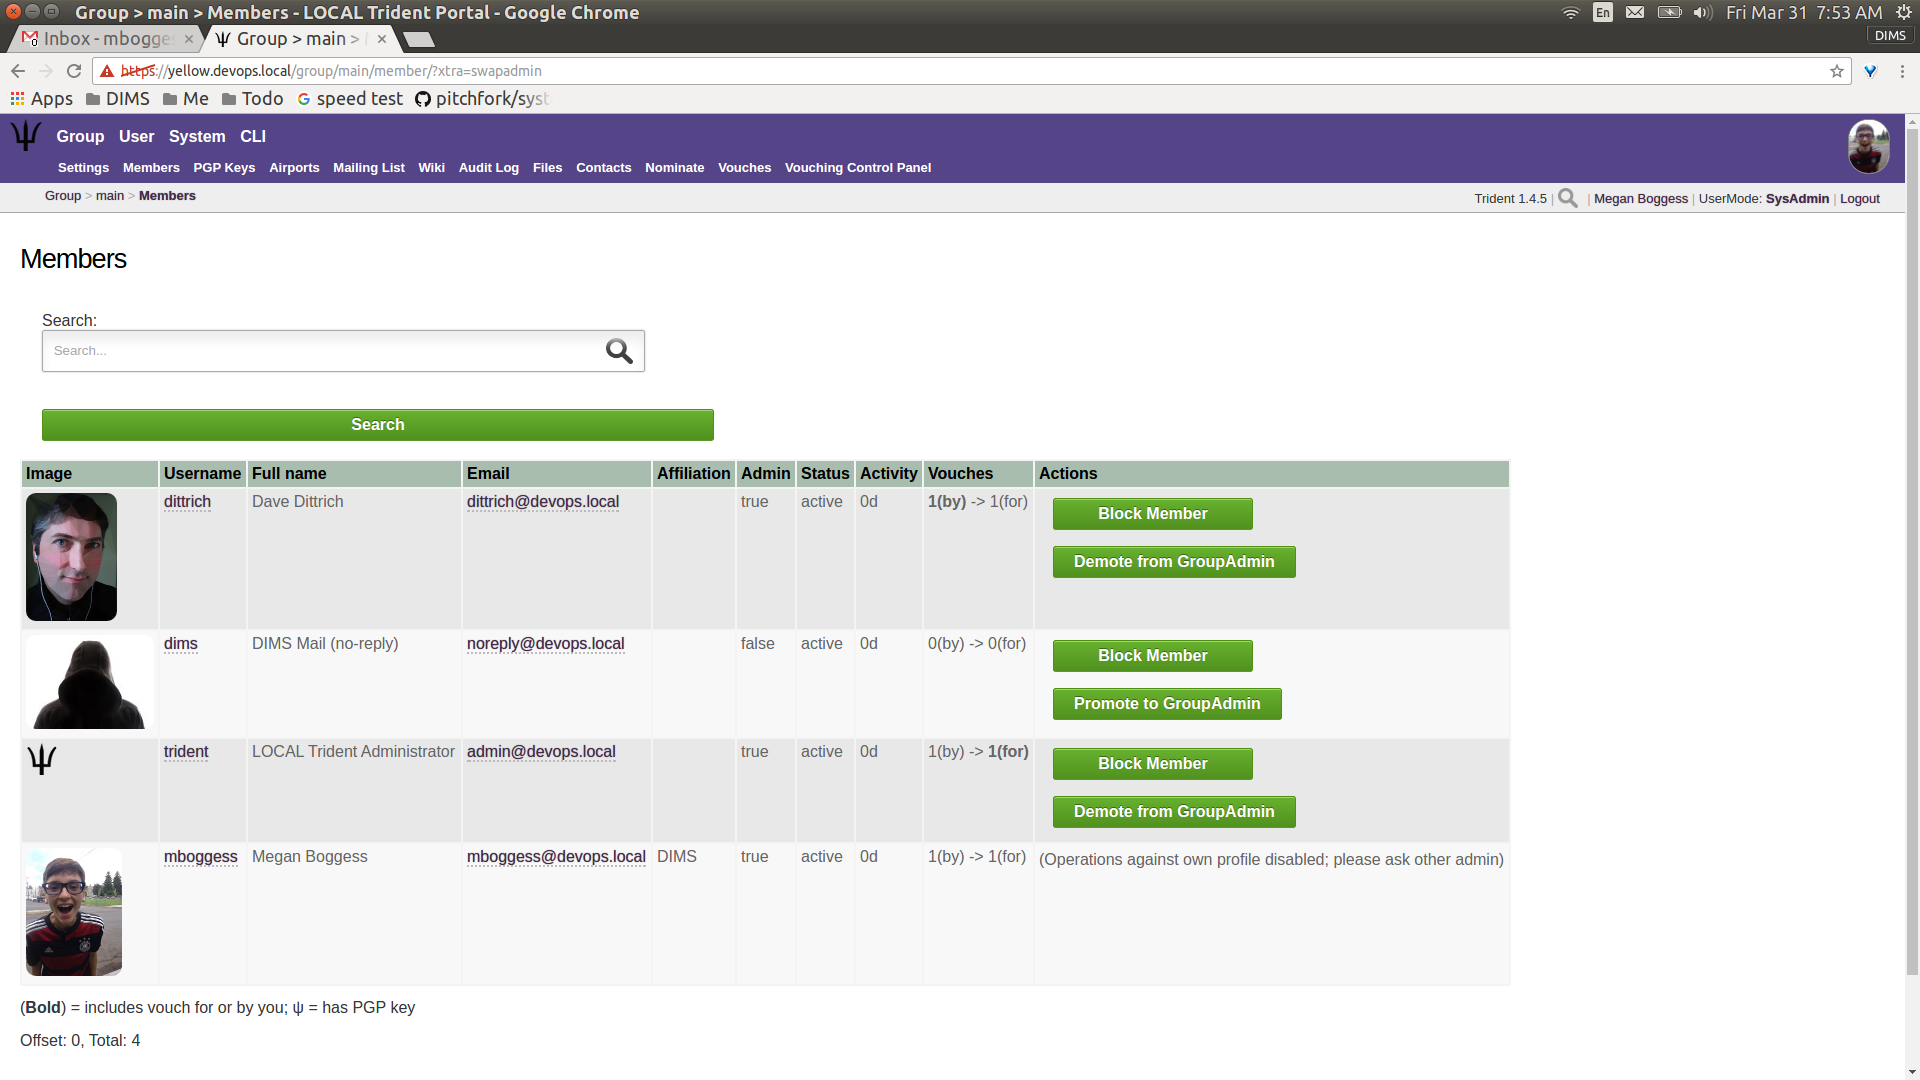
Group member admin actions
Thes actions (blocking/unblocking and demoting/promoting)
are also available on each trust group member’s profile.
Click the member’s link from the list on the Members page
to go to the member’s profile (Figure
Group member profile, top).
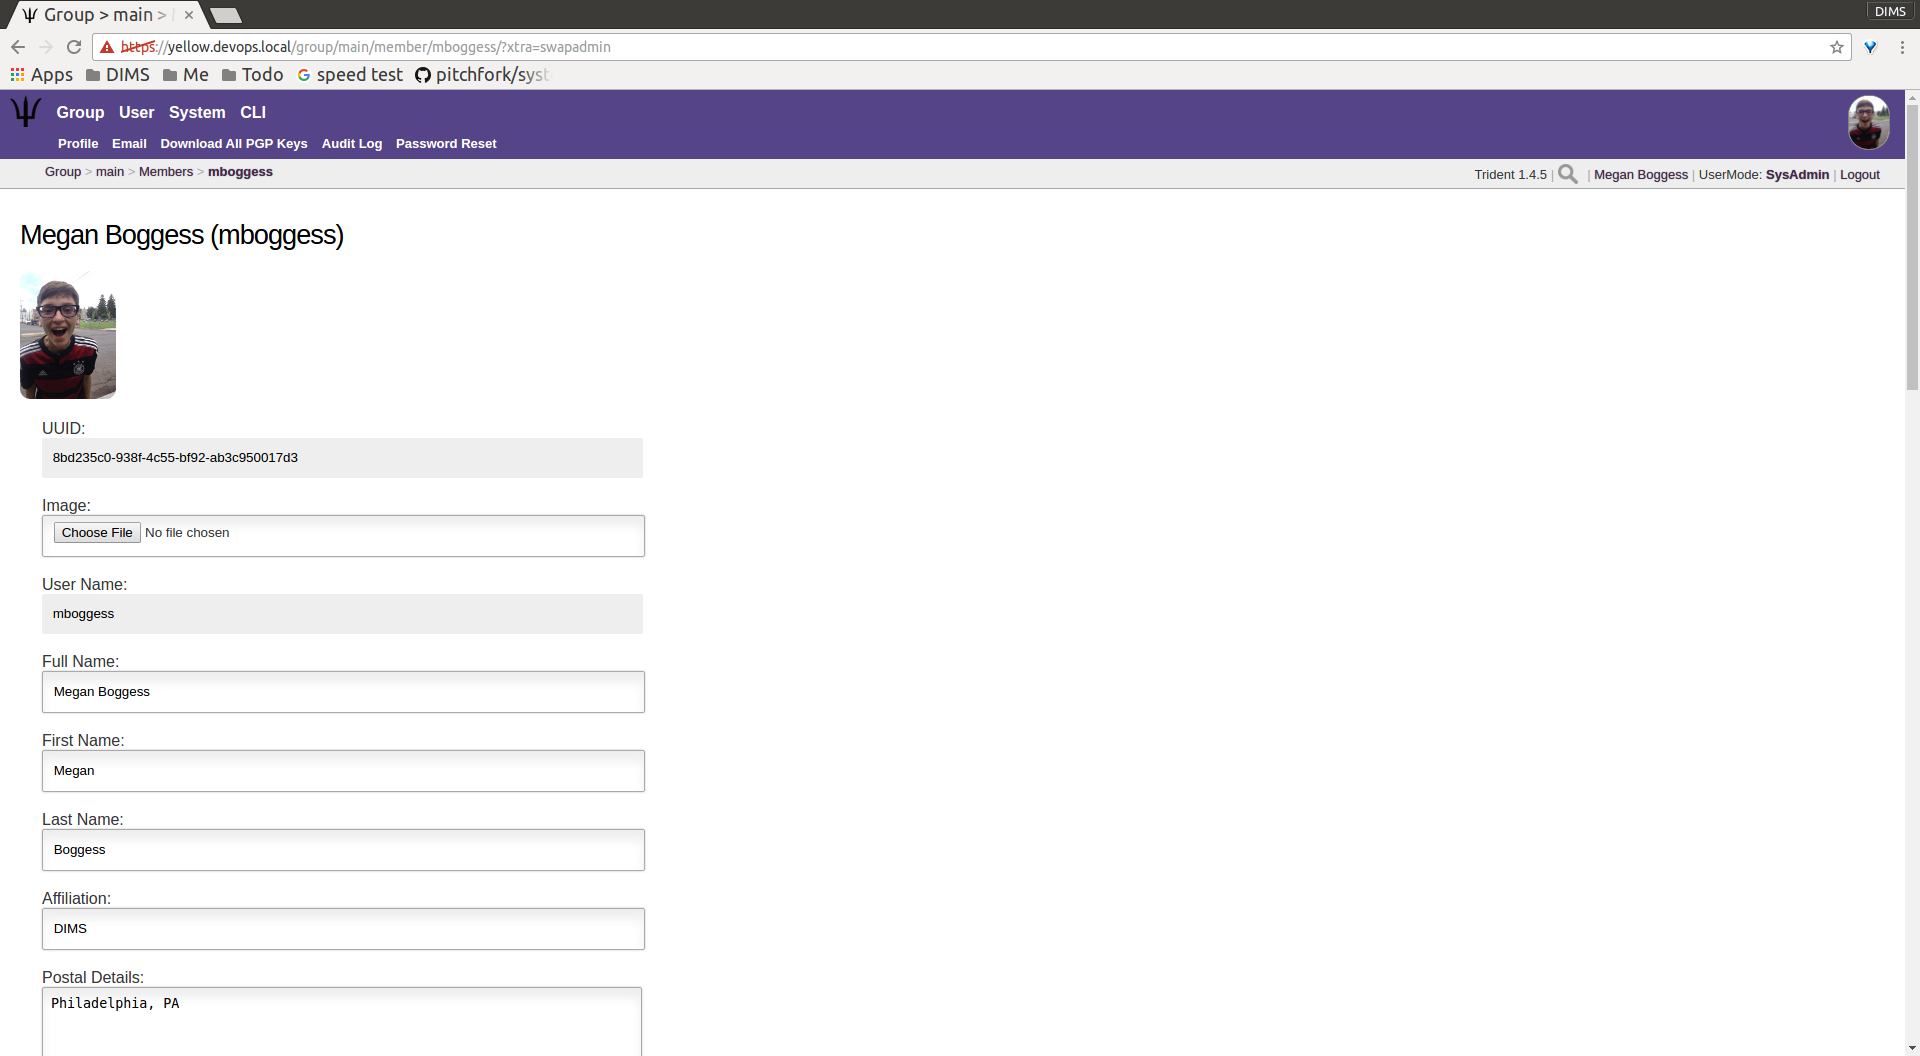
Group member profile, top
Scroll down towards the bottom of the profile until just
before the vouching section of the profile. There is a
section titled Admin functions for a given user. This
section contains the same buttons to block or unblock and
demote or promote as can be found in the Actions column
on the member page (Figure Group member profile, bottom).
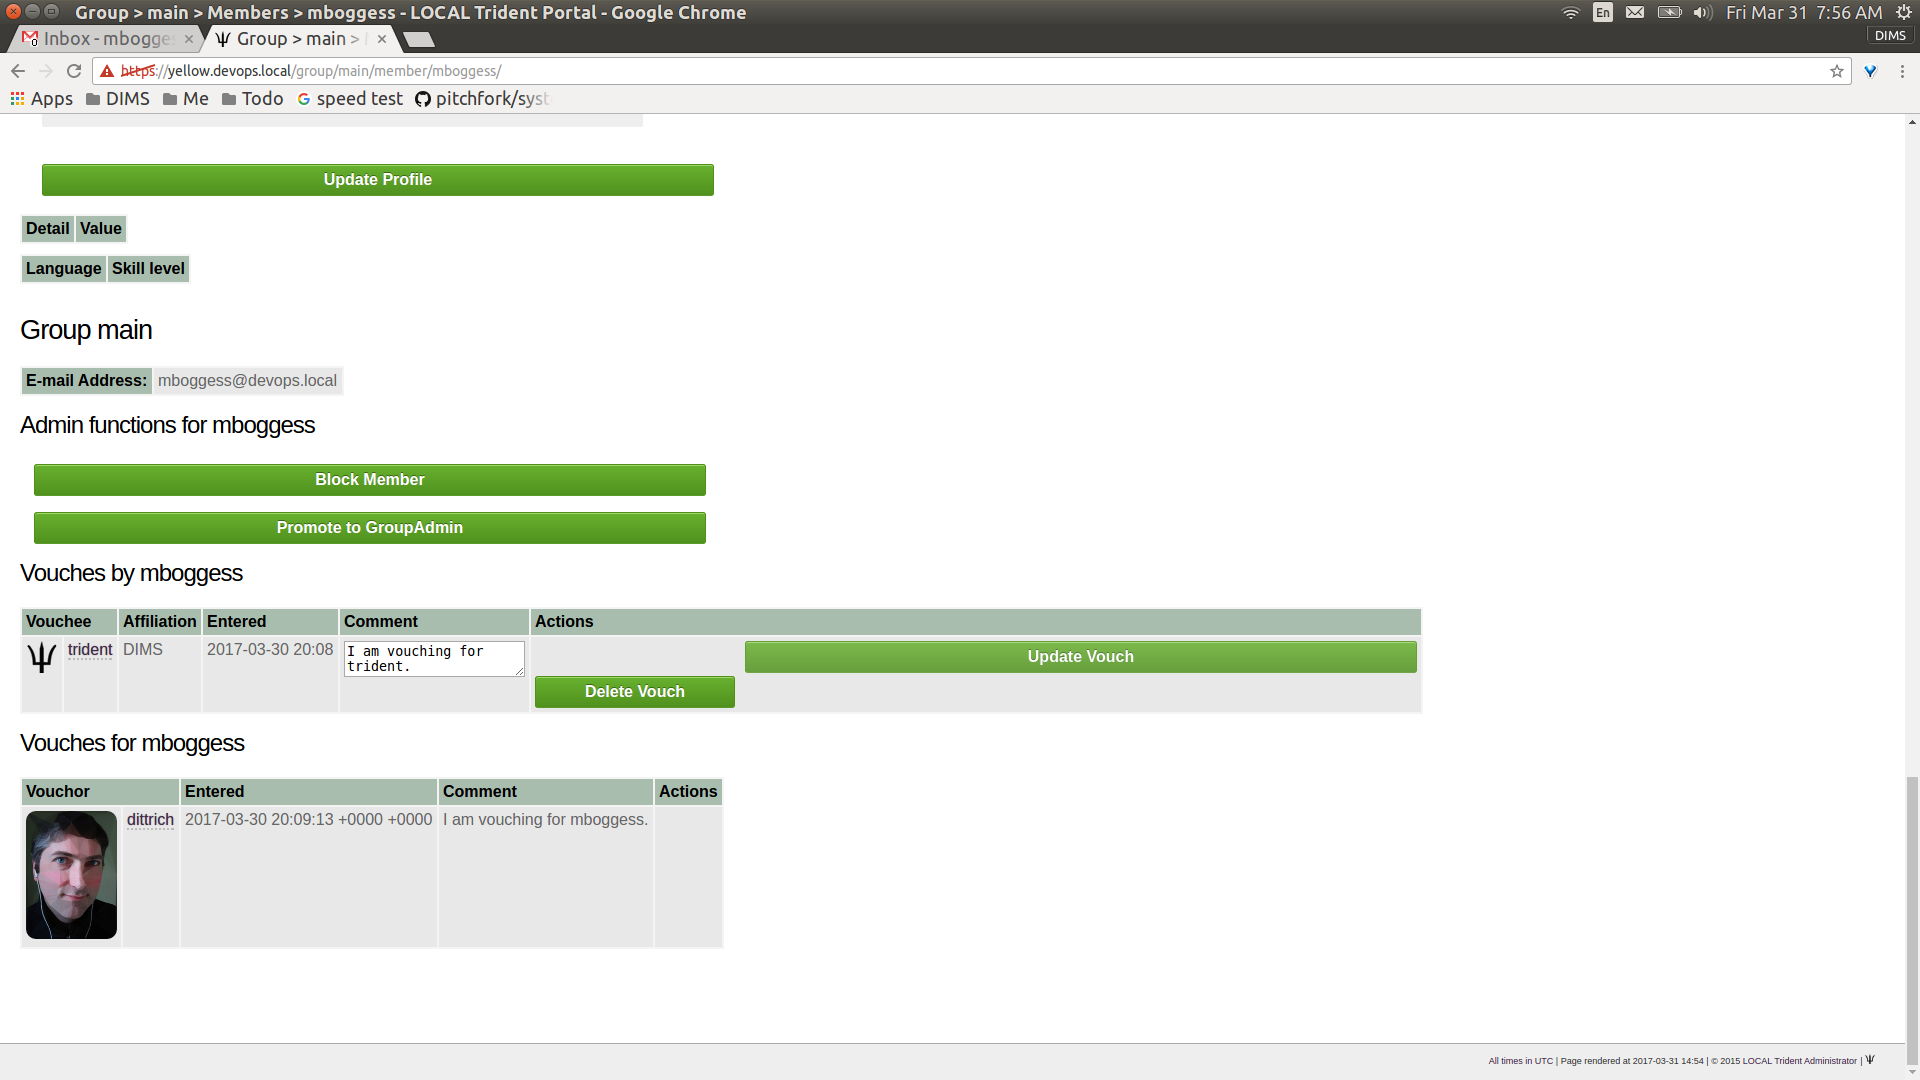
Group member profile, bottom
Finally, trust group administrators can add and delete mailing
lists. To see a list of current mailing lists, from a trust
group’s main page, navigate to the Mailing List page
using either the link on the page or the tab in the second
row at the top of the page. The list can be seen on the page
shown by Figure Mailing lists list.
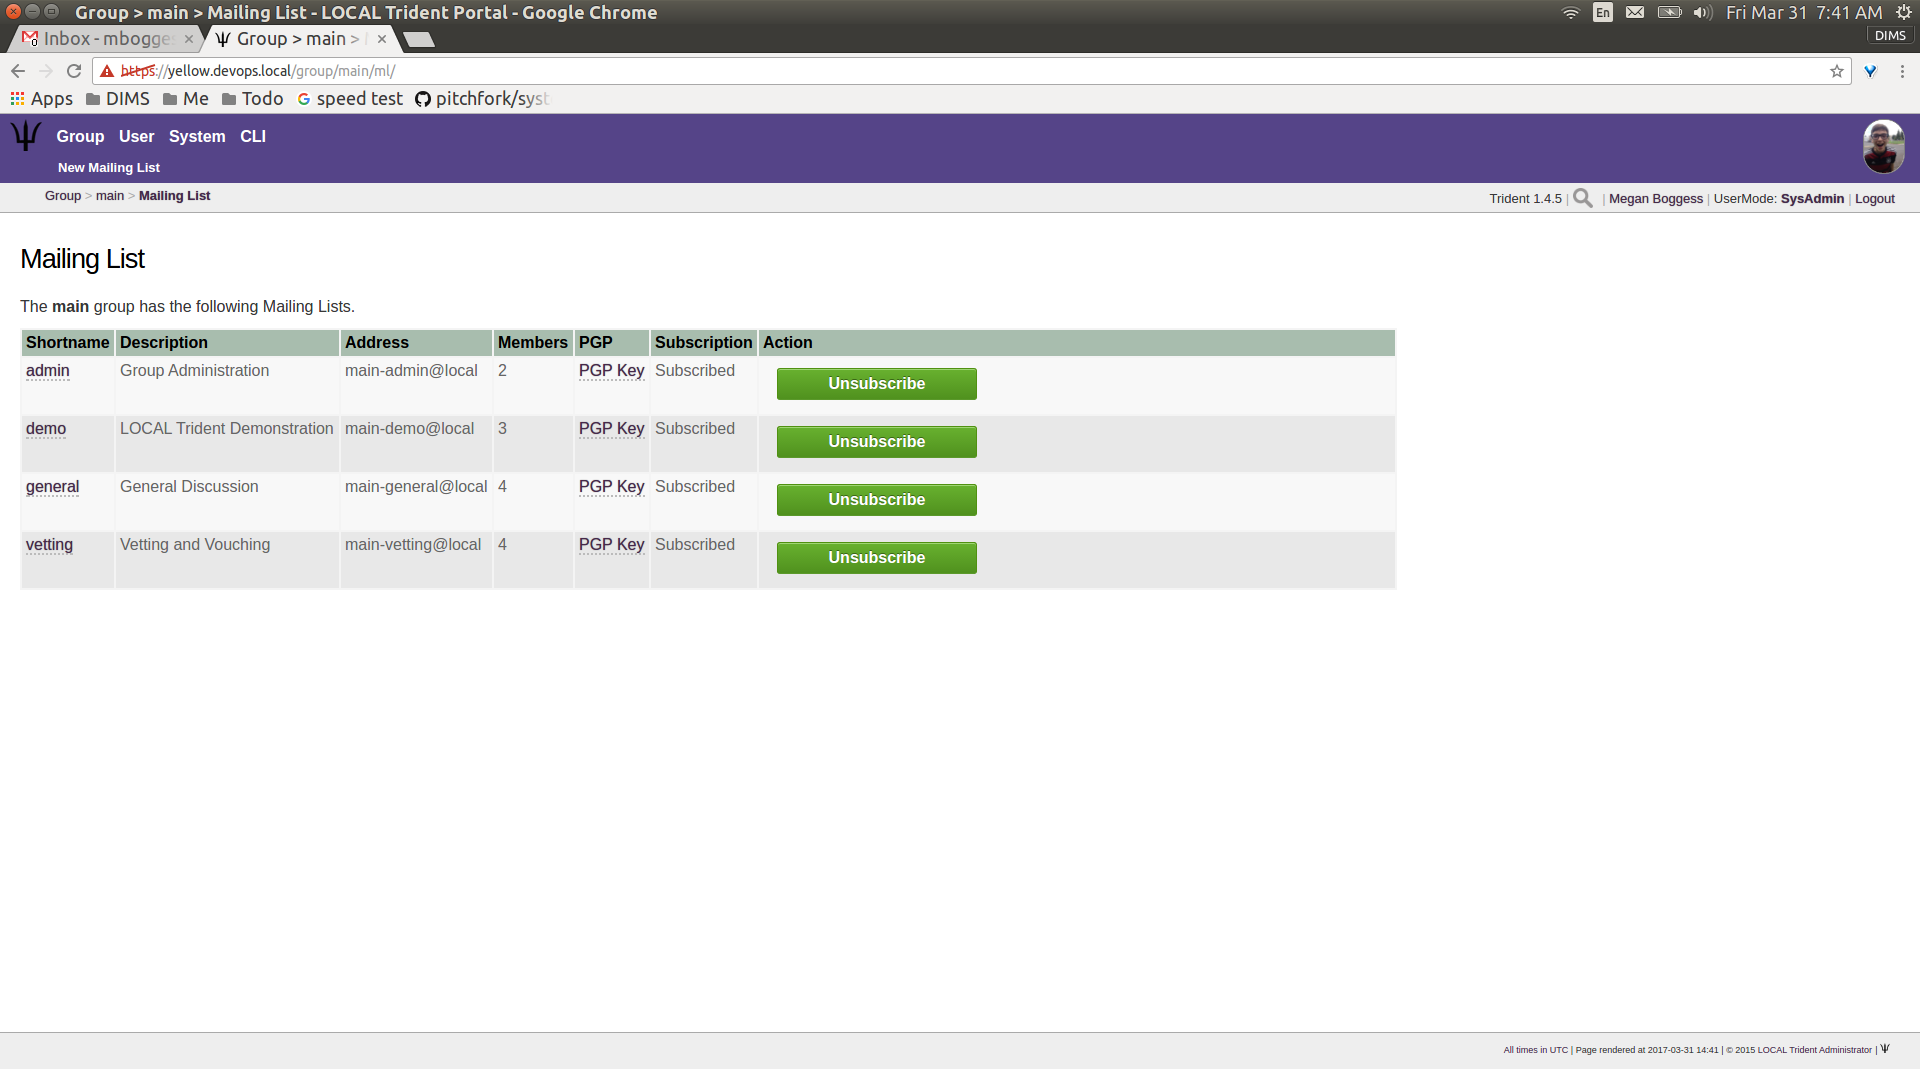
Mailing lists list
Now, the second row of tabs at the top of the page has
changed to just one, New Mailing List. Click this tab to
go to a new page to add a new mailing list. Fill in a name
for the mailing list in the required field as shown in
Figure Add new mailing list. Then click the
Create button.
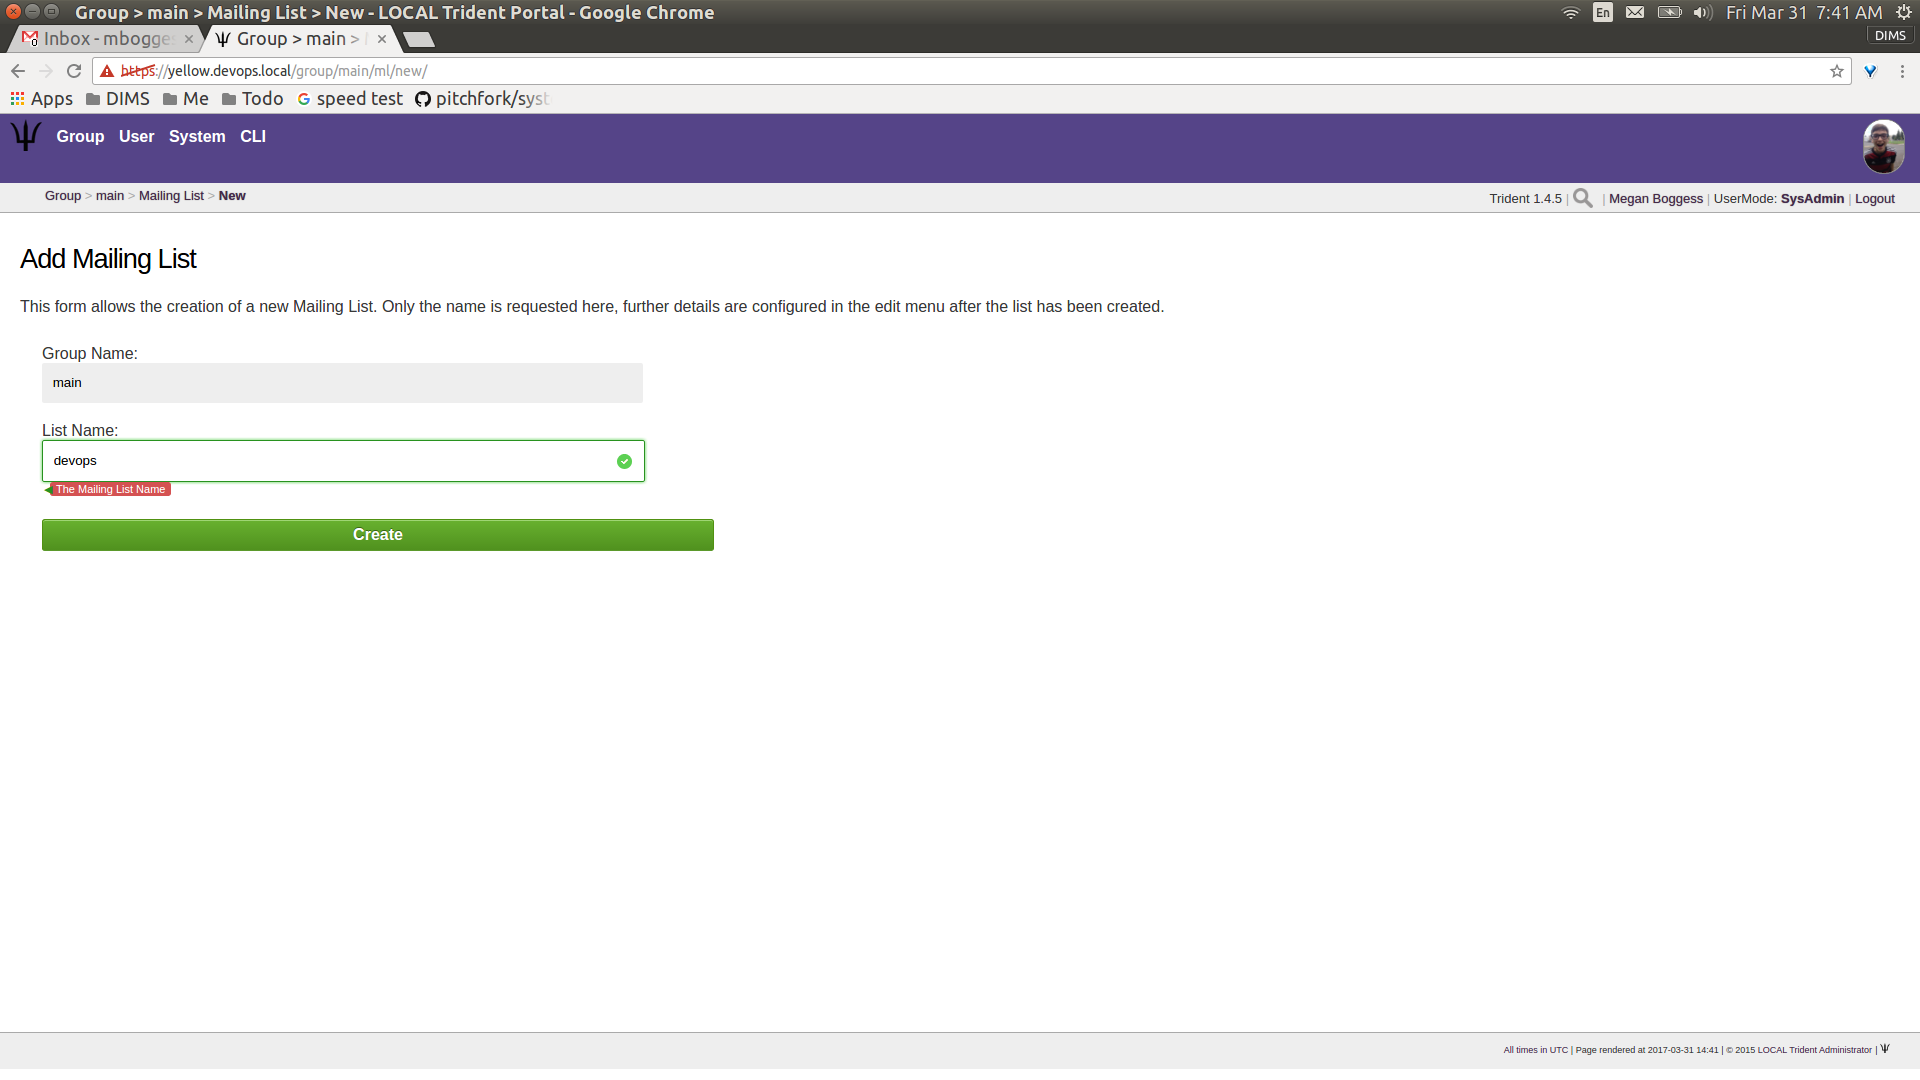
Add new mailing list
Clicking the Create button immediately opens the
Settings page (Figure Mailing list settings)
for the new mailing list. Modify the settings as needed, and
click the Update Configuration button.
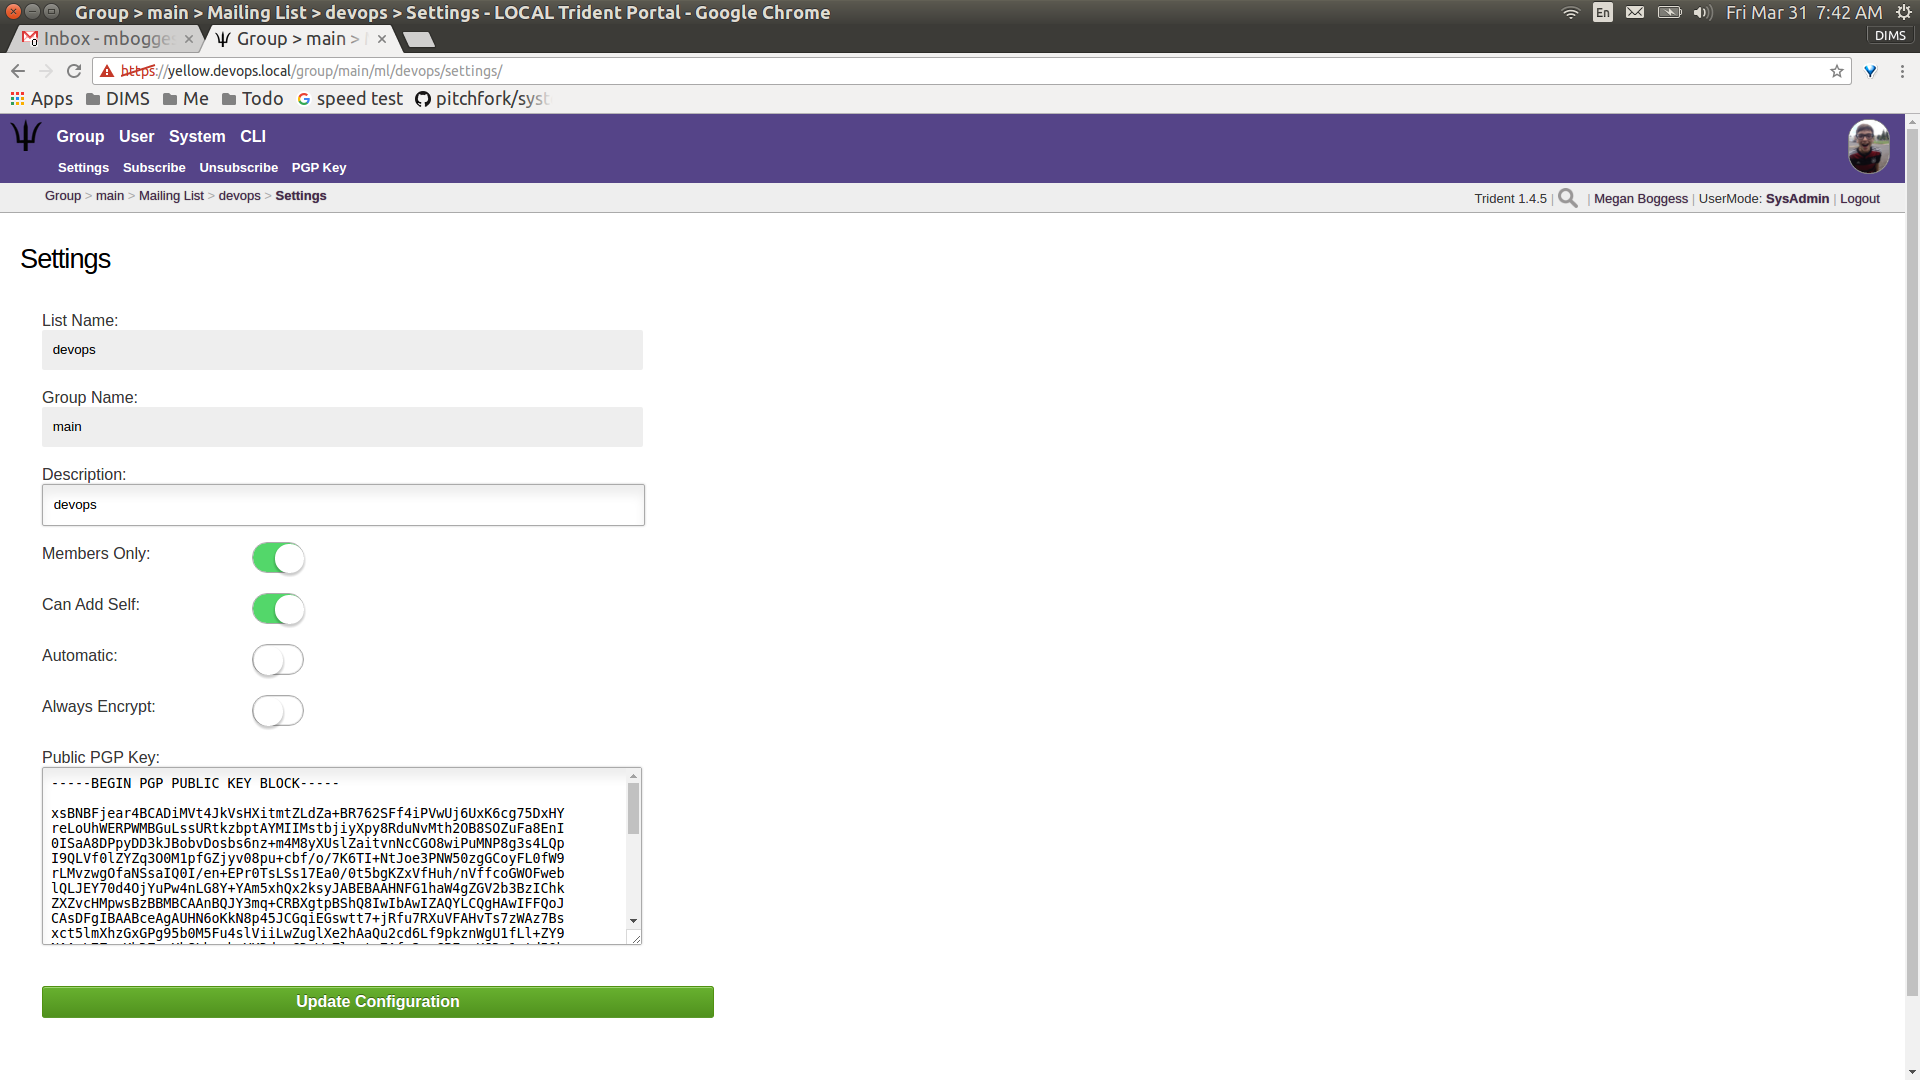
Mailing list settings
Returning to the Mailing List home page, the new mailing
list has been added to the list, as can be seen in the page
shown by Figure Updated list of mailing lists.
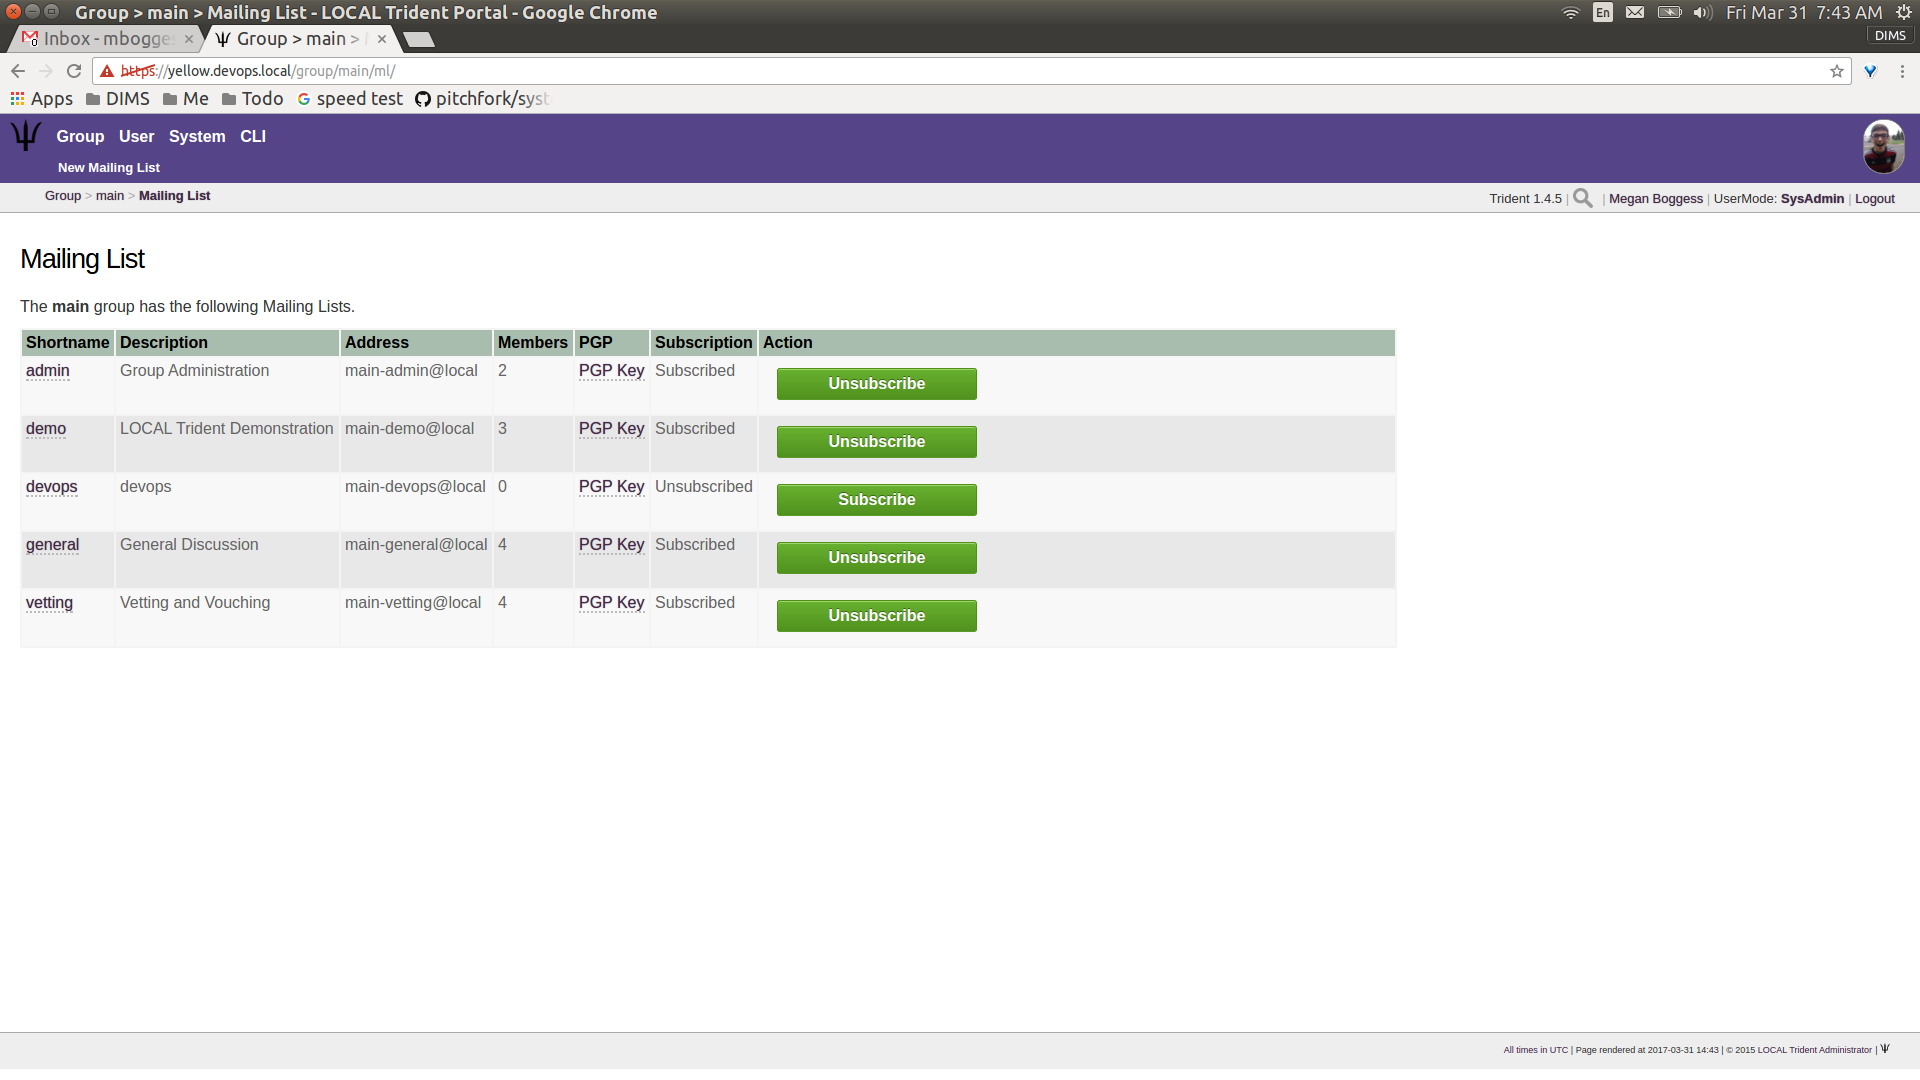
Updated list of mailing lists
A Settings page is available for all mailing lists.
In the list on the Mailing List page (see Figure
Updated list of mailing lists), there are links in
the Shortname column. Clicking this link opens a new page
with a list of current mailing list members and tabs in the
second row at the top of the page (Figure
Mailing list members) for the Settings page
(Figure Mailing list settings), to Subscribe
or Unsubscribe the current user to or from the mailing
list, and to download PGP keys for the current mailing list.
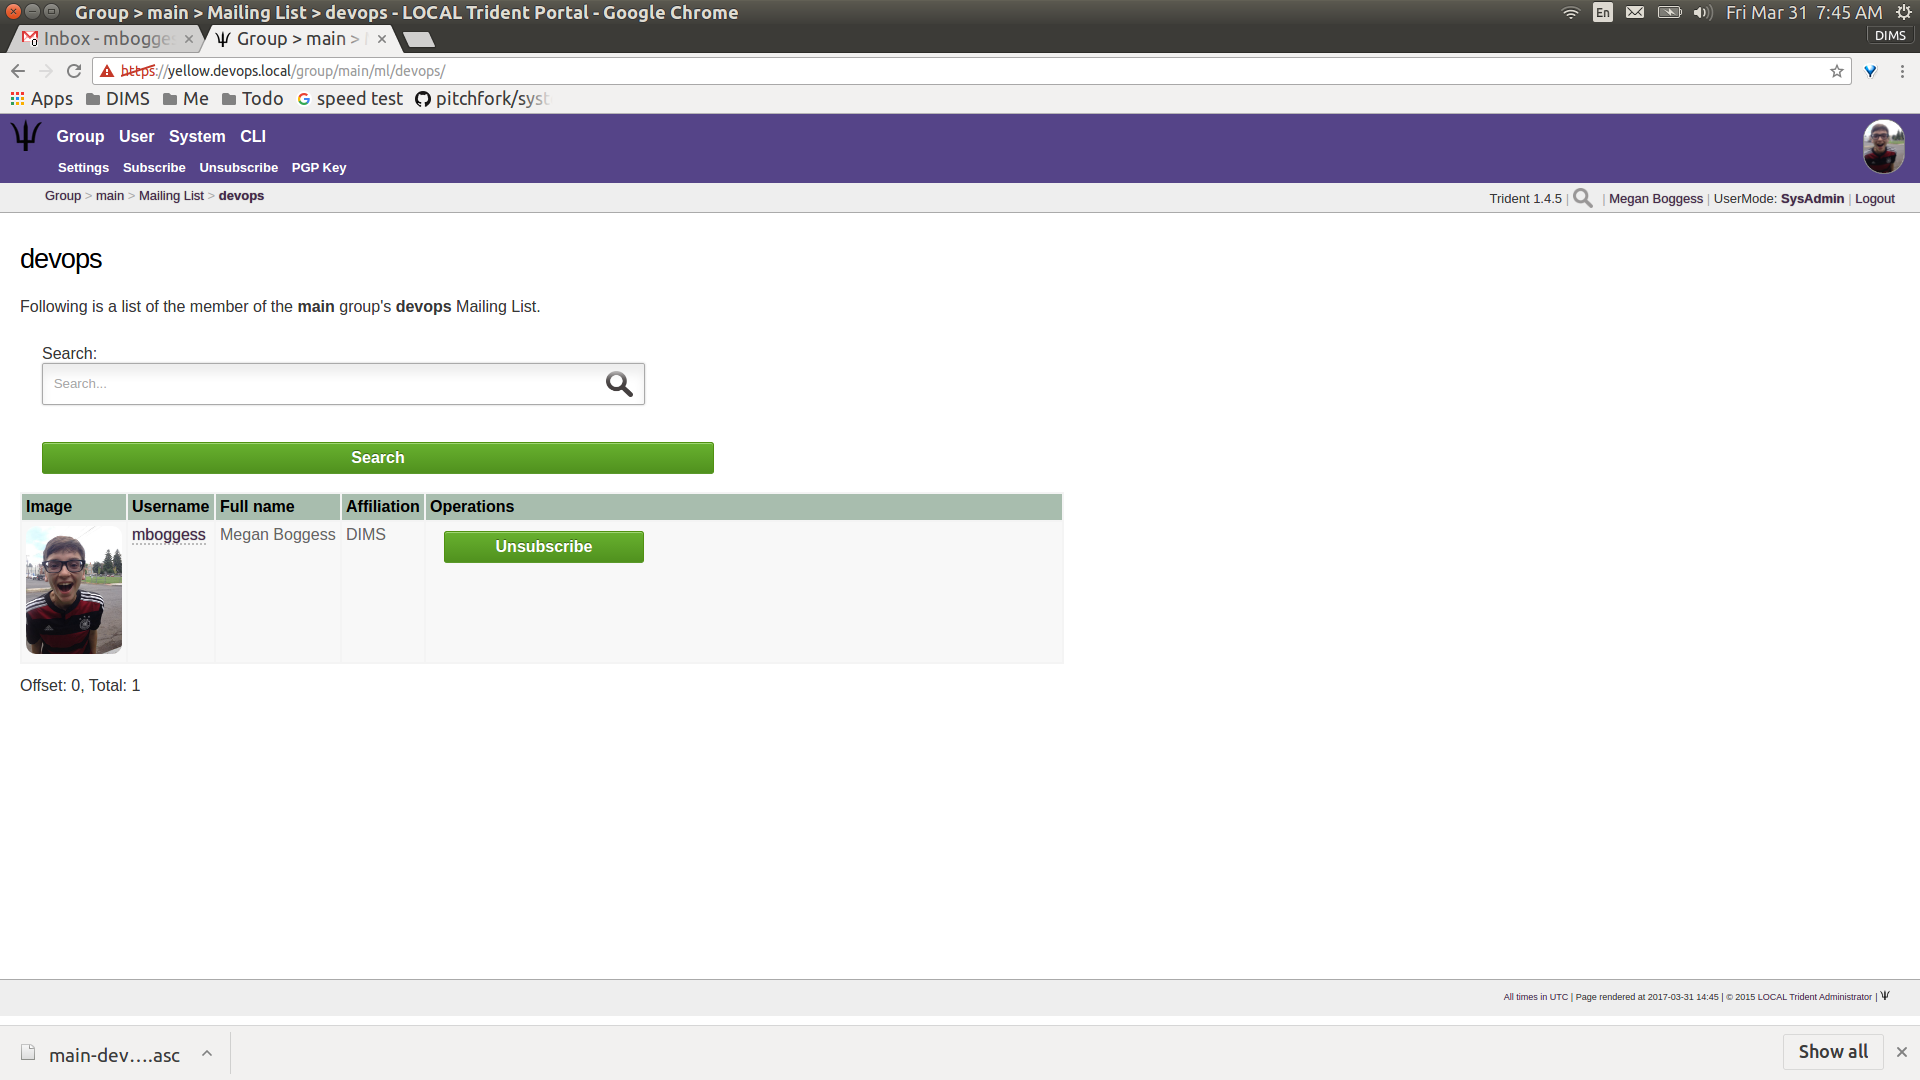
Mailing list members
Click the Subscribe or Unsubscribe tabs to subscribe
or unsubscribe the current member from the current mailing
list. Click the PGP Key tab to download the PGP key for
the current mailing list.
These actions can also be completed from the Mailing
List home page (Figure Mailing list activities).
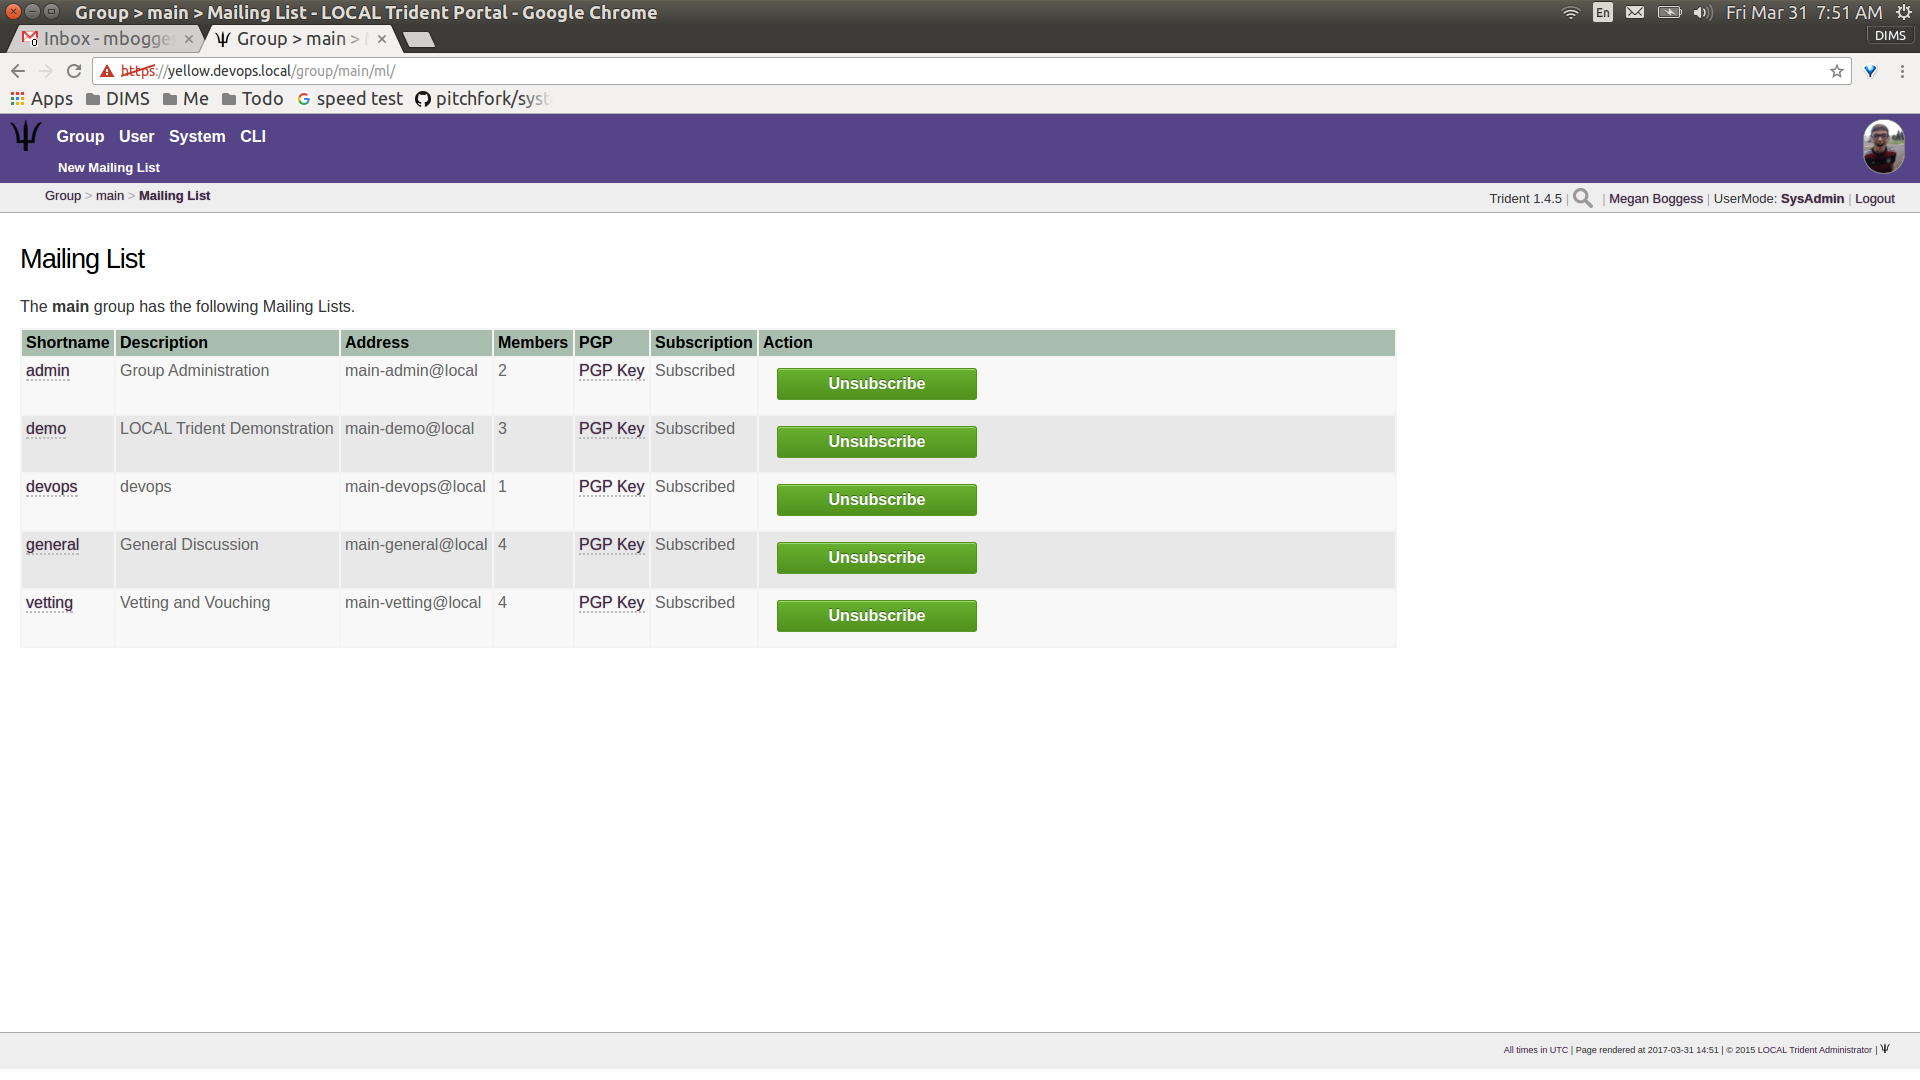
Mailing list activities
For the desired mailing list, click the link PGP Key in
the PGP column to download the PGP key for that mailing
list. To unsubscribe or subscribe to a mailing list, click
the available button in the Action
column.
3.3. CLI Activities
The sections covers activities that can only be accomplished
via the CLI page. This page utilizes a command line
interface through which the databases holding information of
the Trident system may be manipulated. These activities
include adding a new user to the Trident system, removing a
member from a trust group, and removing a mailing list from
a trust group.
Click the link on the user’s home page or the tab in the
second row at the top of the page to go to the CLI page.
A new page will open with a field to enter the command,
simulating a command, and the larger, top box returns the
results of the command executed (see Figure
cliHomePage` which shows the results of running
“help” via the command line interface).
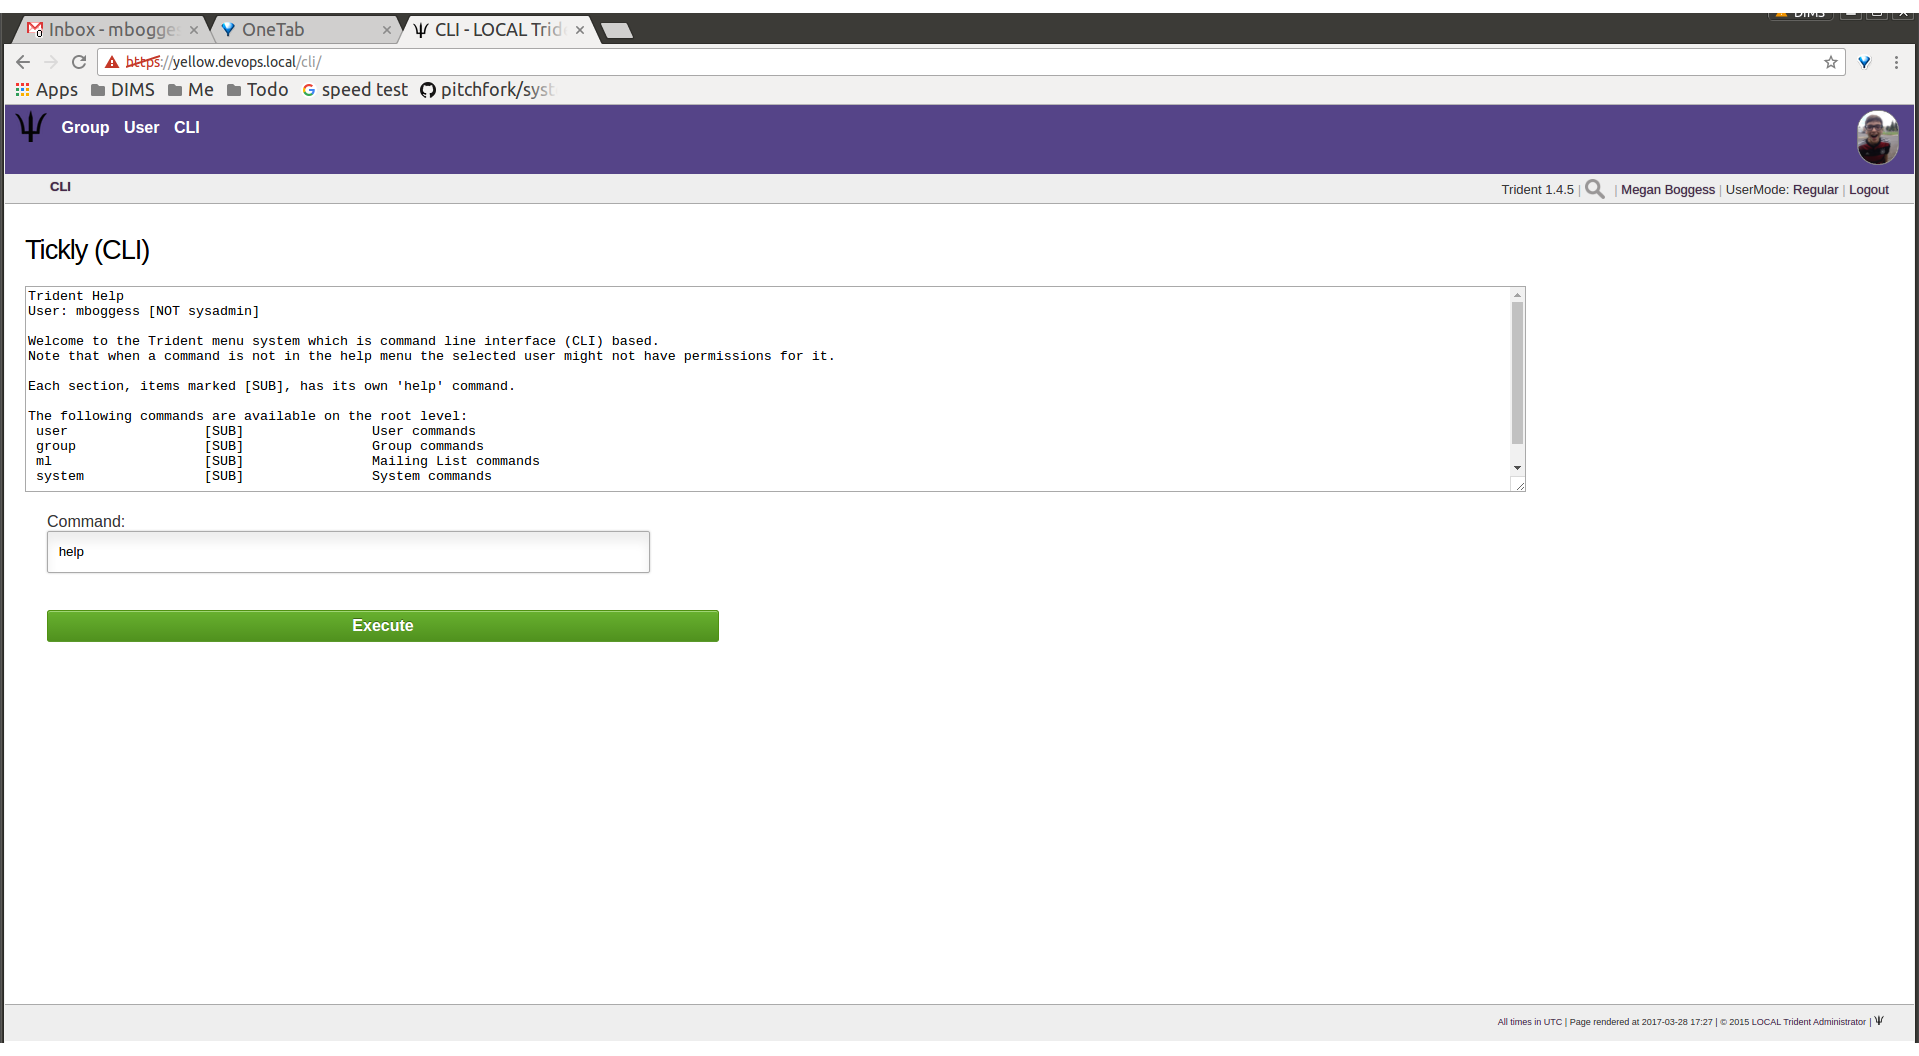
CLI home page
Figure CLI home page shows help for using the Trident
CLI when a user is not logged in as a sysadmin. Each top
level command indicates the domains of attributes which can
be manipulated via the CLI: user, to manipulate user
information; group, to manipulate trust group
information, ml to manipulate mailing list information,
and system, to manipulate system information.
Figure CLI group help shows the results from
running the command group help.
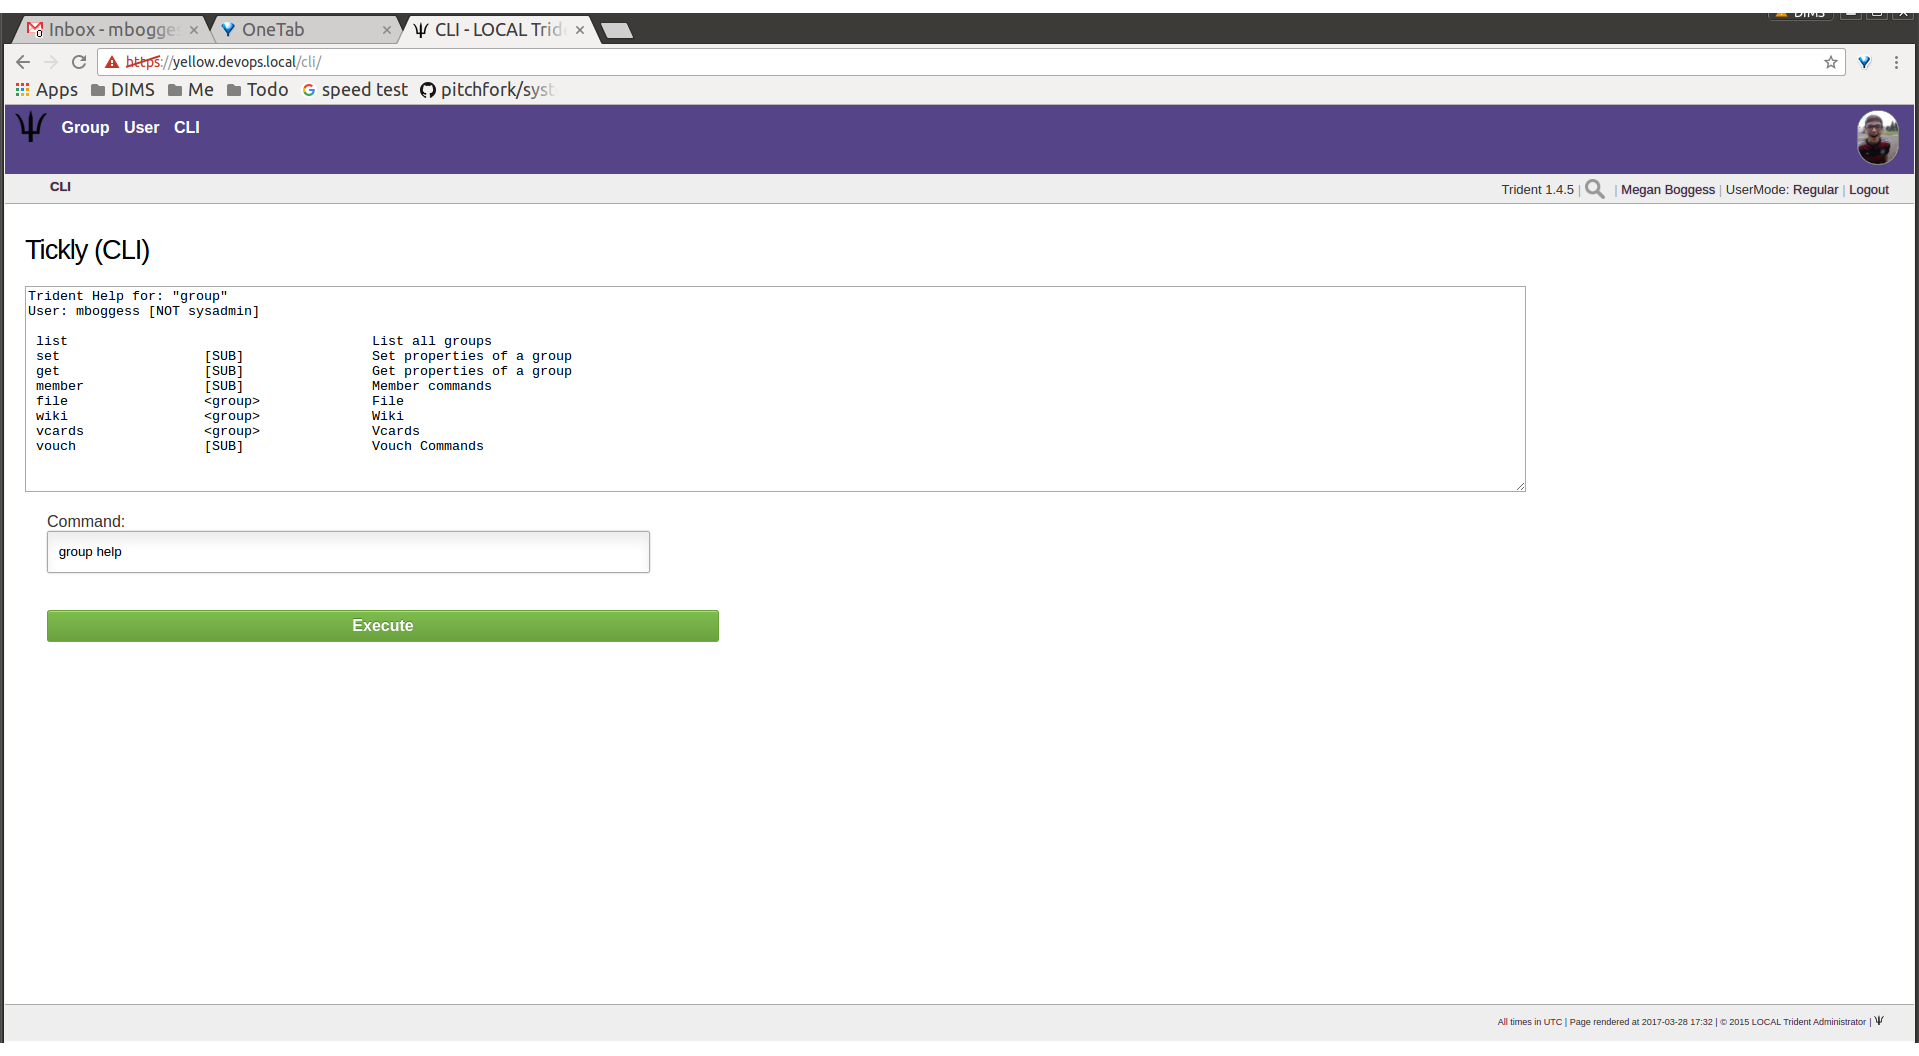
CLI group help
A user must become a sysadmin via the CLI to gain access to
sysadmin CLI commands; being logged in as a sysadmin in the
webapp does not allow sysadmin access via the CLI. To obtain
sysadmin rights, use the command system swapadmin, as
shown in Figure CLI sysadmin.

CLI sysadmin
Once logged in as a sysadmin, more commands are available.
See Figure CLI group help and compare with Figure
CLI group help for the additional commands
available in the group domain.
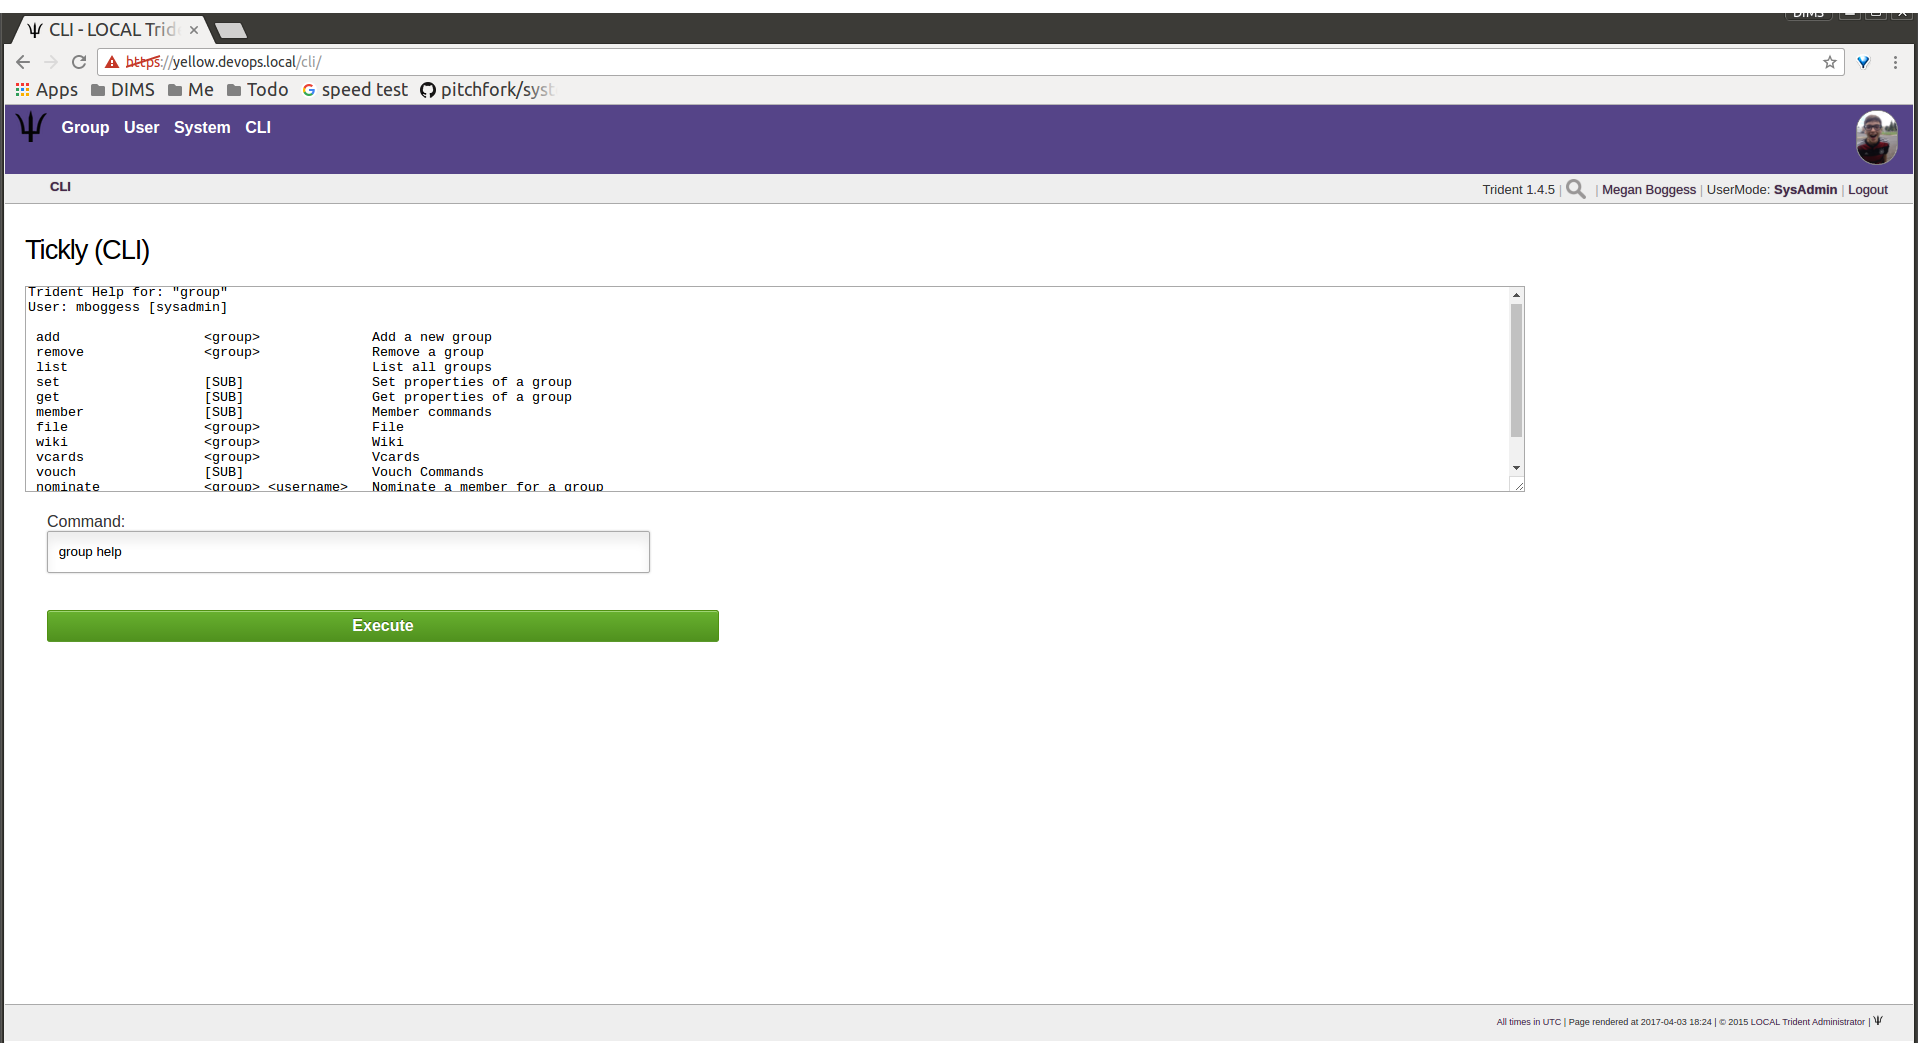
CLI group help
Trust group admins should use the web app interface for as
many tasks as possible. However, there are some tasks which
are not able to be accomplished with the web app, and these
must be handled using the CLI page. One of those tasks
is adding a new user to the system.
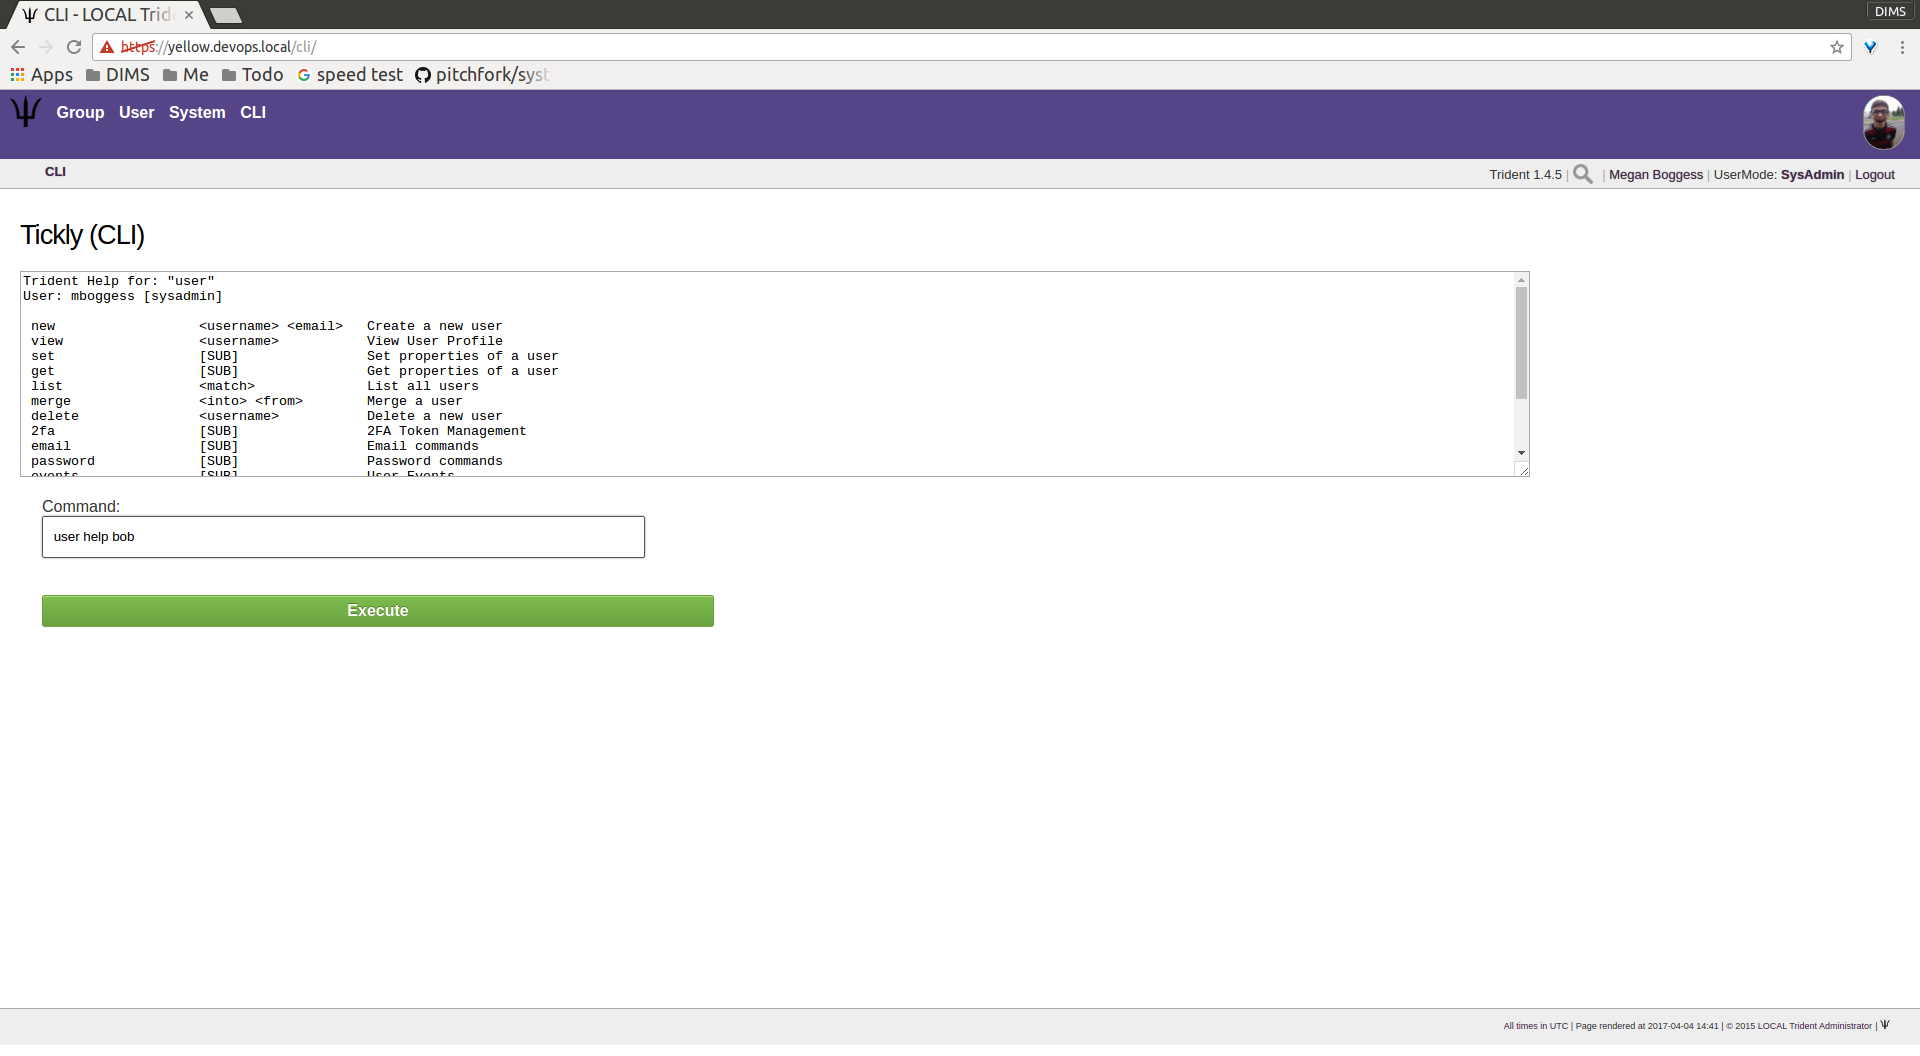
All users must be added to the Trident system before they
can become members of any trust groups. Help for the
user domain can be seen in Figure
CLI user help.
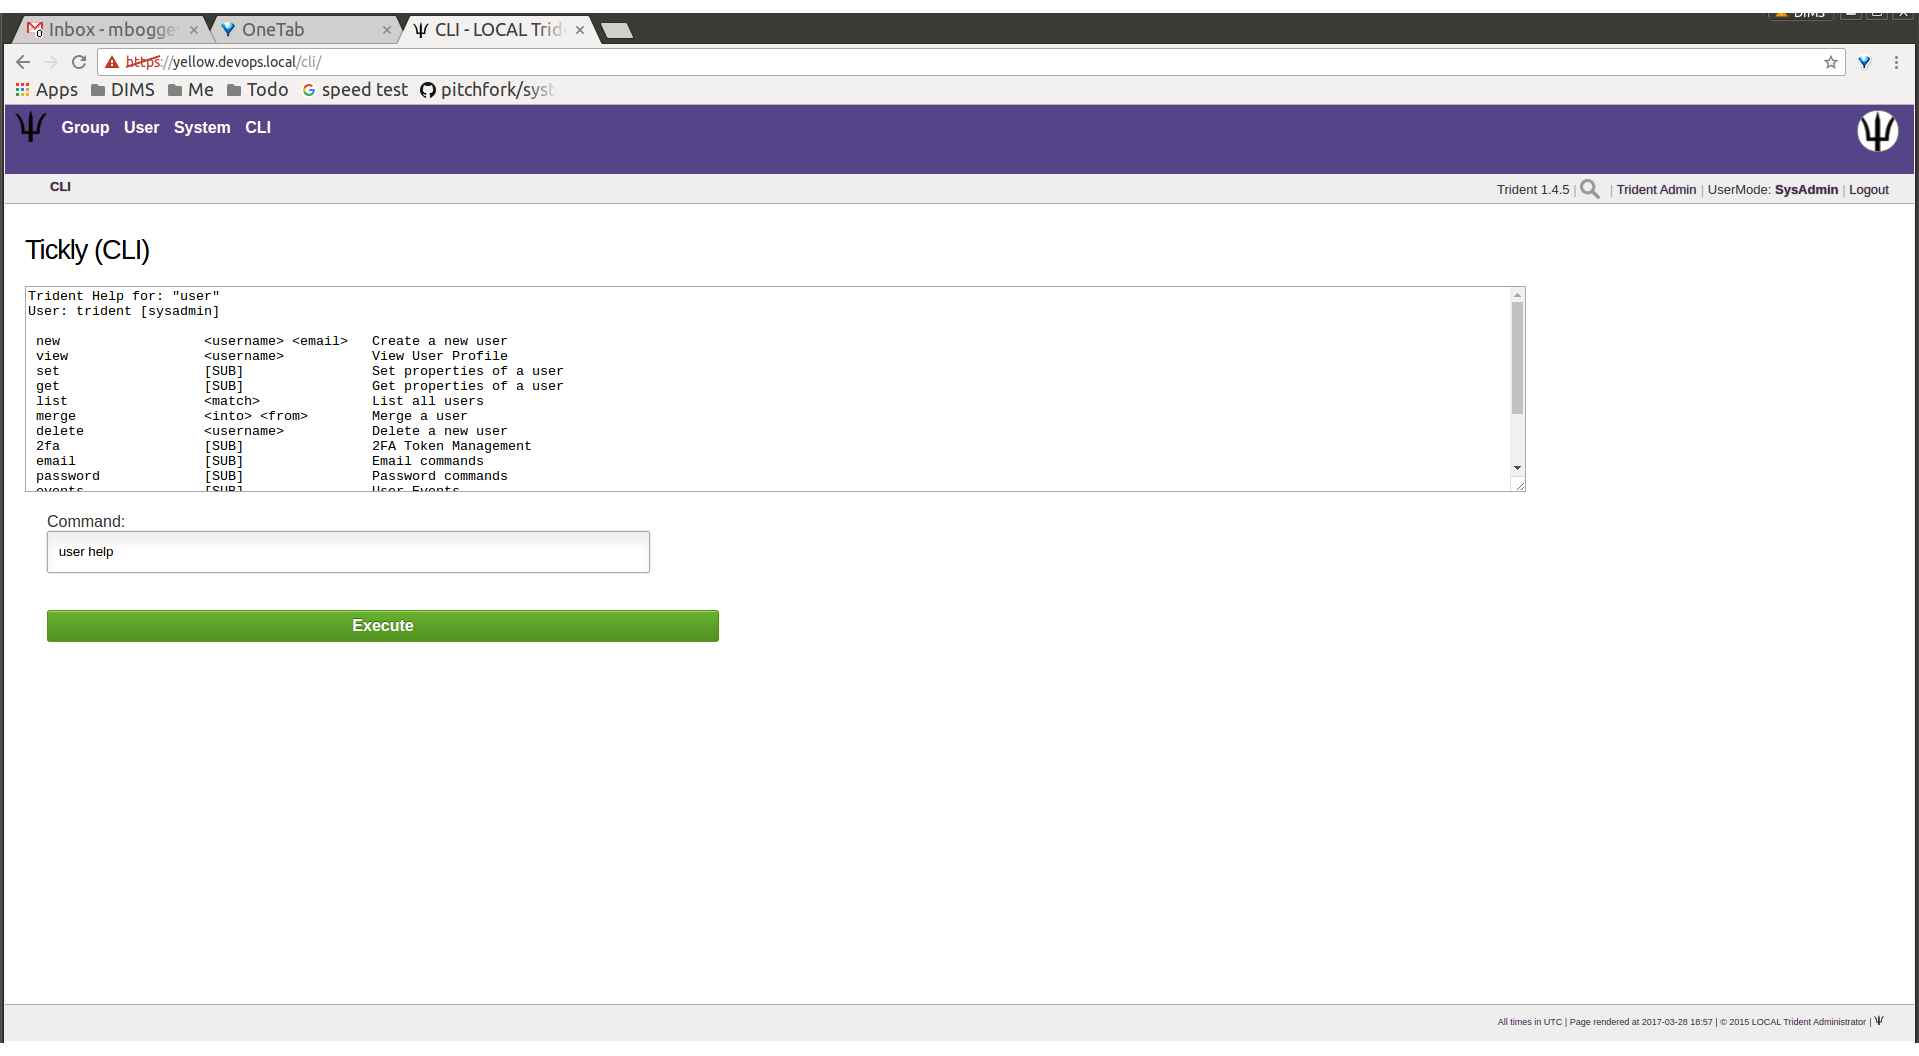
CLI user help
To add a user, use the command user add new <username>
<email> where <username> is a username for the user
and <email> is a valid email address the user owns. See
Figure CLI user add.
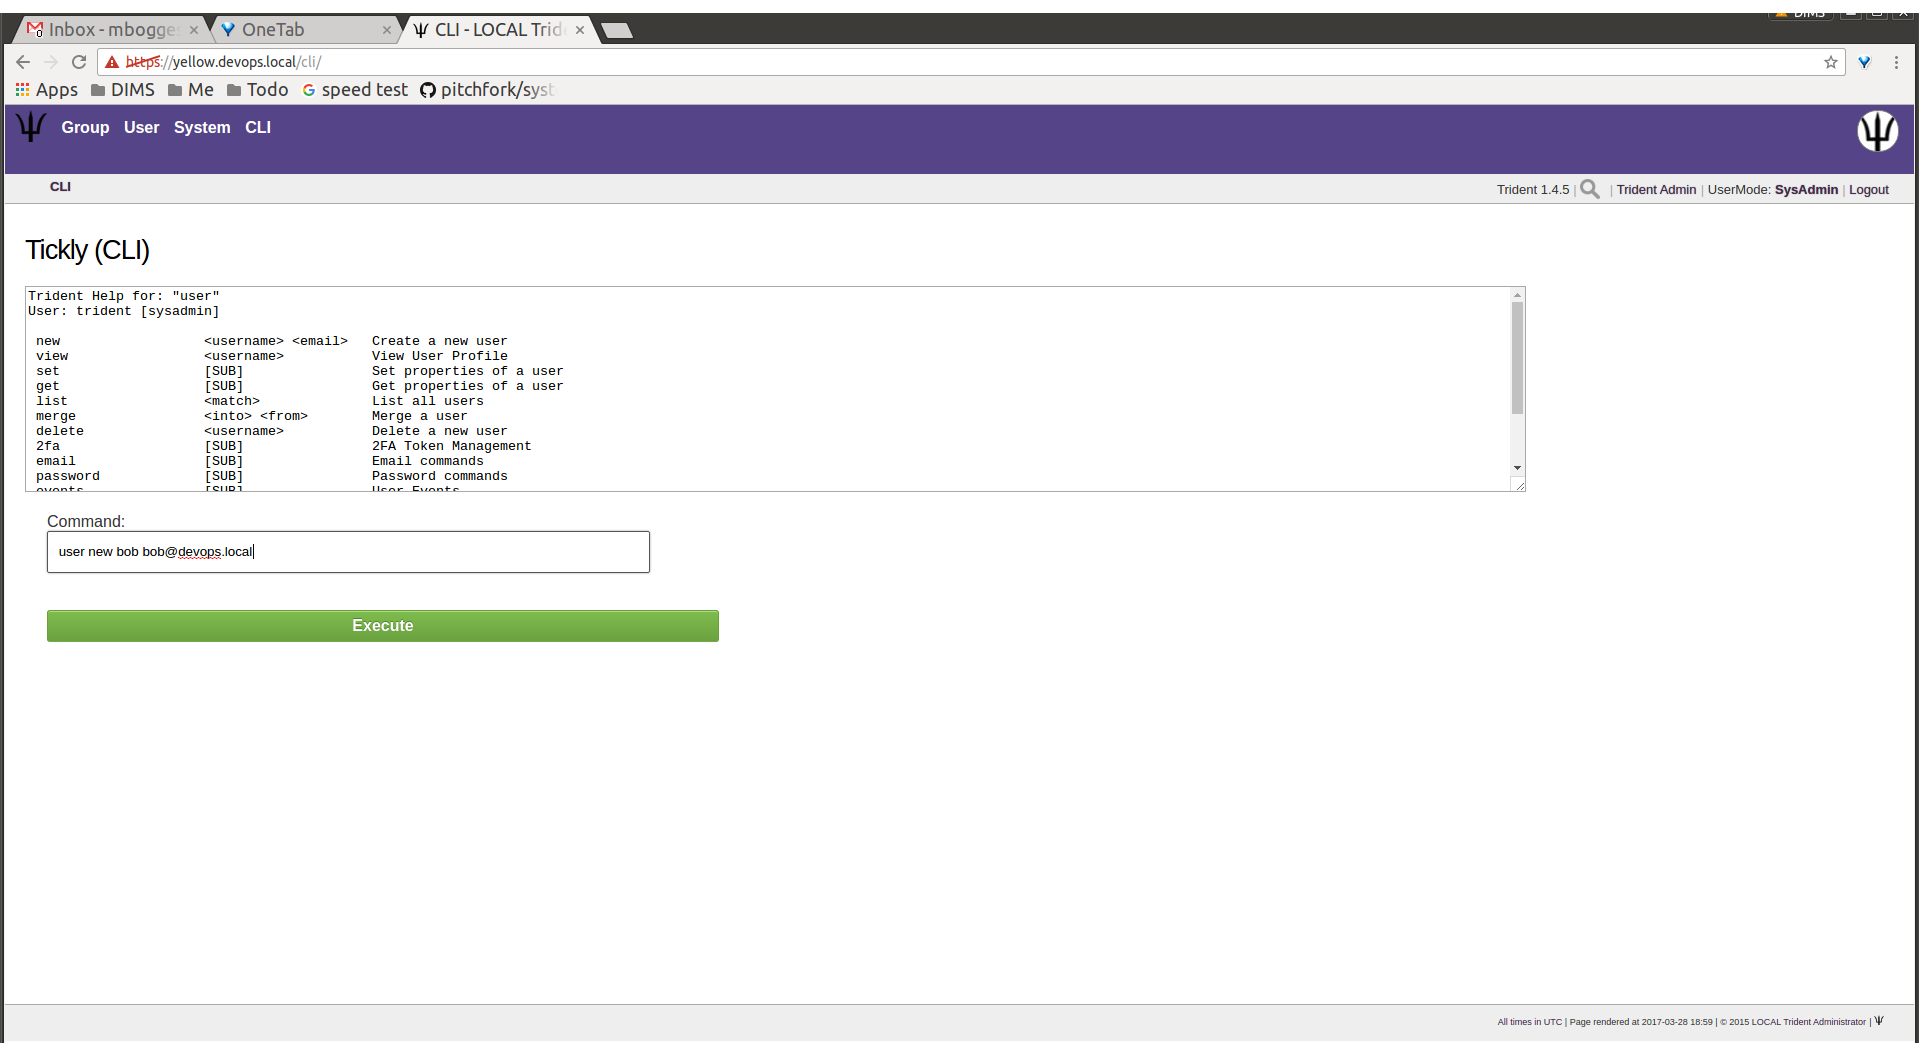
CLI user add
The user can always change their username using the
Username page in the User perspective of the portal.
See Figure User username change in Section
User Management. The email must be the correct, valid
email address to which the user wishes to receive communications
regarding initial Trident use. Email addresses can be
changed, added, or deleted once the user has Trident access.
See the Section Email Management.
Additionally, a trust group admin must set the user’s
initial password. The user can change their password via the
Password page in the User perspective (see Section
userPwdChange`). The initial password must be
set by the administrator and then passed along to the user
either through out-of-band means or via an encrypted
message.
To set a user’s password via the CLI, use the command user
password set portal <username> <password> in the field
simulating the command line on the CLI page (Figure
CLI set password).
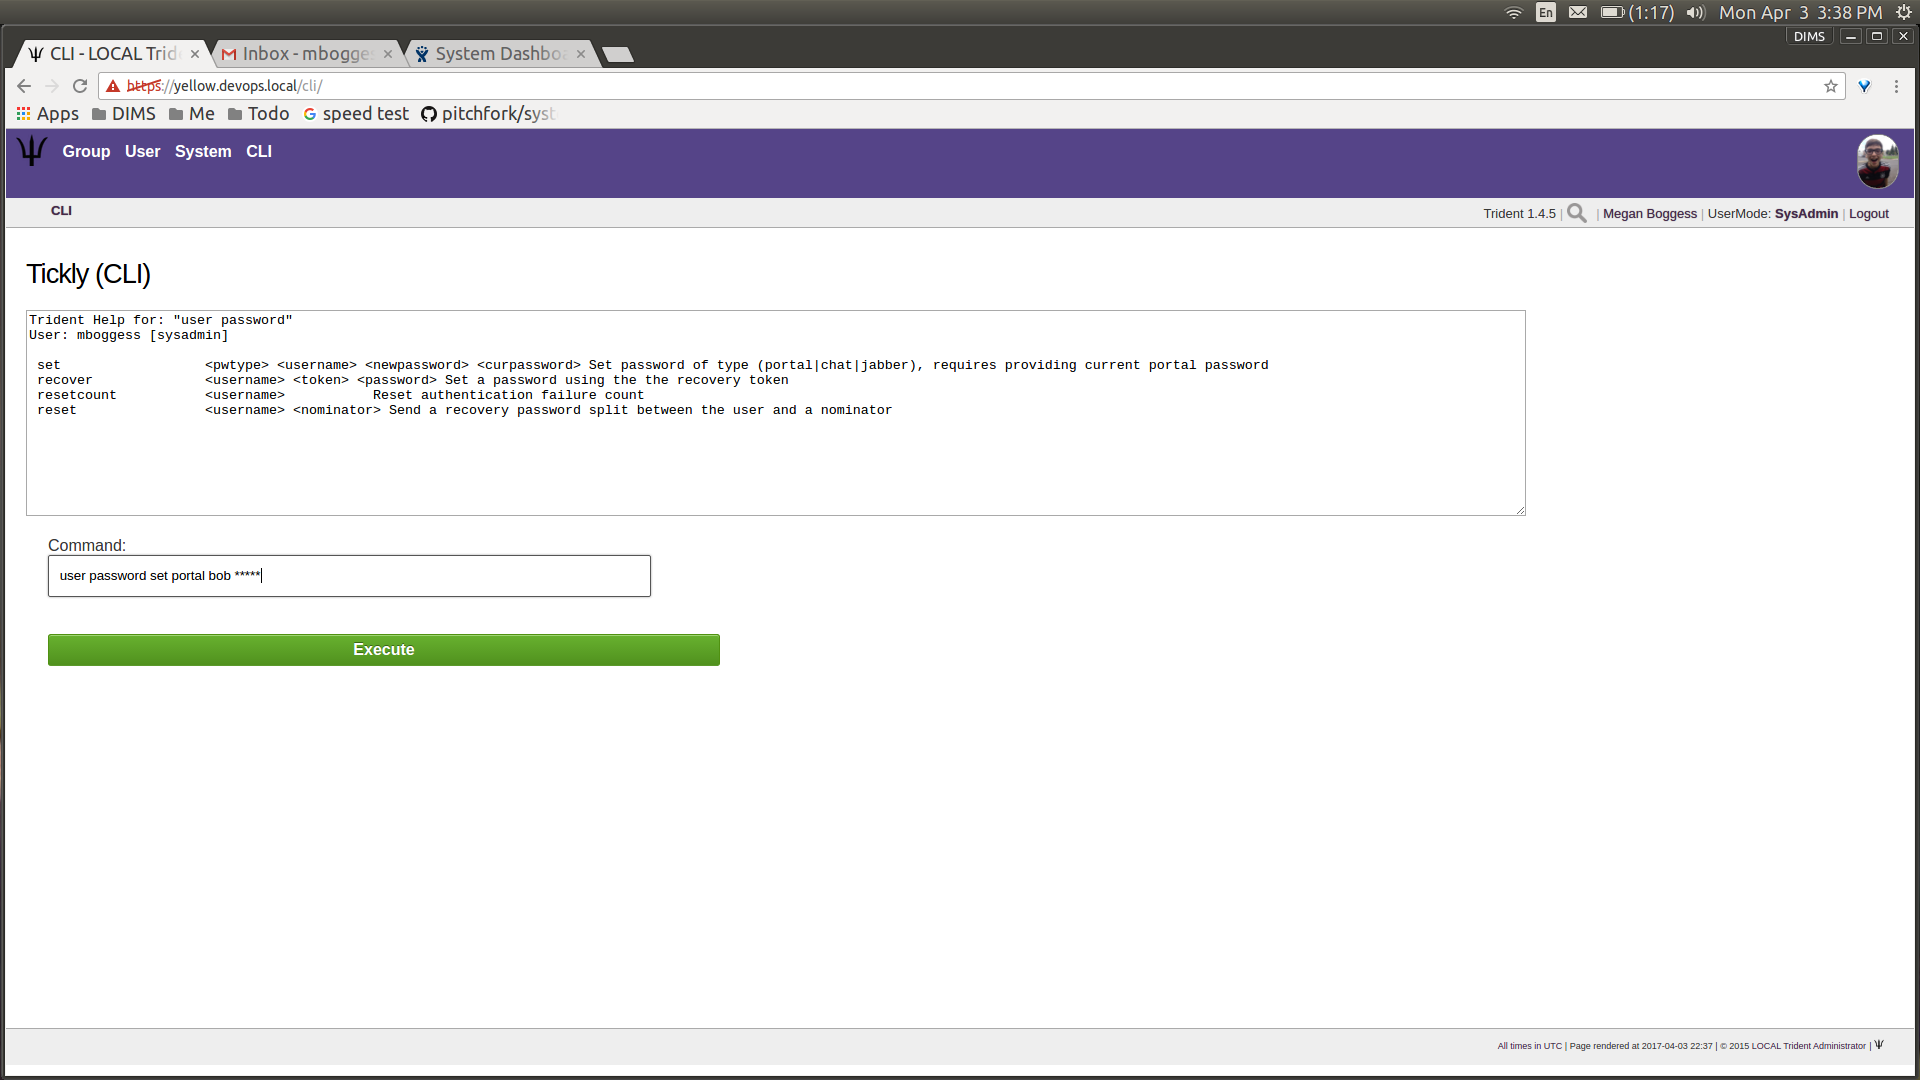
CLI set password
The user will now show up in a trust group administrator’s
list of users found on the User home page (see Figure
New user list). The user does not yet exist in
the trust group. For the user to become a member of the
trust group, follow the trust group’s policies for becoming
a member (nomination, vouches, etc.).
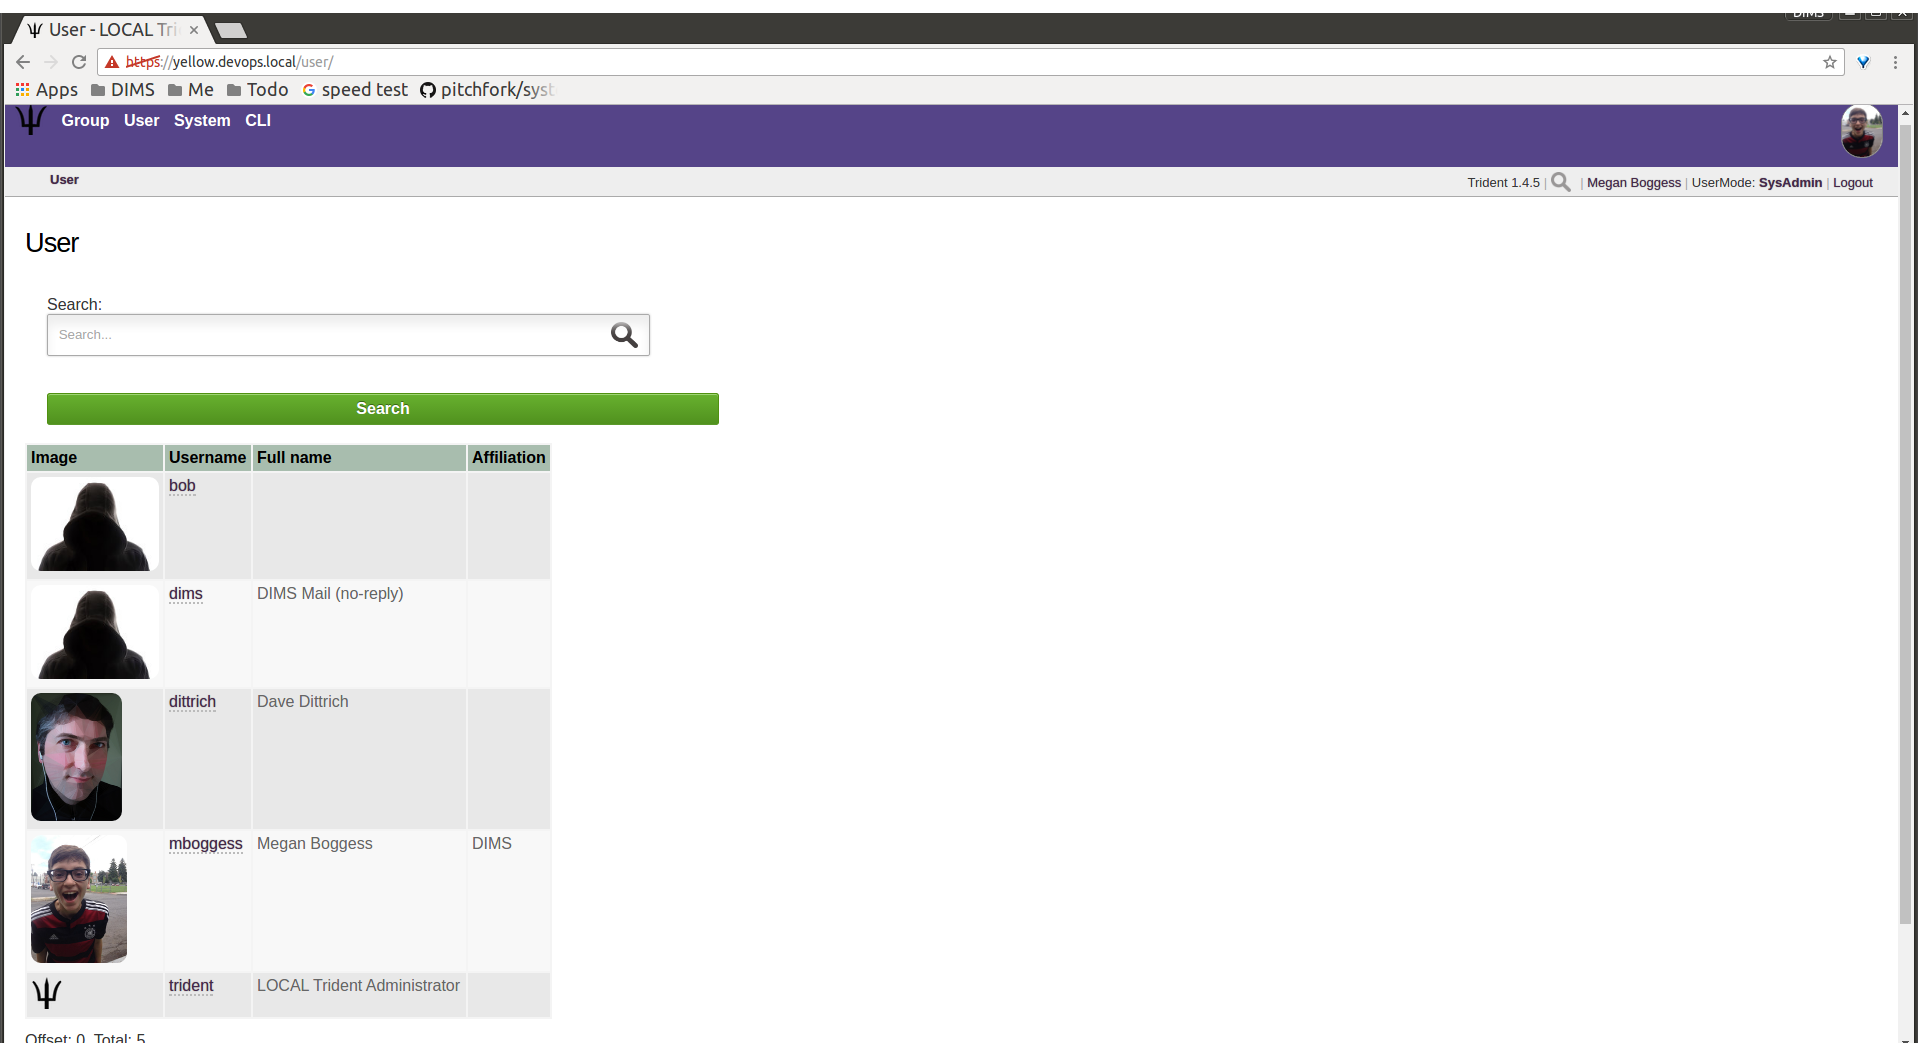
New user list
There are instances where a user must be removed from a
trust group. Members can be blocked via the web
application’s Group perspective (see Figure
Group member admin actions in Section
Group Admin Activities). This does not remove a member
completely from the trust group, nor does it remove a member
as a user from the Trident system itself. These actions must
be taken via the CLI.
To remove a member from a trust group, use the command
group member remove <group> <username> in the field
simulating the command line, where <group> is the trust
group from which the user should be removed and <username>
is the username for the user (Figure
CLI remove member).
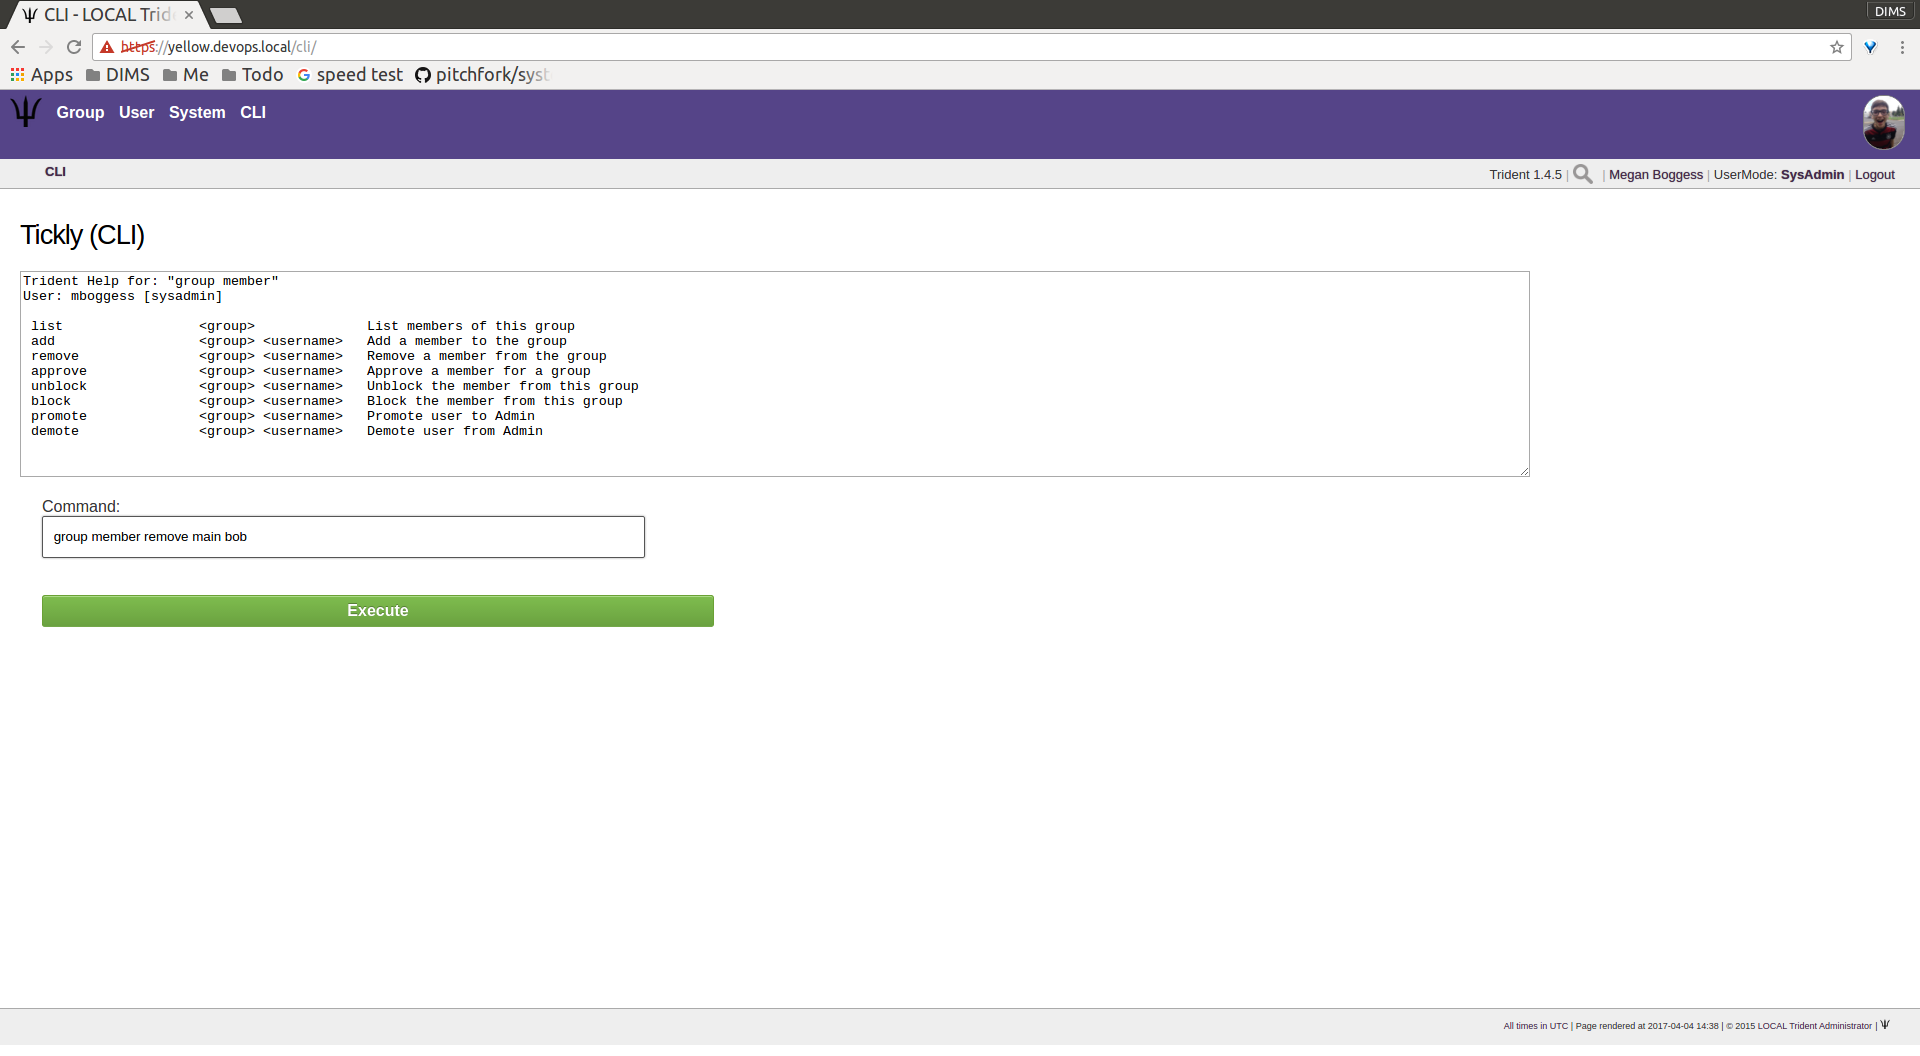
CLI remove member
To remove a user from the Trident system, use the command
user delete <username> (Figure
CLI remove user).
CLI remove user
Finally, trust group administrators are responsible for
the group’s mailing lists. Sometimes, lists must be deleted.
There is no way to remove a list via the web application
Mailing
List
home page (see Figure
Mailing lists list in Section
Group Admin Activities). Thus, the removal must be
accomplished via the CLI.
To see what subcommands are available in the ml domain,
use the command ml help (Figure
cliAdminMailingListHelp`).

CLI ml help
To see a current list of available mailing lists, use the
command ml list <group> where <group> is the name of
the trust group from which to list available mailing lists
(Figure CLI ml group list).
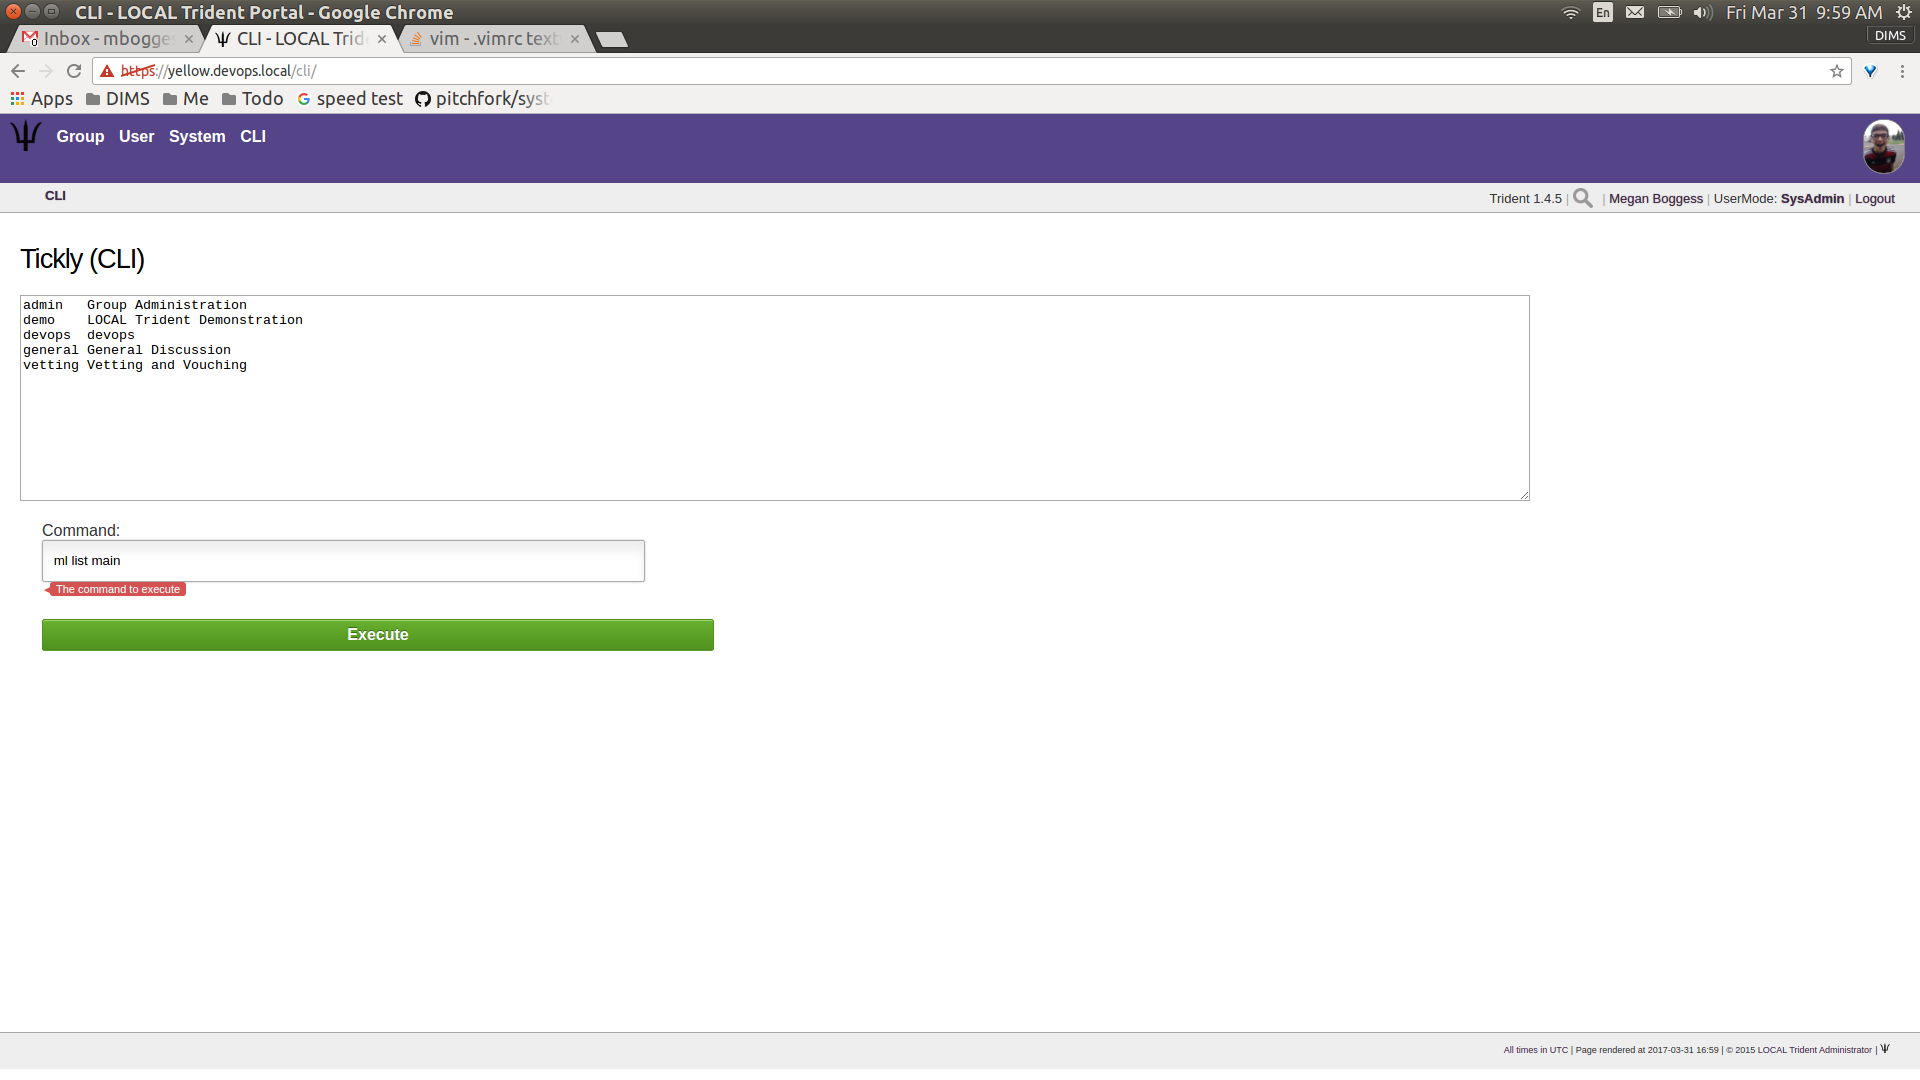
CLI ml group list
To remove a mailing list, use the command ml remove
<group> <ml> where <group> is the trust group from
which the mailing list is to be removed and <ml> is the
name of the mailing list to be removed (Figure
CLI ml remove list).
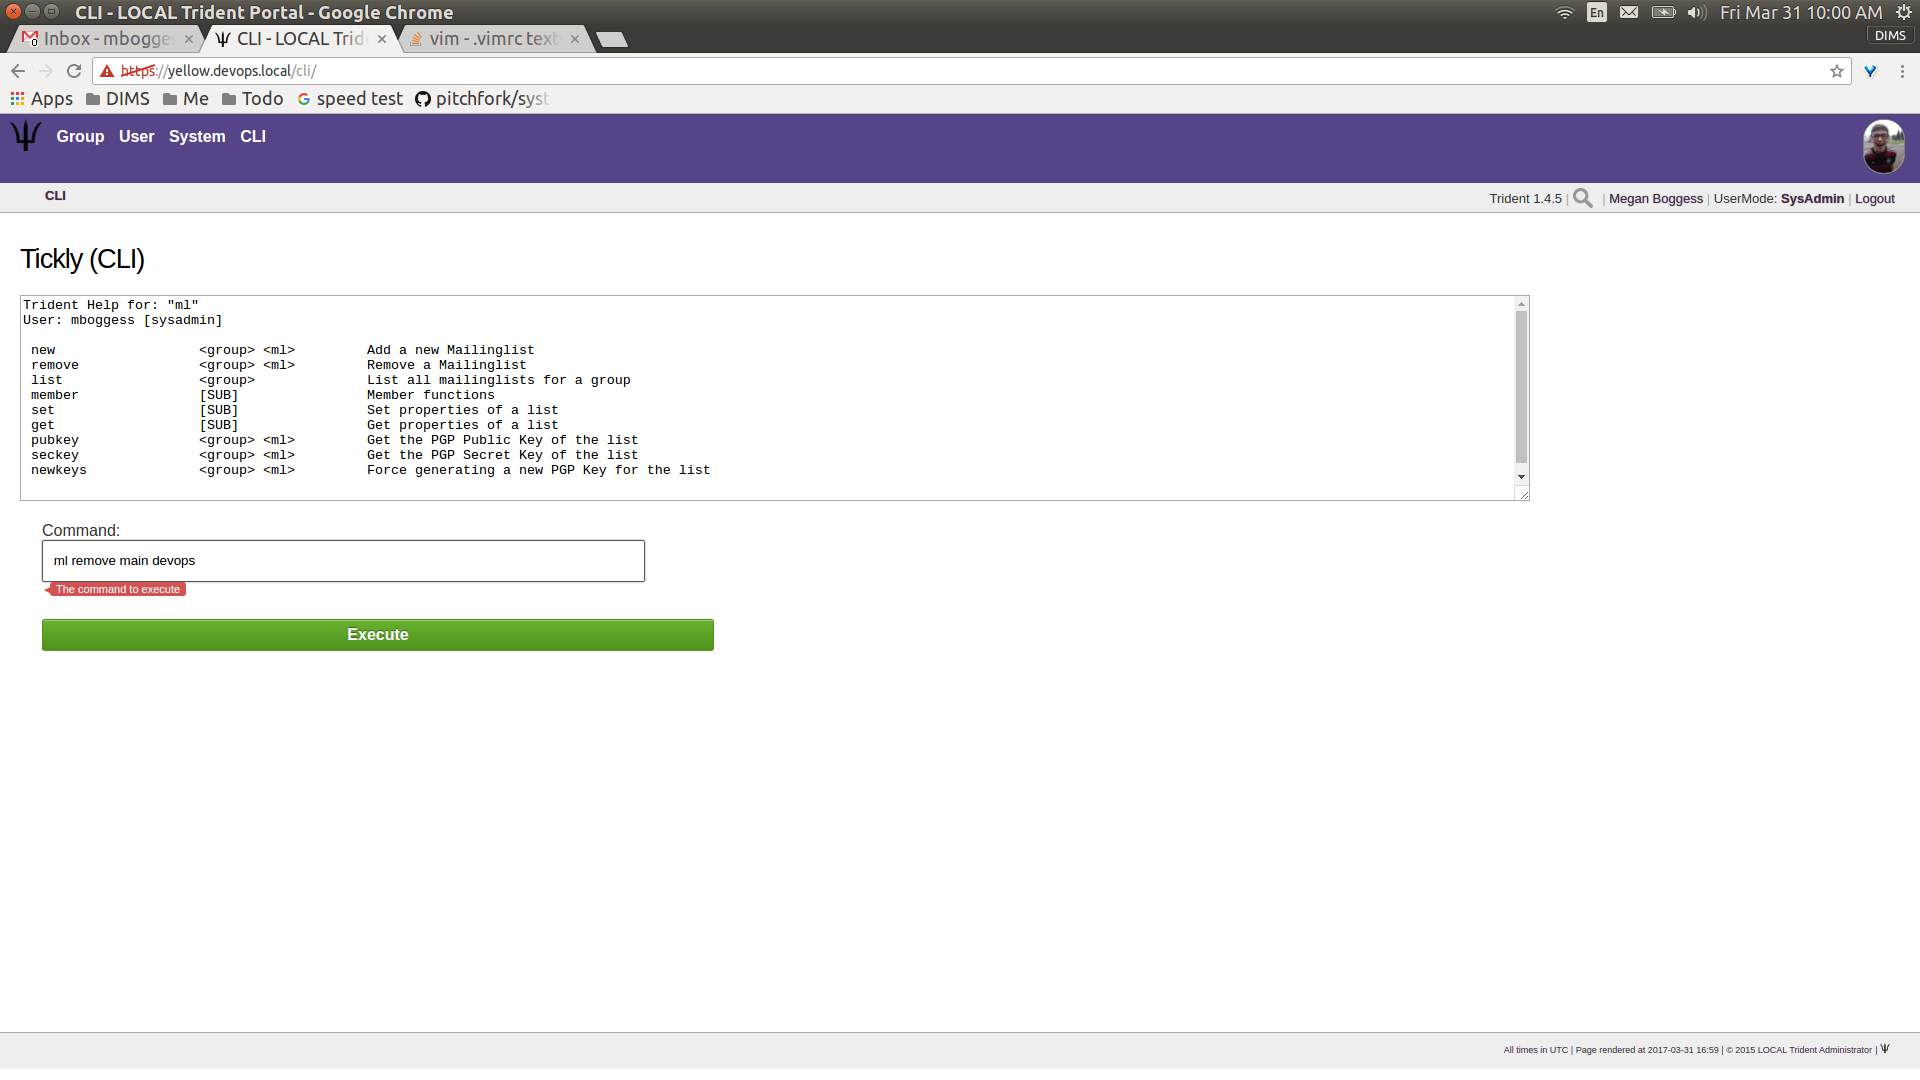
CLI ml remove list
The list of mailing lists on the web app’s Mailing List
home page will then be updated (Figure
Mailing list list updated).
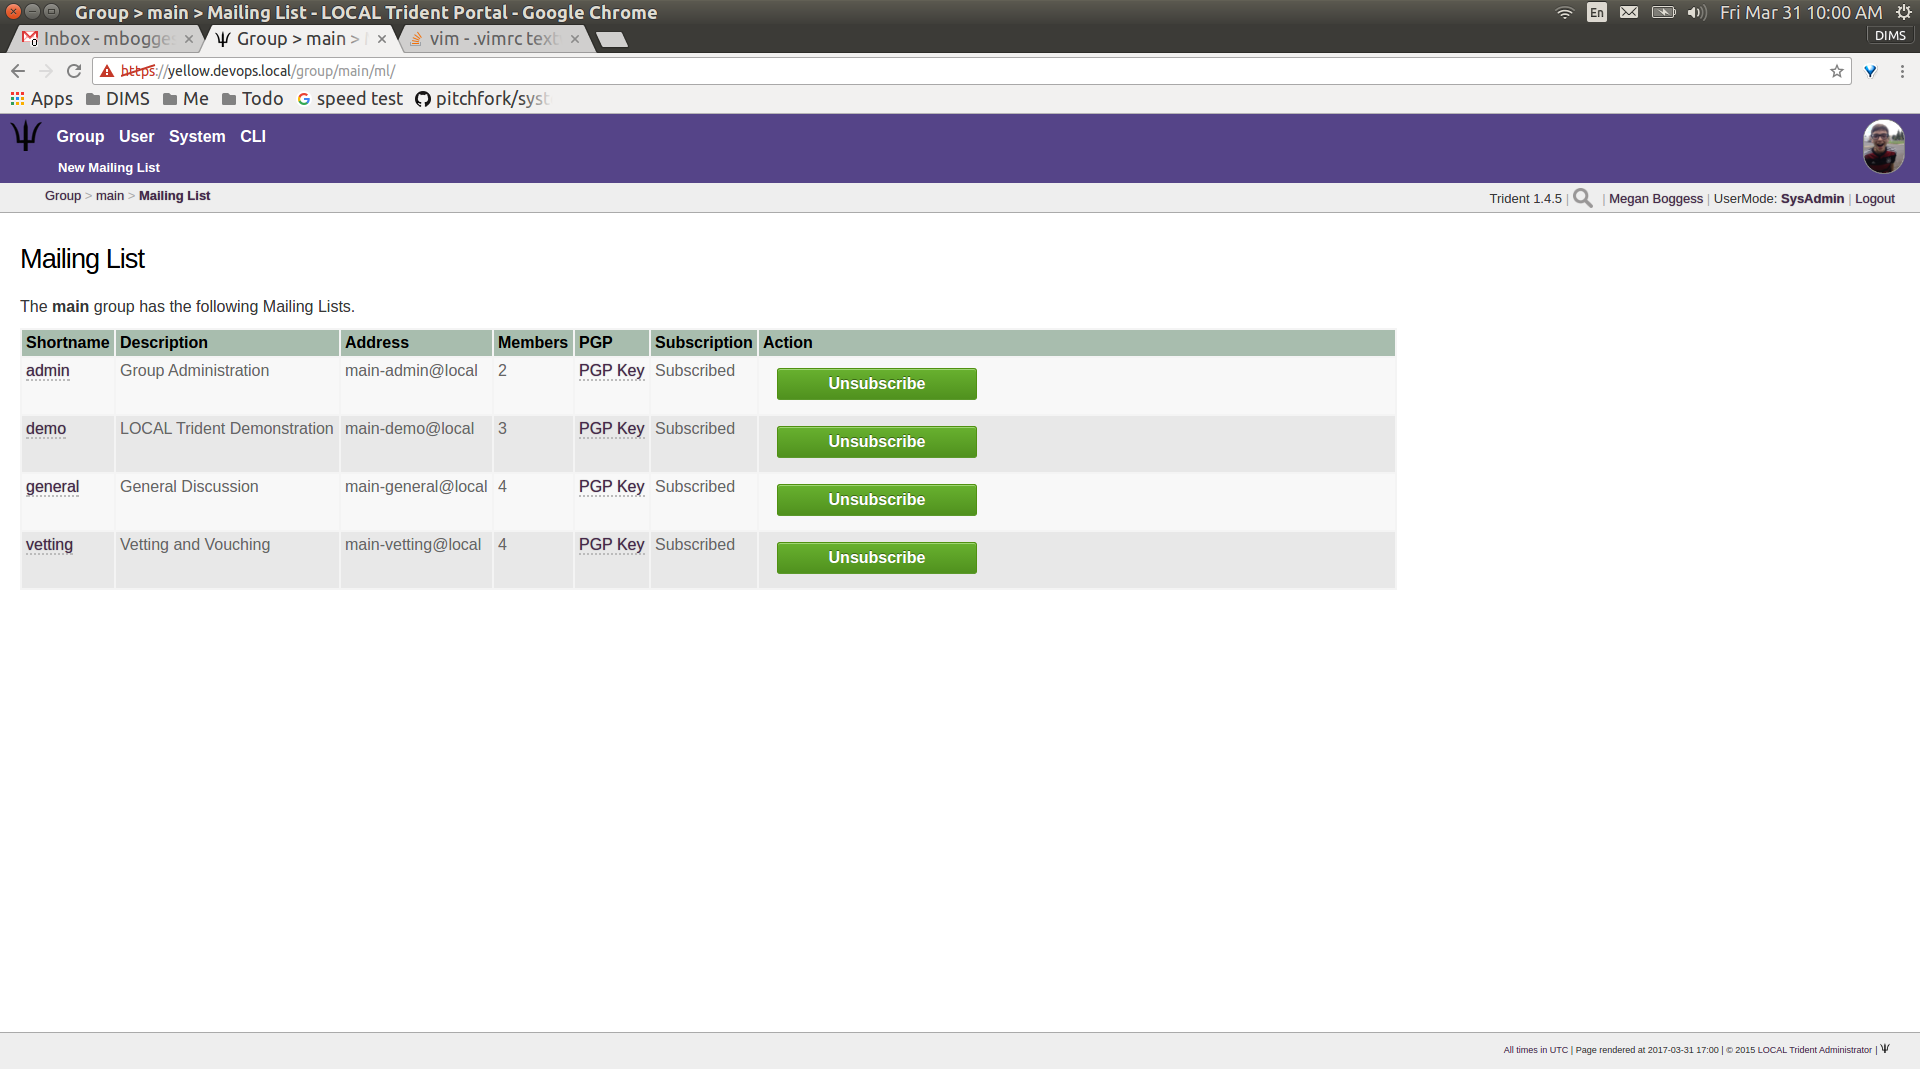
Mailing list list updated
PGP keys are also manageable via the CLI’s ml domain.
If PGP keys for a mailing list are compromised for some
reason, they need to be regenerated. Trust group
administrators can retrieve both public and secret PGP keys,
as well as regenerate new ones. See Figure
CLI ml help to see the ml subcommands
and the necessary parameters. Trust group admins should then
notify all members of the change of keys so the members can
go retrieve the new keys (see Section
PGP Keys).
To log out of the CLI as a trust group admin, run the
command system swapadmin again (Figure
CLI log out).
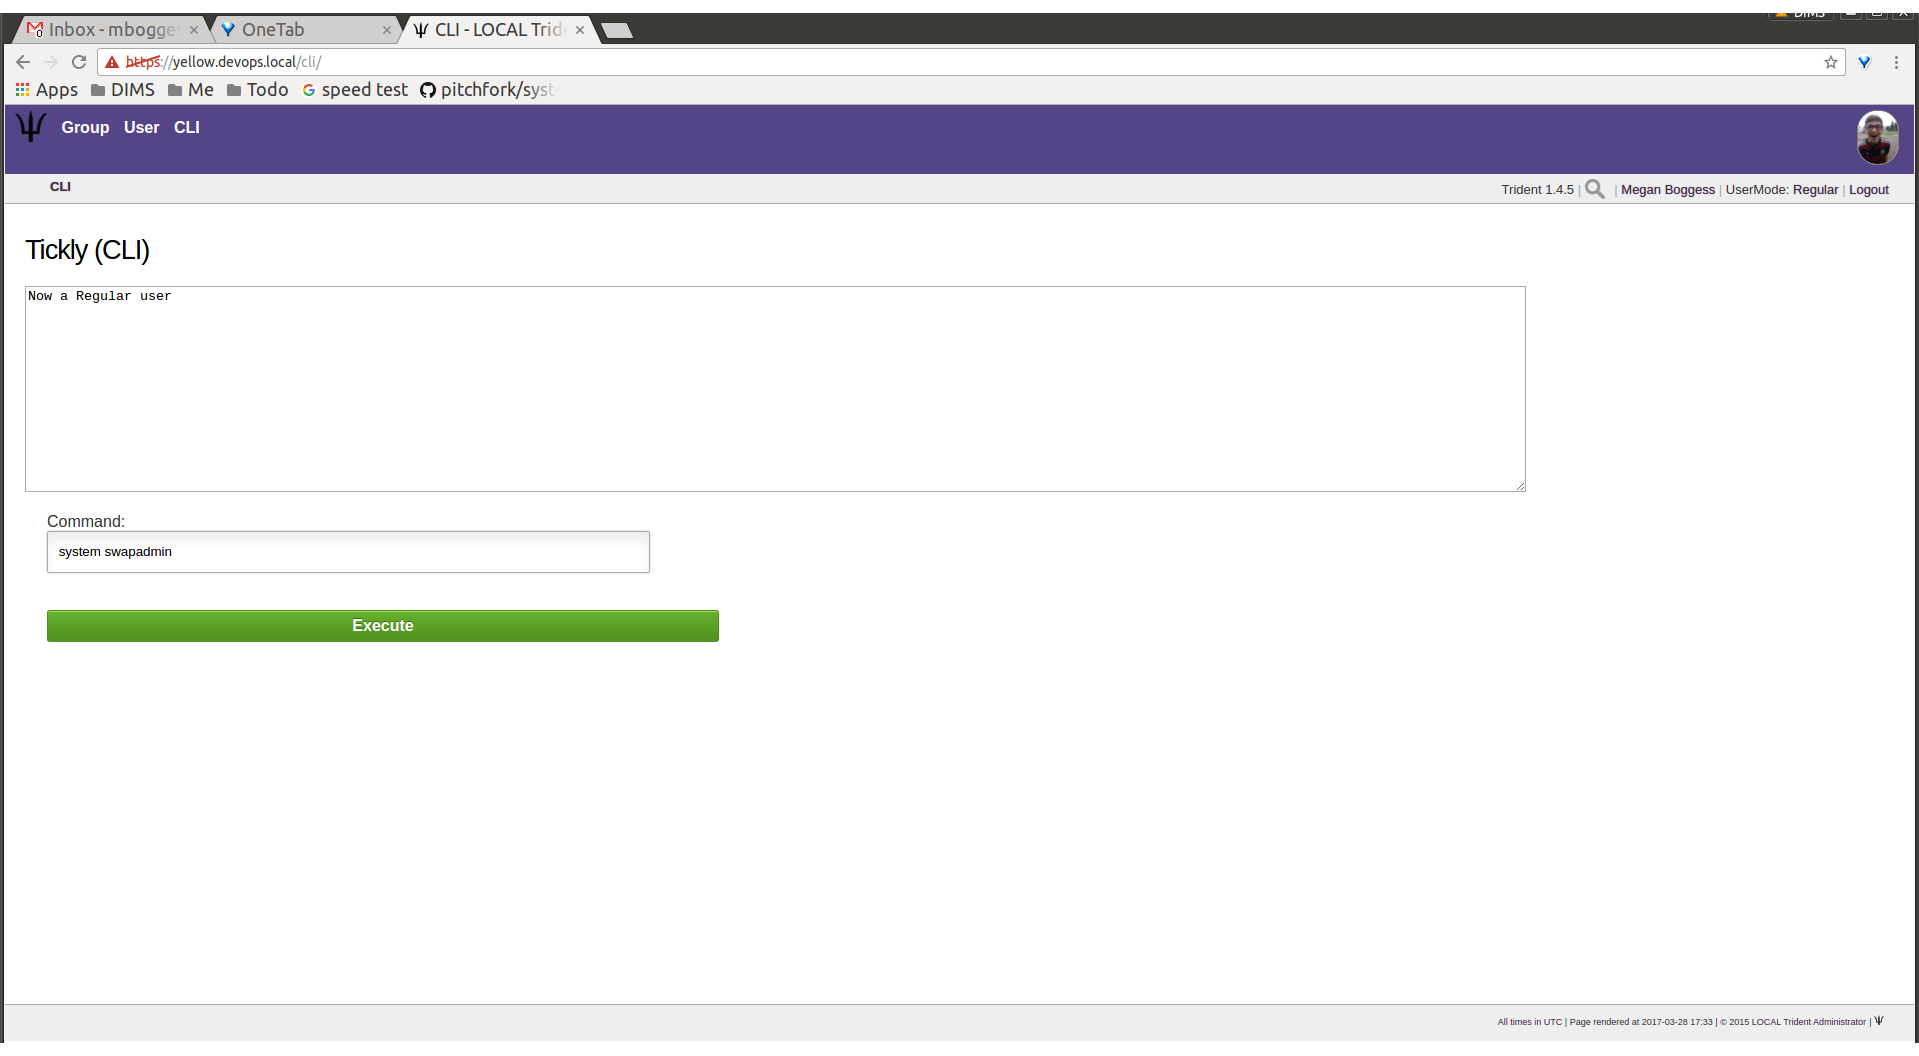
CLI log out
This concludes the activities manageable by a trust group administrator. To see tasks for regular members of trust groups or for system administrators, please see the other chapters in this document (Section Trust Group Member Activities and Section System Administration Activities, respectively).