2. Trust Group Member Activities
This chapter serves as a training guide for members of a trust group using a Trident portal system. It clearly shows what activities a member may pursue and attributes she may manage. These activities include updating a member’s profile and other personal details, managing mailing list memberships, using the wiki, etc.
2.1. User Management
This section will cover management of a user’s attributes. While most (if not all) of the time, a user of the Trident portal system will be a member of a trust group, a user can exist without being a member. This section covers actions any user or member can take. Thus, the words “user” and “member” are used interchangeably. It should be noted, there are actions which only a user who is also a trust group member can take. These actions are covered in Section Group Management.
2.1.1. Profile Management
Most of the details a regular member of a trust group can
modify about himself are found in the Profile page.
This page is accessible by clicking the Profile tab in
the second row of links at the top of the page from most
user-related pages, or the Profile link in the list of
links on the user’s home page. Click either of those to get
to the Profile page that has editable attributes. The
profile can be seen in Figures User profile, top,
User profile, middle, and User profile, bottom.
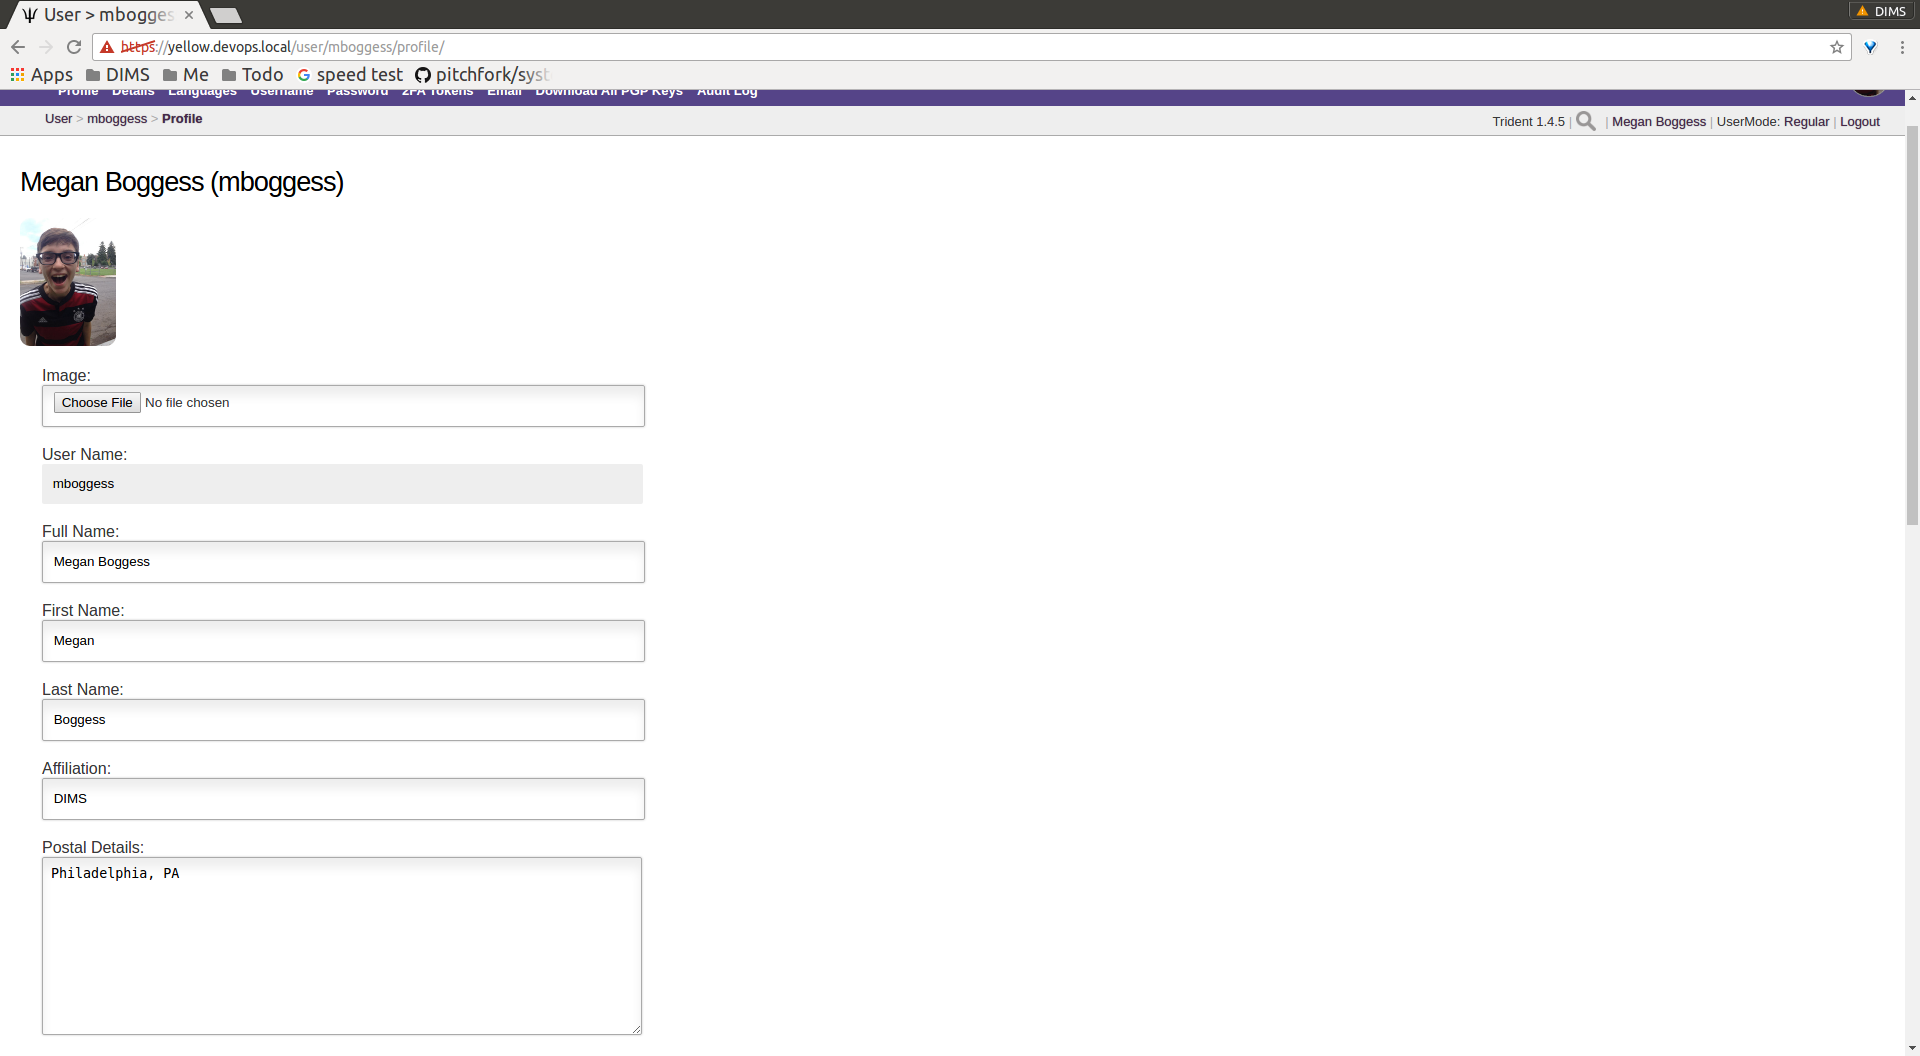
User profile, top
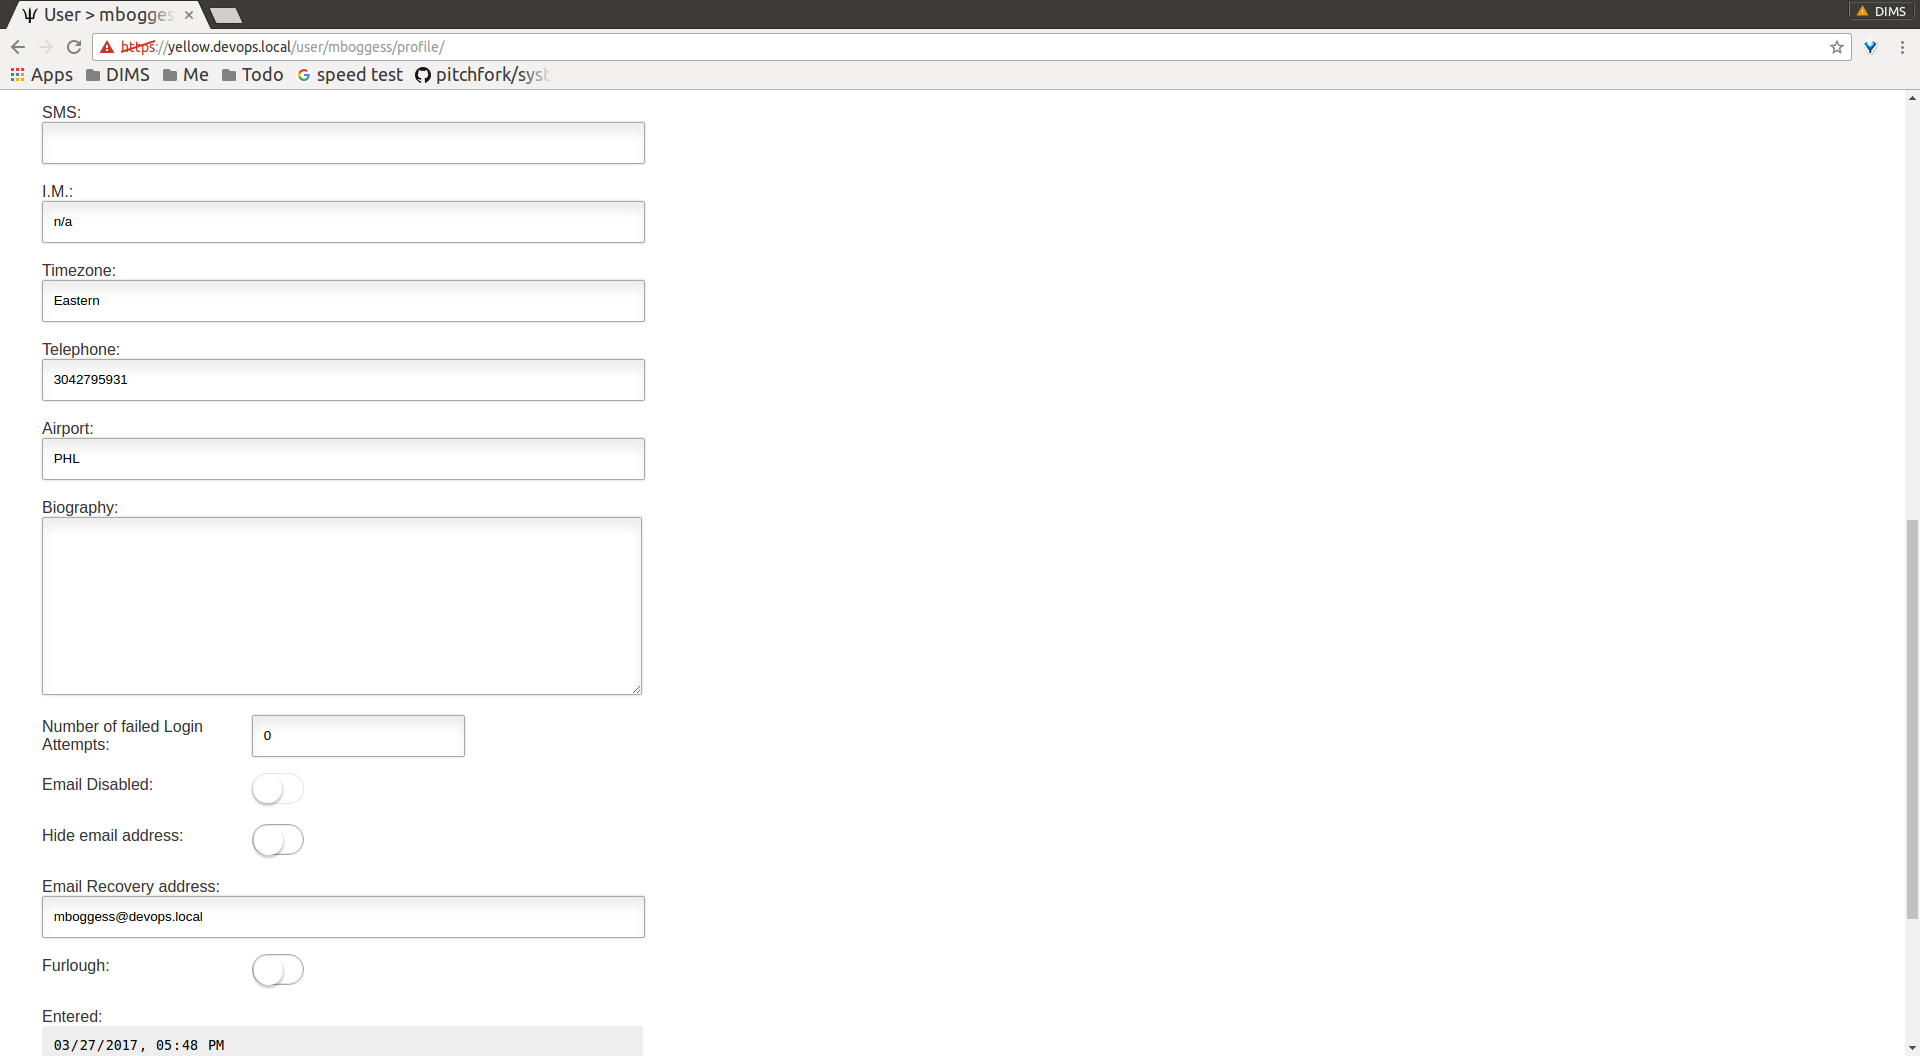
User profile, middle
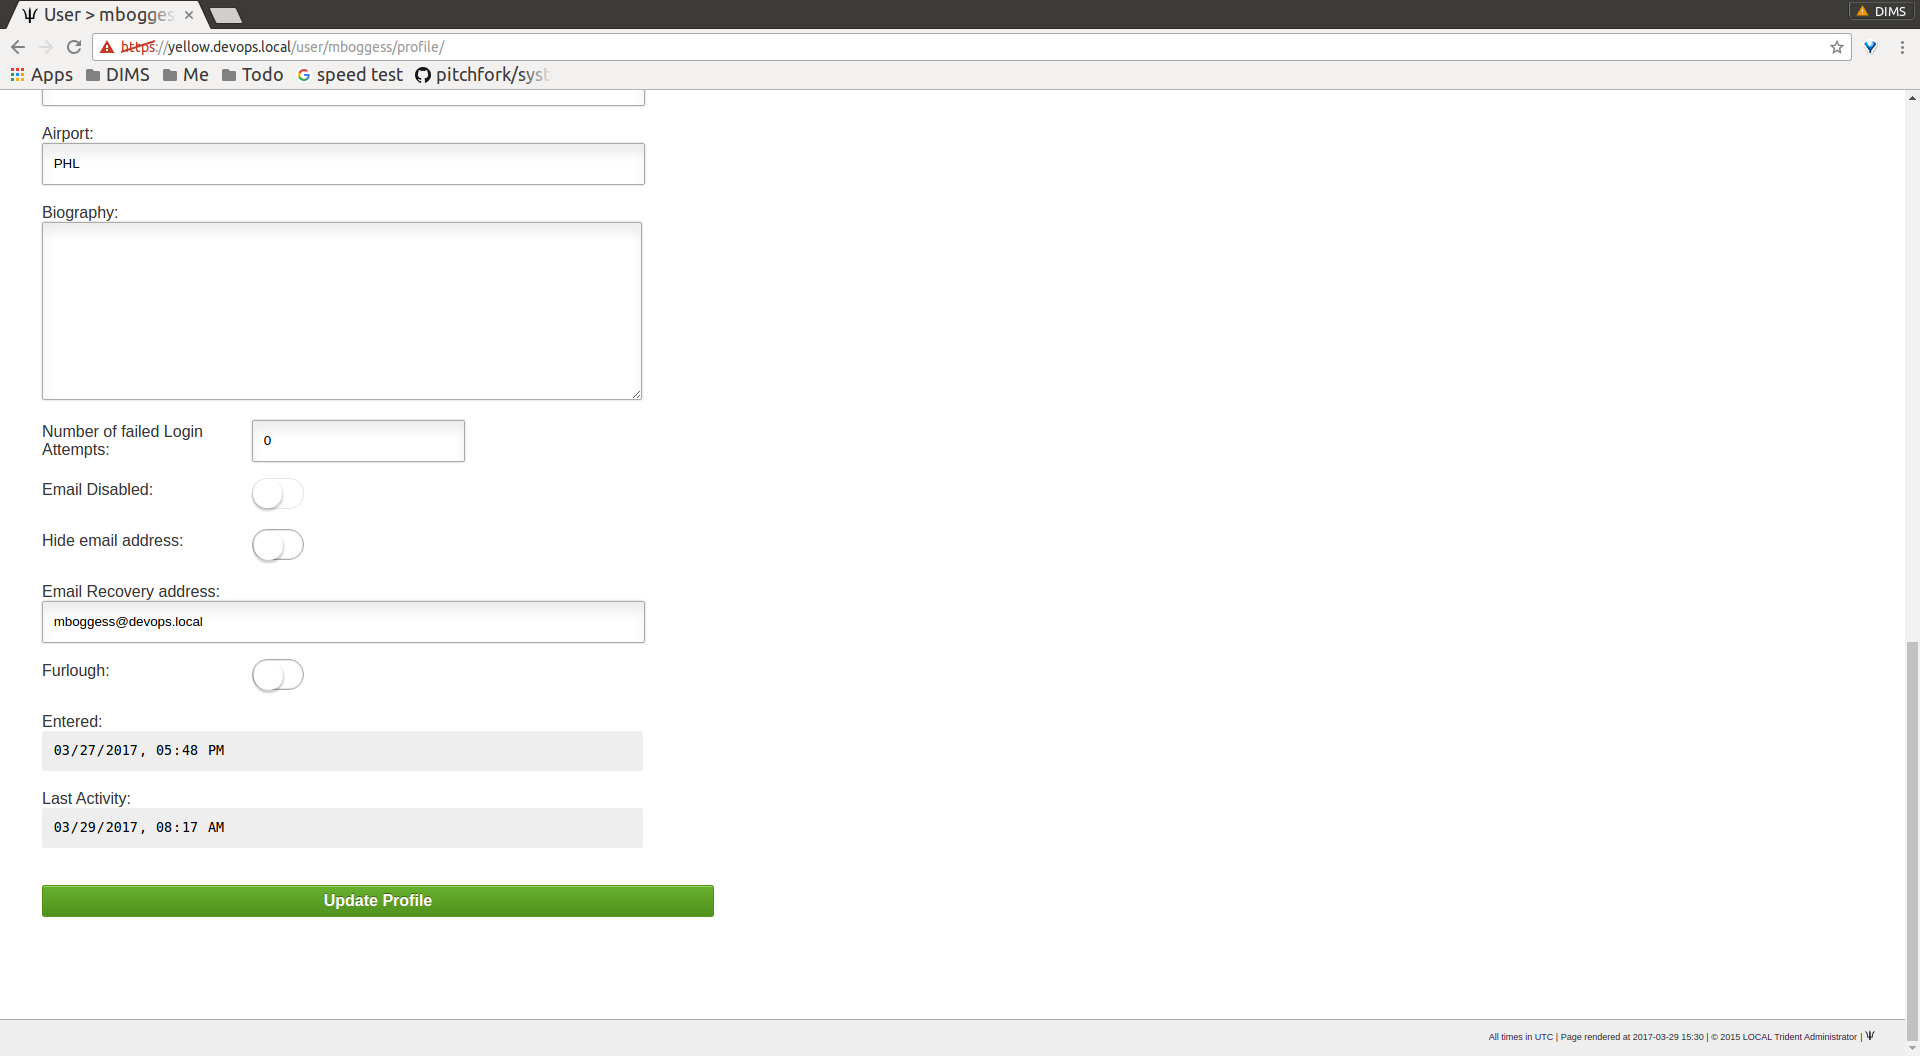
User profile, bottom
On the profile page, details such as name, affiliation, address, phone number, and airport can be added or modified. A profile image can be uploaded. Longer-form attributes can be edited, such as postal details and biography. Failed logins and some activity statistics are also tracked on a member’s profile.
Click the Update Profile button to save the changes
after modifications have been made. The page will
refresh with the newly saved information, as well as indicate
how many fields were updated and how many fields were not
updated.
2.1.2. Other Personal Details
Other personal details can be modified through the Details,
Languages, and Username tabs found in the second row
at the top of any user-related page or in the list of links
found on a user’s home page. This section covers these
actions.
The Details page (Figure User details) is a place to add
any other details that don’t conform to the profile.
Currently, the only detail type is a callsign.
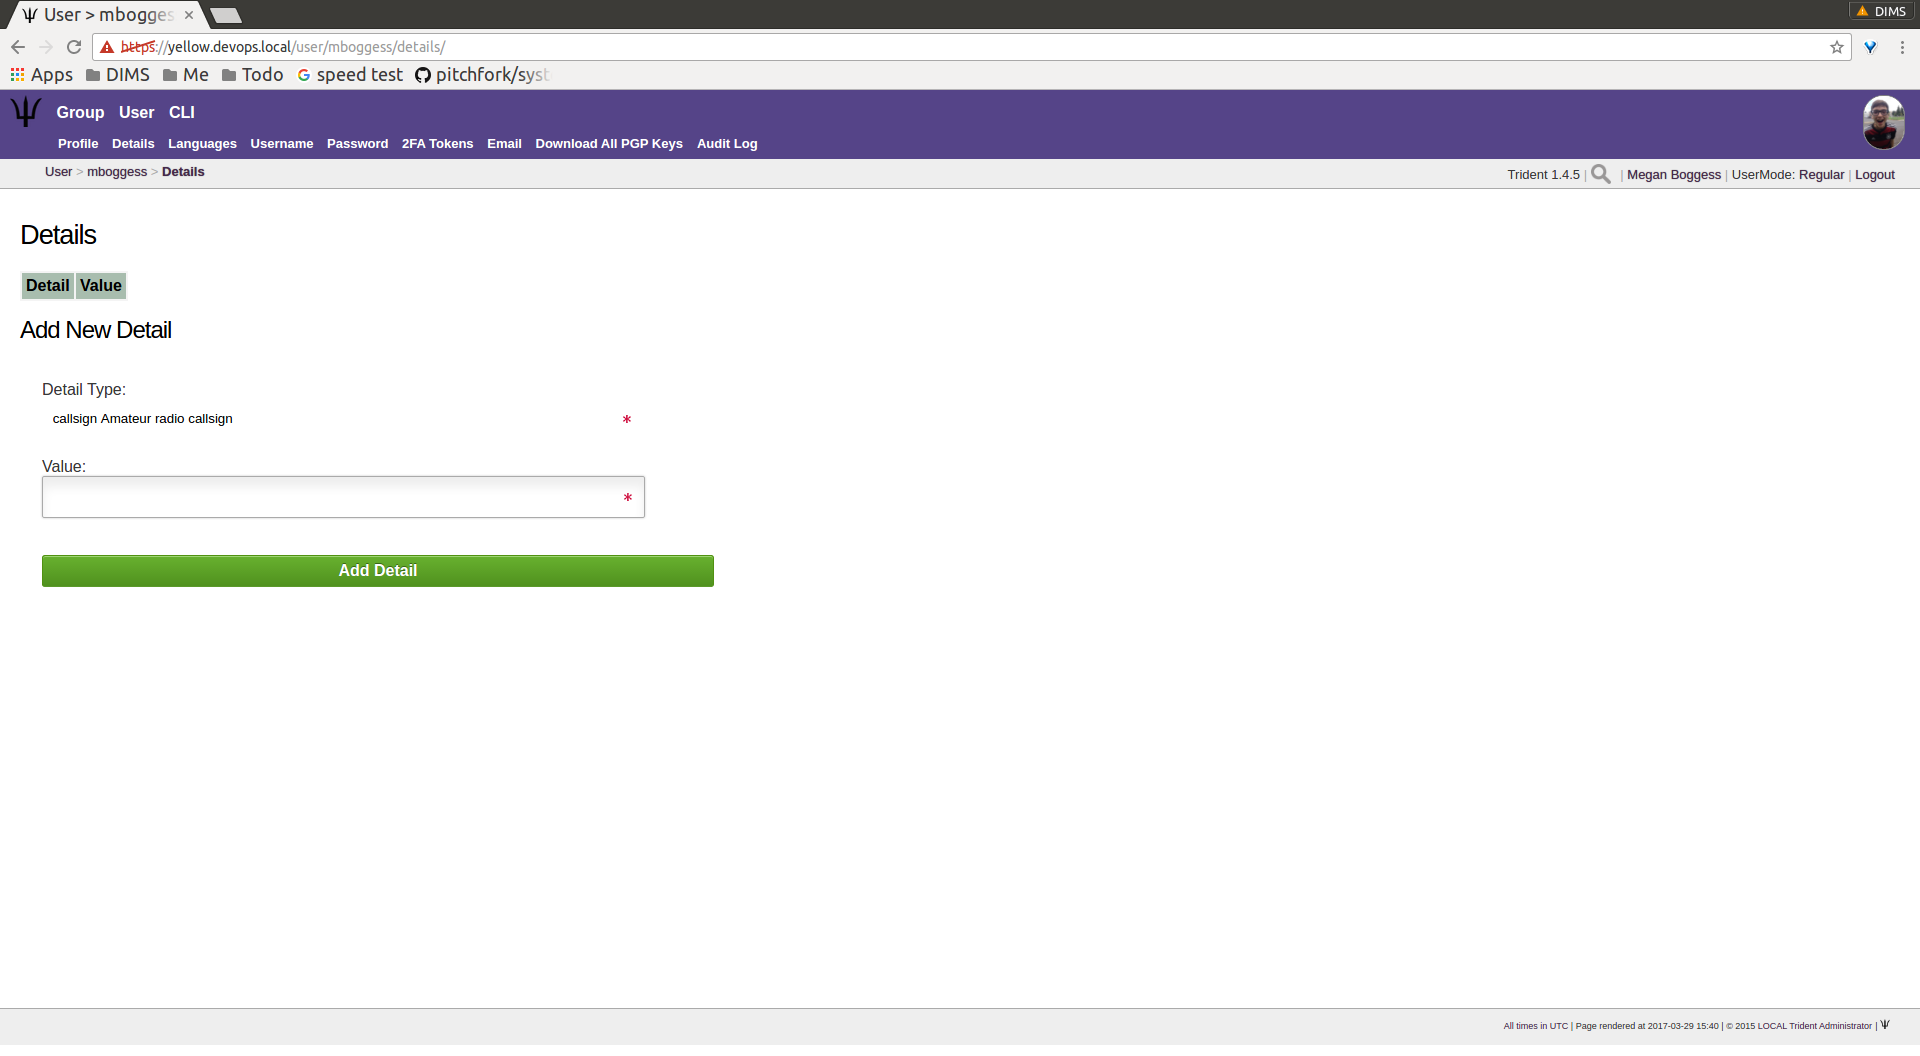
User details
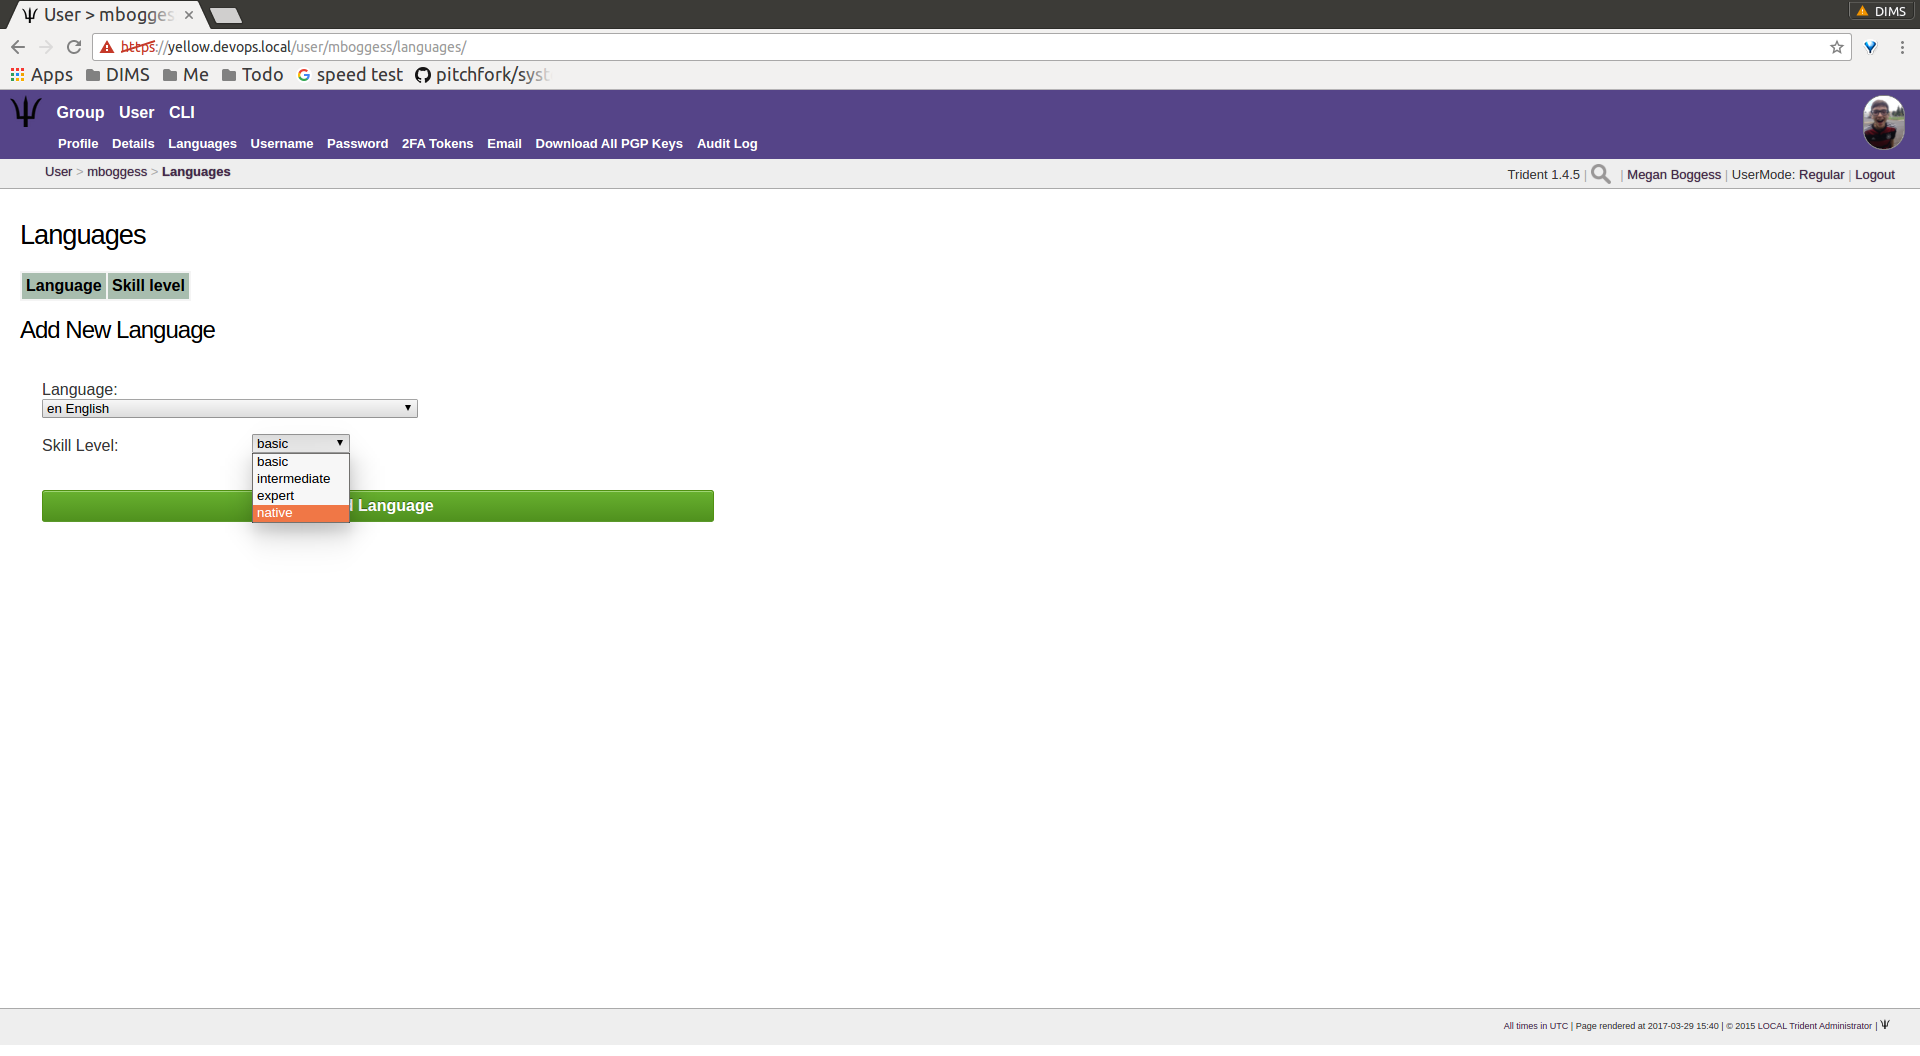
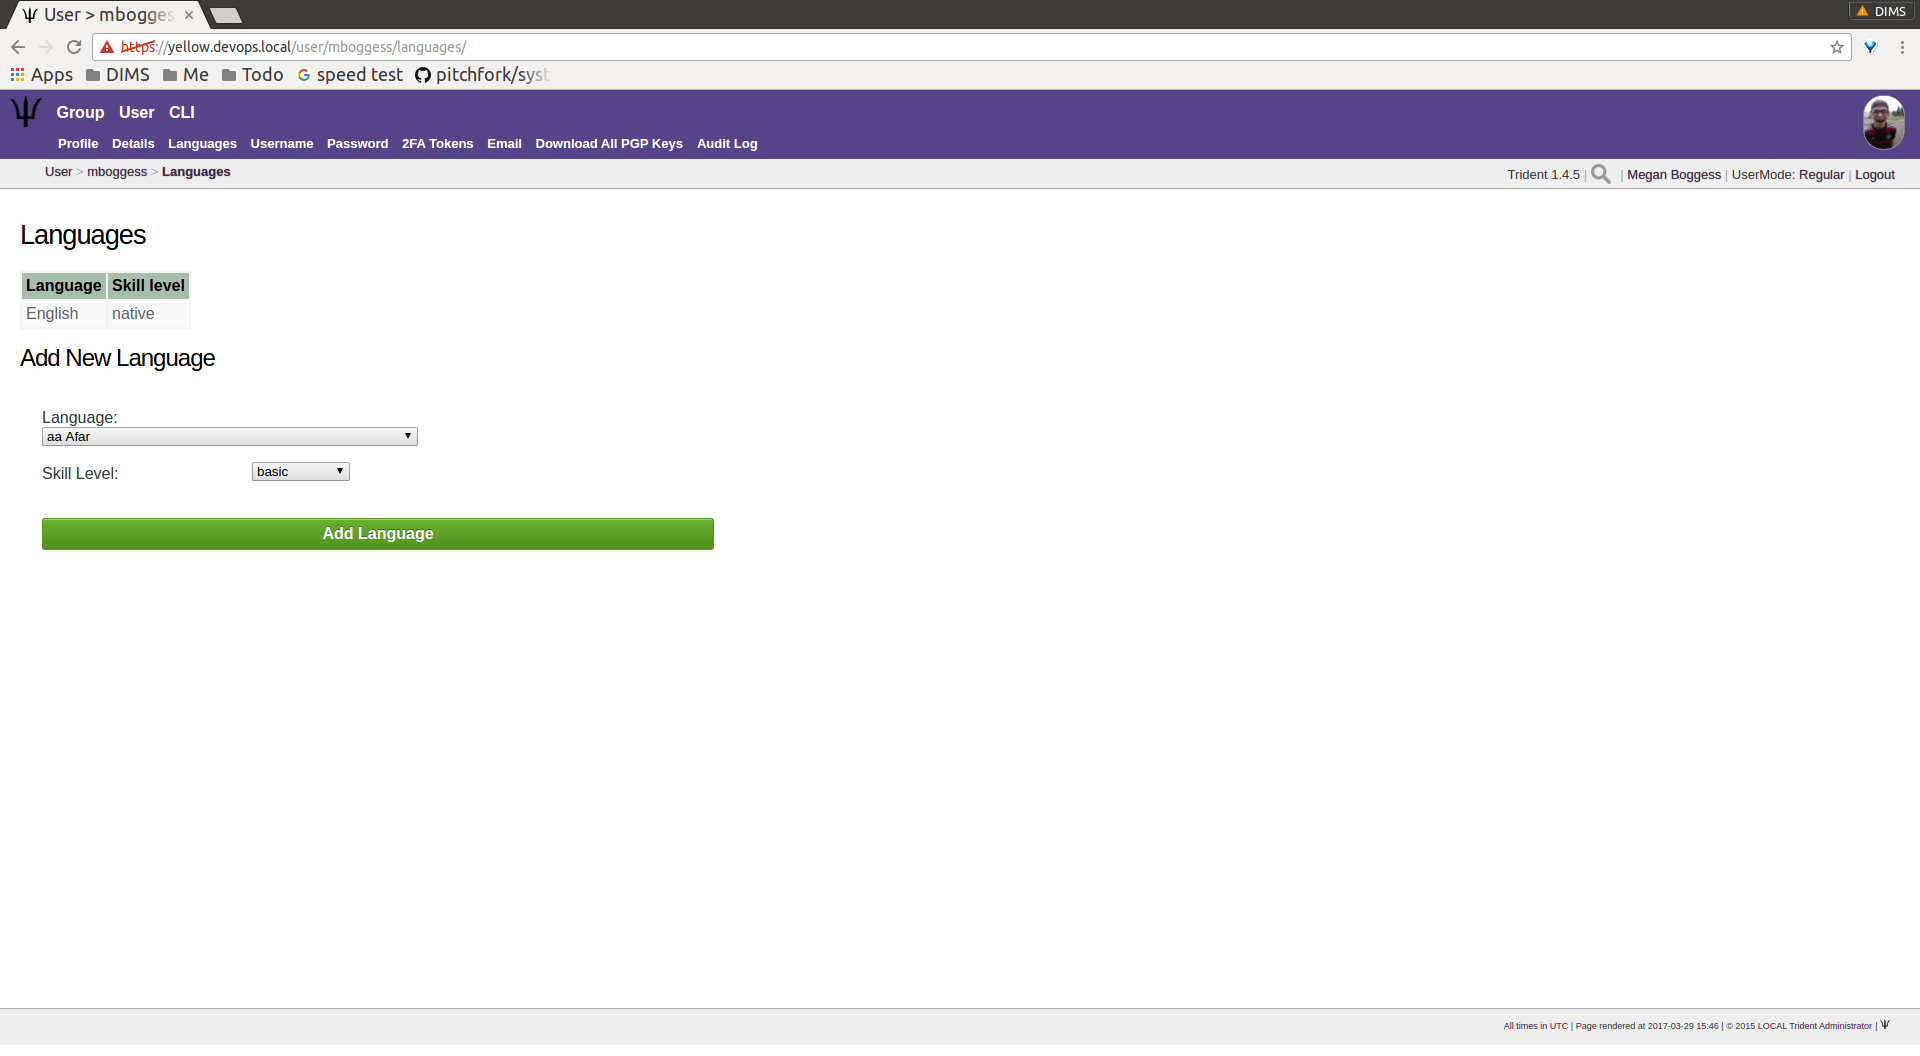
The Languages page (Figure User languages, choose language) is the
place to add languages a member knows and her skill level
(Figure User languages, choose skill level) at that language. Click the
Add Language button to add a new language
(Figure User languages, updated language).
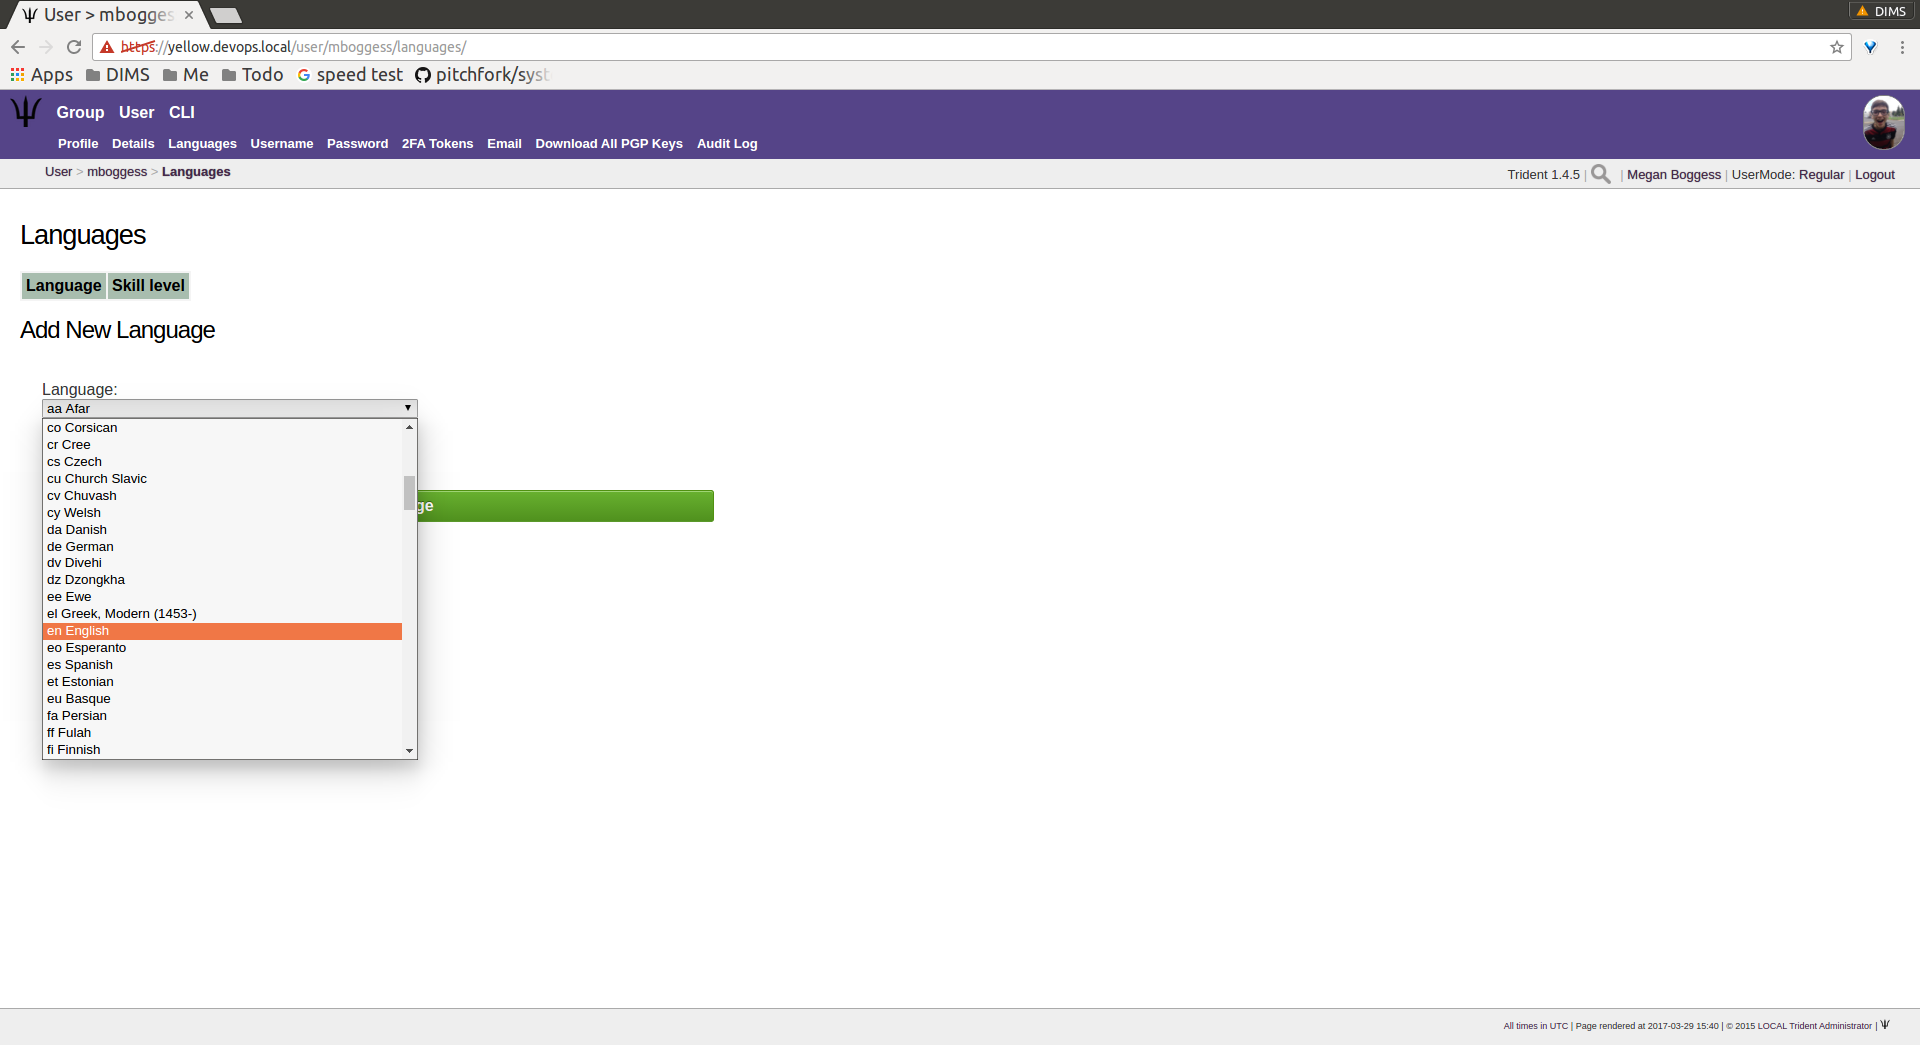
User languages, choose language
User languages, choose skill level
User languages, updated language
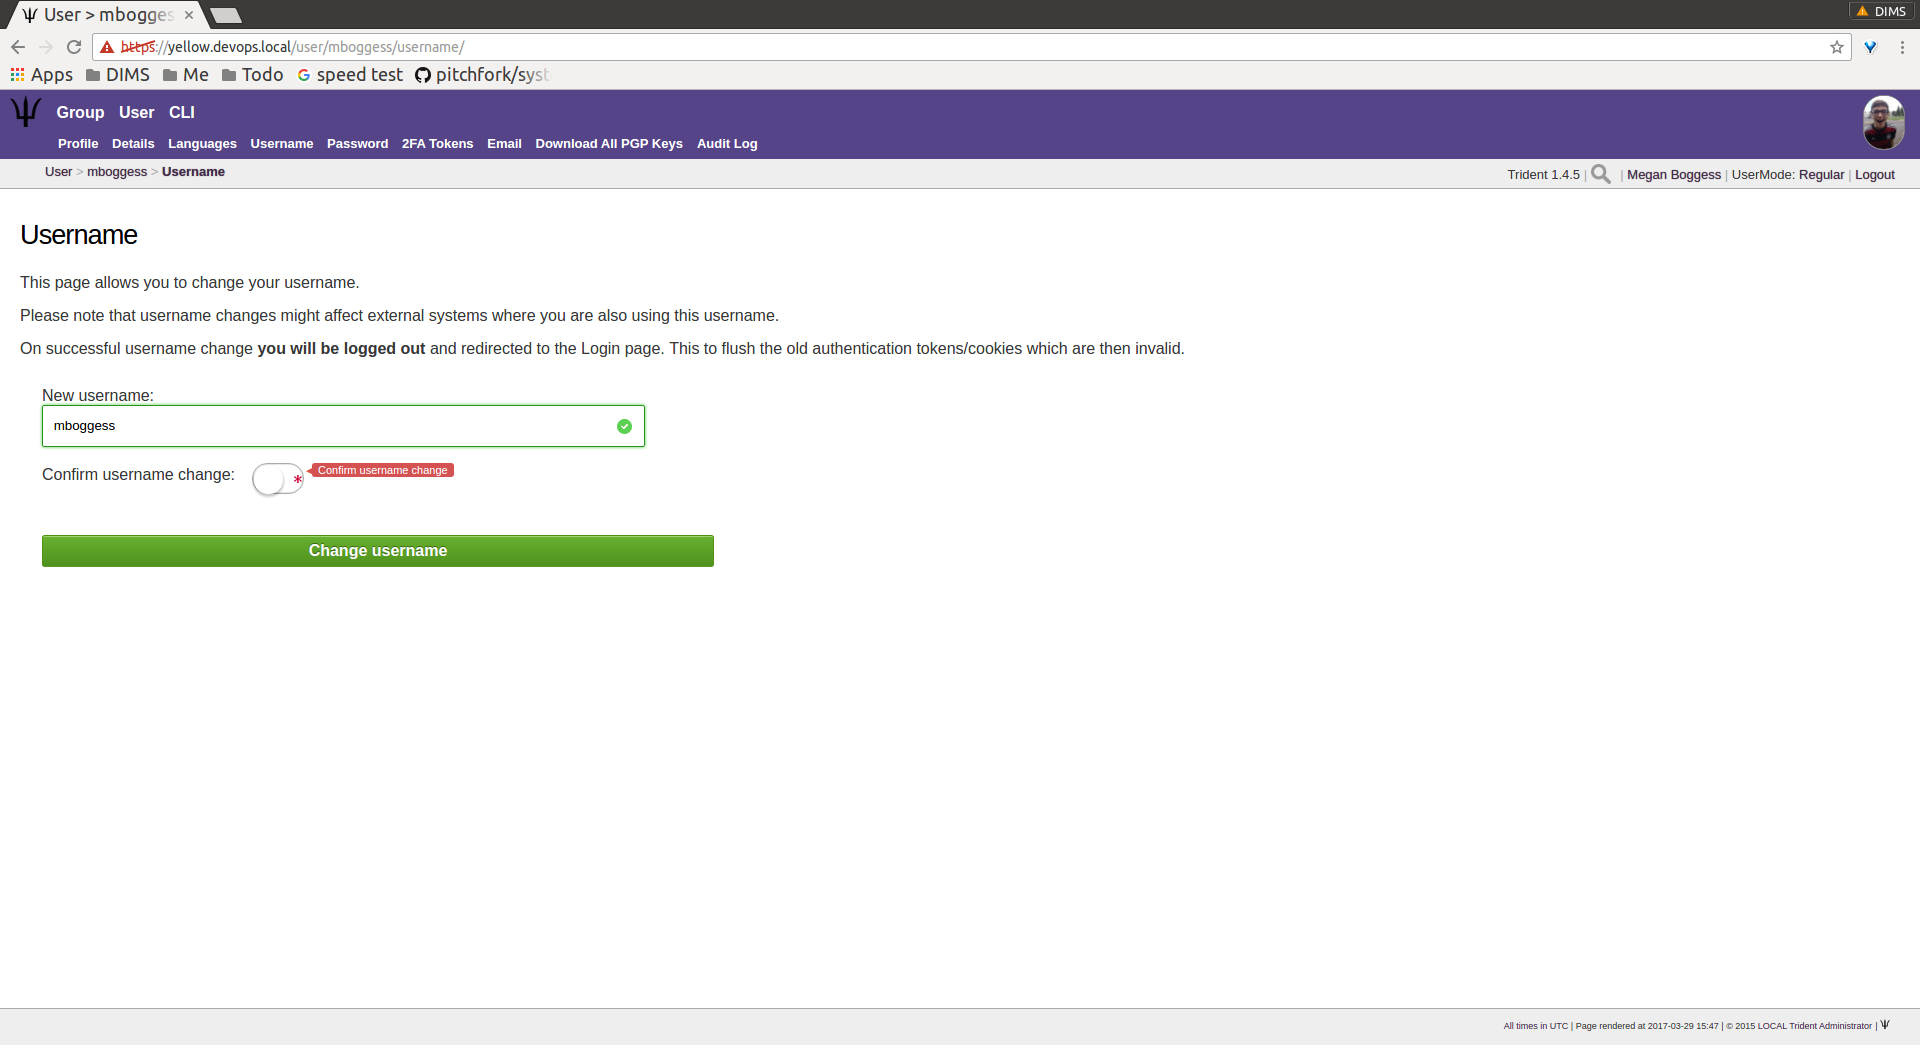
The Username page (Figure User username change) allows a member
to change her username. This can affect external systems,
so this change should be used with care and caution. Enter
the new username in the field and use the toggle to confirm
the change before clicking the Change username button.
User username change
2.1.3. Password Change
The Password page (Figure Define new password) allows a
member to change her password, provided she knows her current
password (which she should, since she is logged in already).
When the member clicks the Change Password button, she
is immediately logged out and must login again with the new
password (Figure Login with new password).
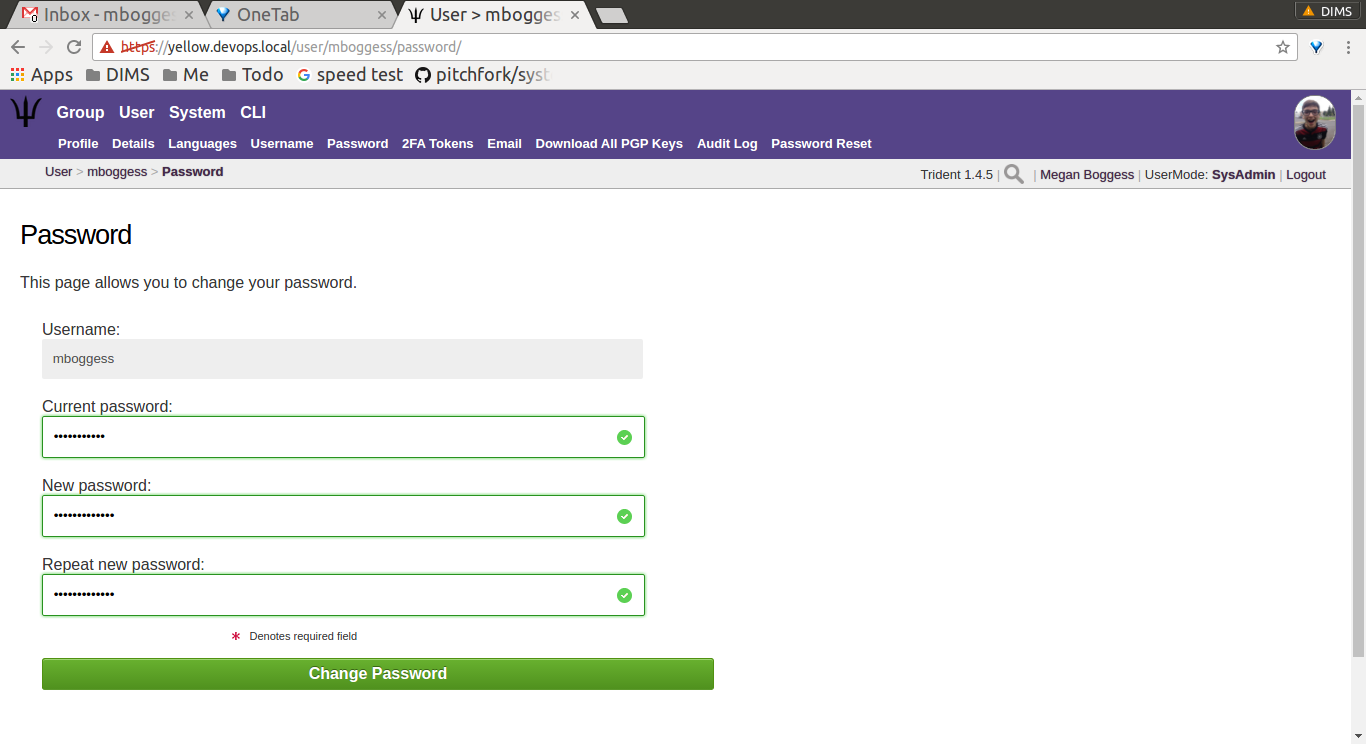
Define new password
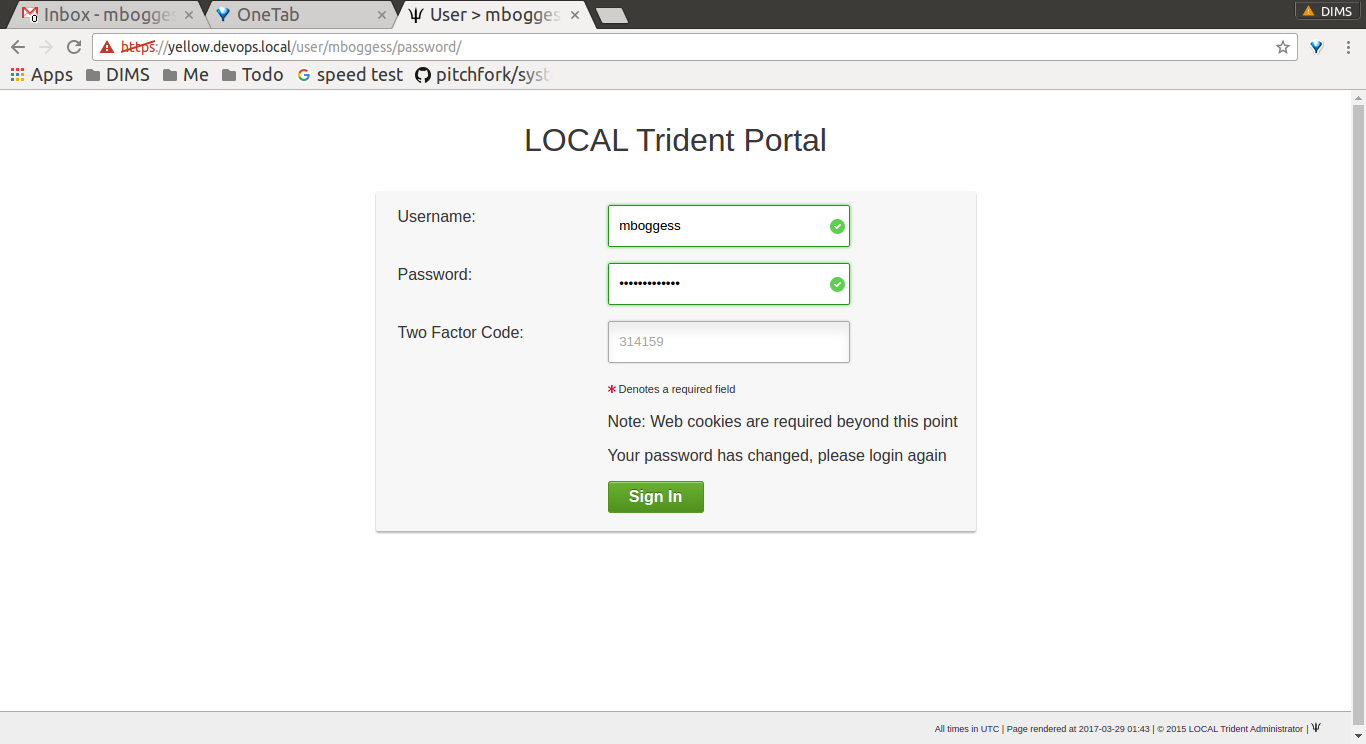
Login with new password
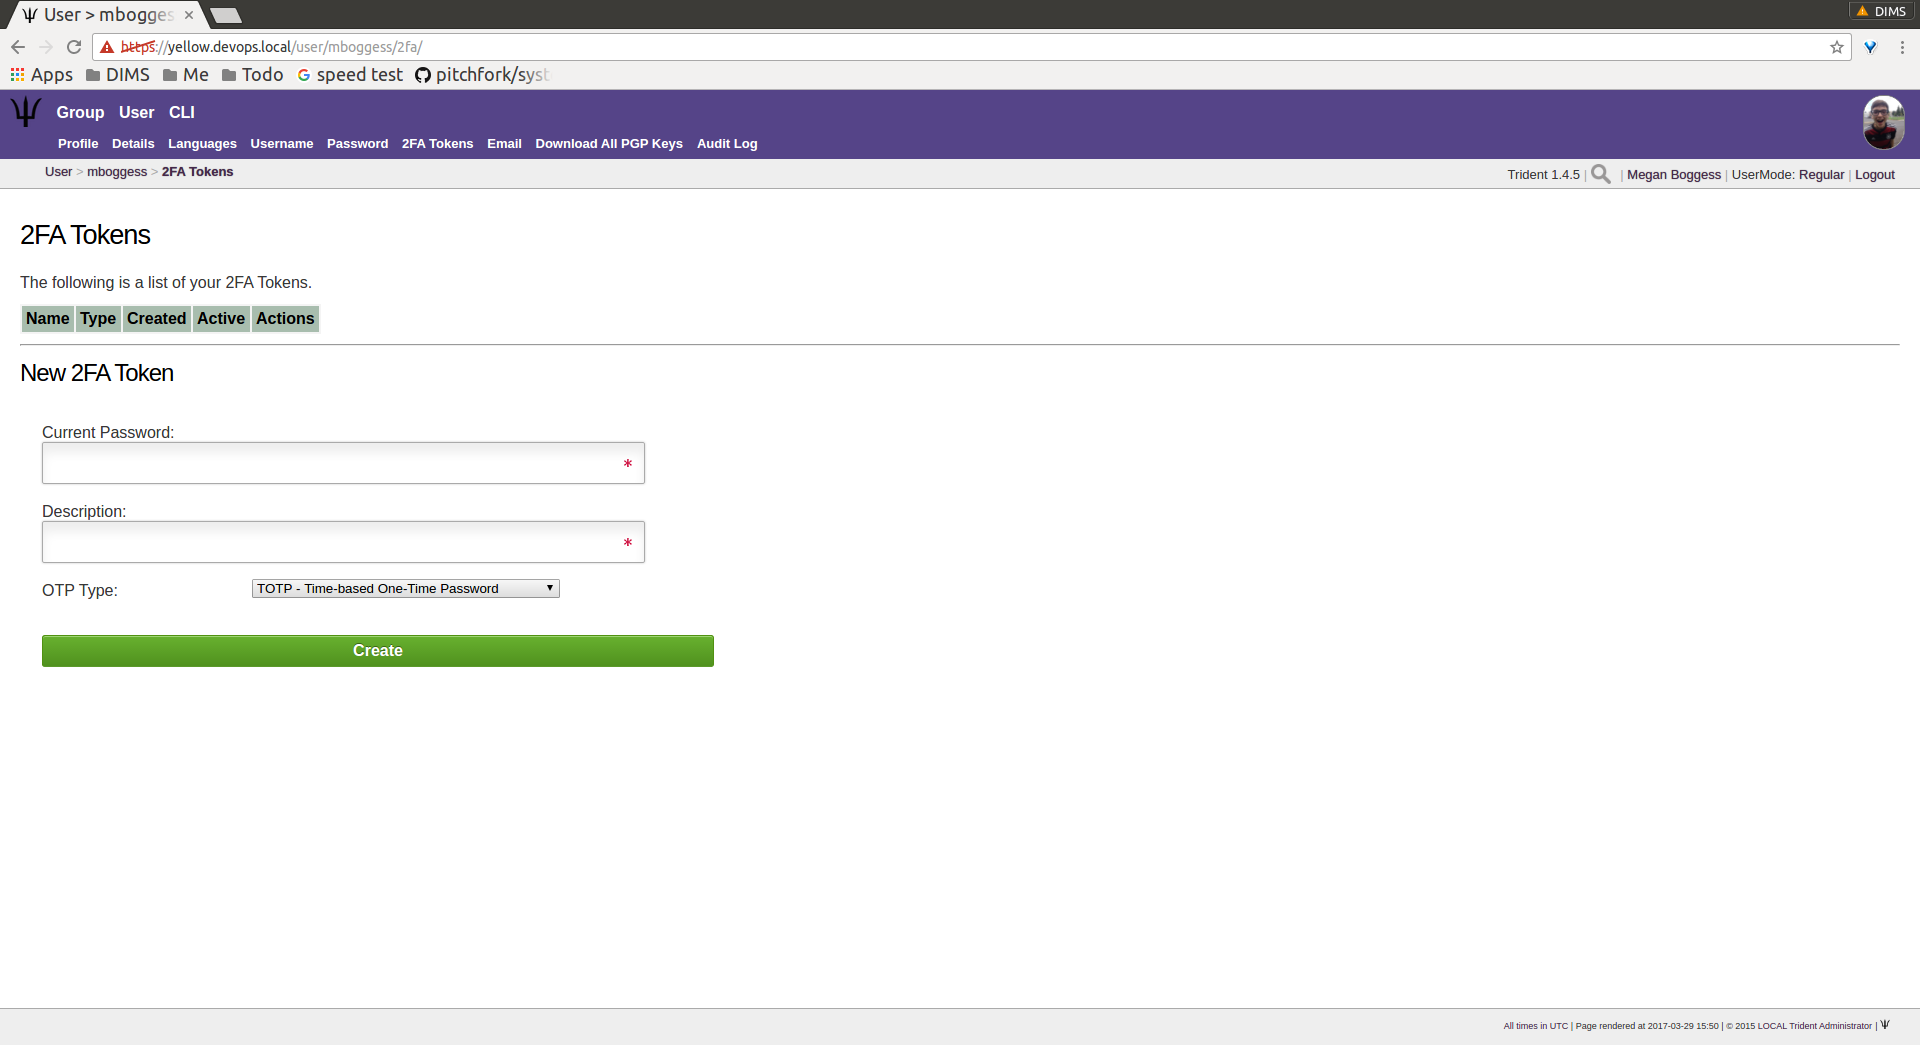
2.1.4. Two Factor Authentication
The 2FA Tokens page (Figure Two-factor authentication) allows a member to
add two-factor authentication tokens. Types of two-factor
authentications include a variety of one-time passwords:
time-based, HMAC-based, and single-use. The user must give
his current password and a description for the token, as
well as choose which OTP type. Once those fields have been
filled out, click the Create button, and the new token
will show in the list of two-factor authentication tokens.
Two-factor authentication
2.1.5. Email Management
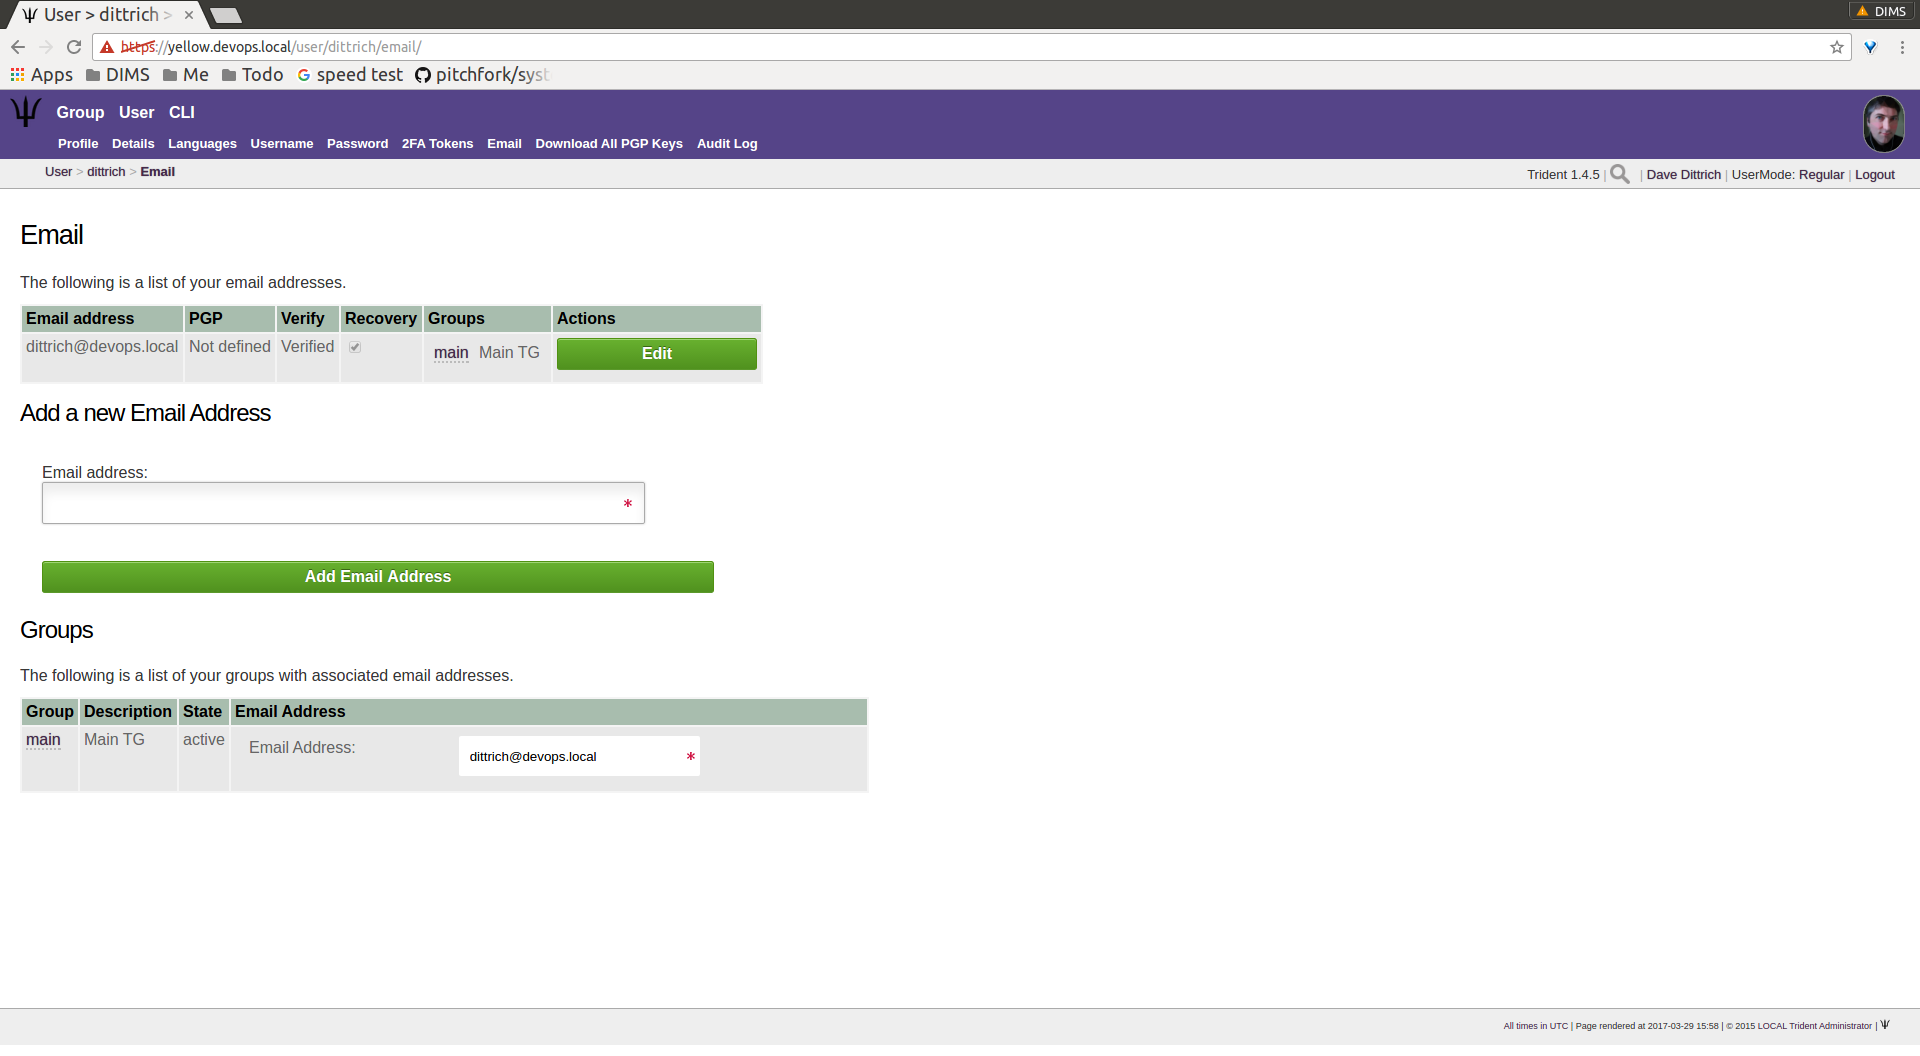
The Email page (Figure Main email page) covers a variety
of things. It lists email addresses tied to a user’s
account, showing if each email address has a PGP key tied to
it, whether it is verified, whether it is the recovery email
address associated with the user’s account, and with which
trust group it will be used. This page also provides a way
to add a new email address, and lists each group and
associated email addresses for that group.
Note
Encryption keys are discussed in Section PGP Keys.

Main email page
A user can edit (Figure Email edit page) attributes about
email addresses associated with his account by clicking the
Edit button in the row of the email address for which
the edits should be made.
Email edit page
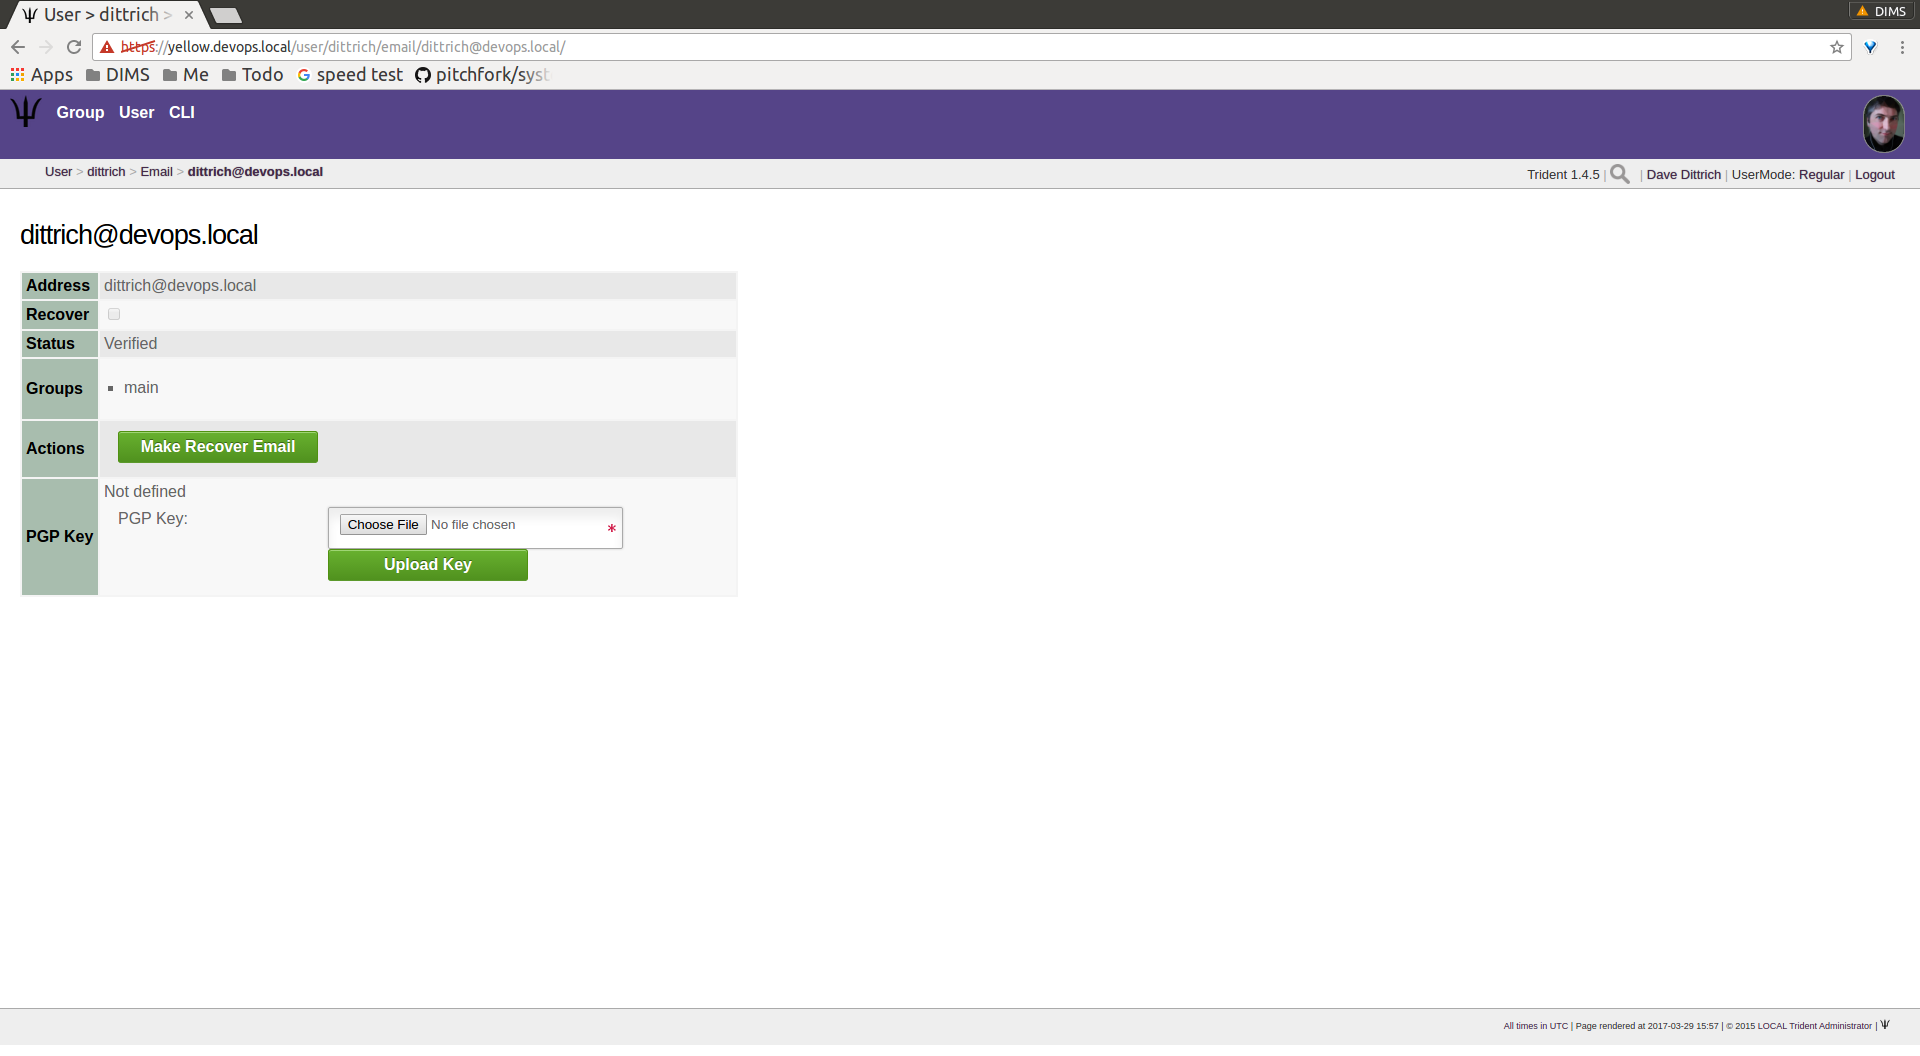
Click the Make Recover Email button to make the
selected email address the recovery email address for the
user’s account.
Once this is completed, the button disappears and a check
box appears in the Recover row (Figure Make recover email).
Make recover email
As can be seen, this is also the page where PGP keys are to be added, and we will cover this in the next section.
Going back to the Email page shows another check box
in the list of email address (Figure Recover email confirmed).
Recover email confirmed
To add an email address (Figure Add new email), type it in the requested field:

Add new email
After clicking the Add Email Address button, the page
will refresh with the new address in the list at the top
of the page. Click the Edit button to make additional
changes (Figure New email attributes).
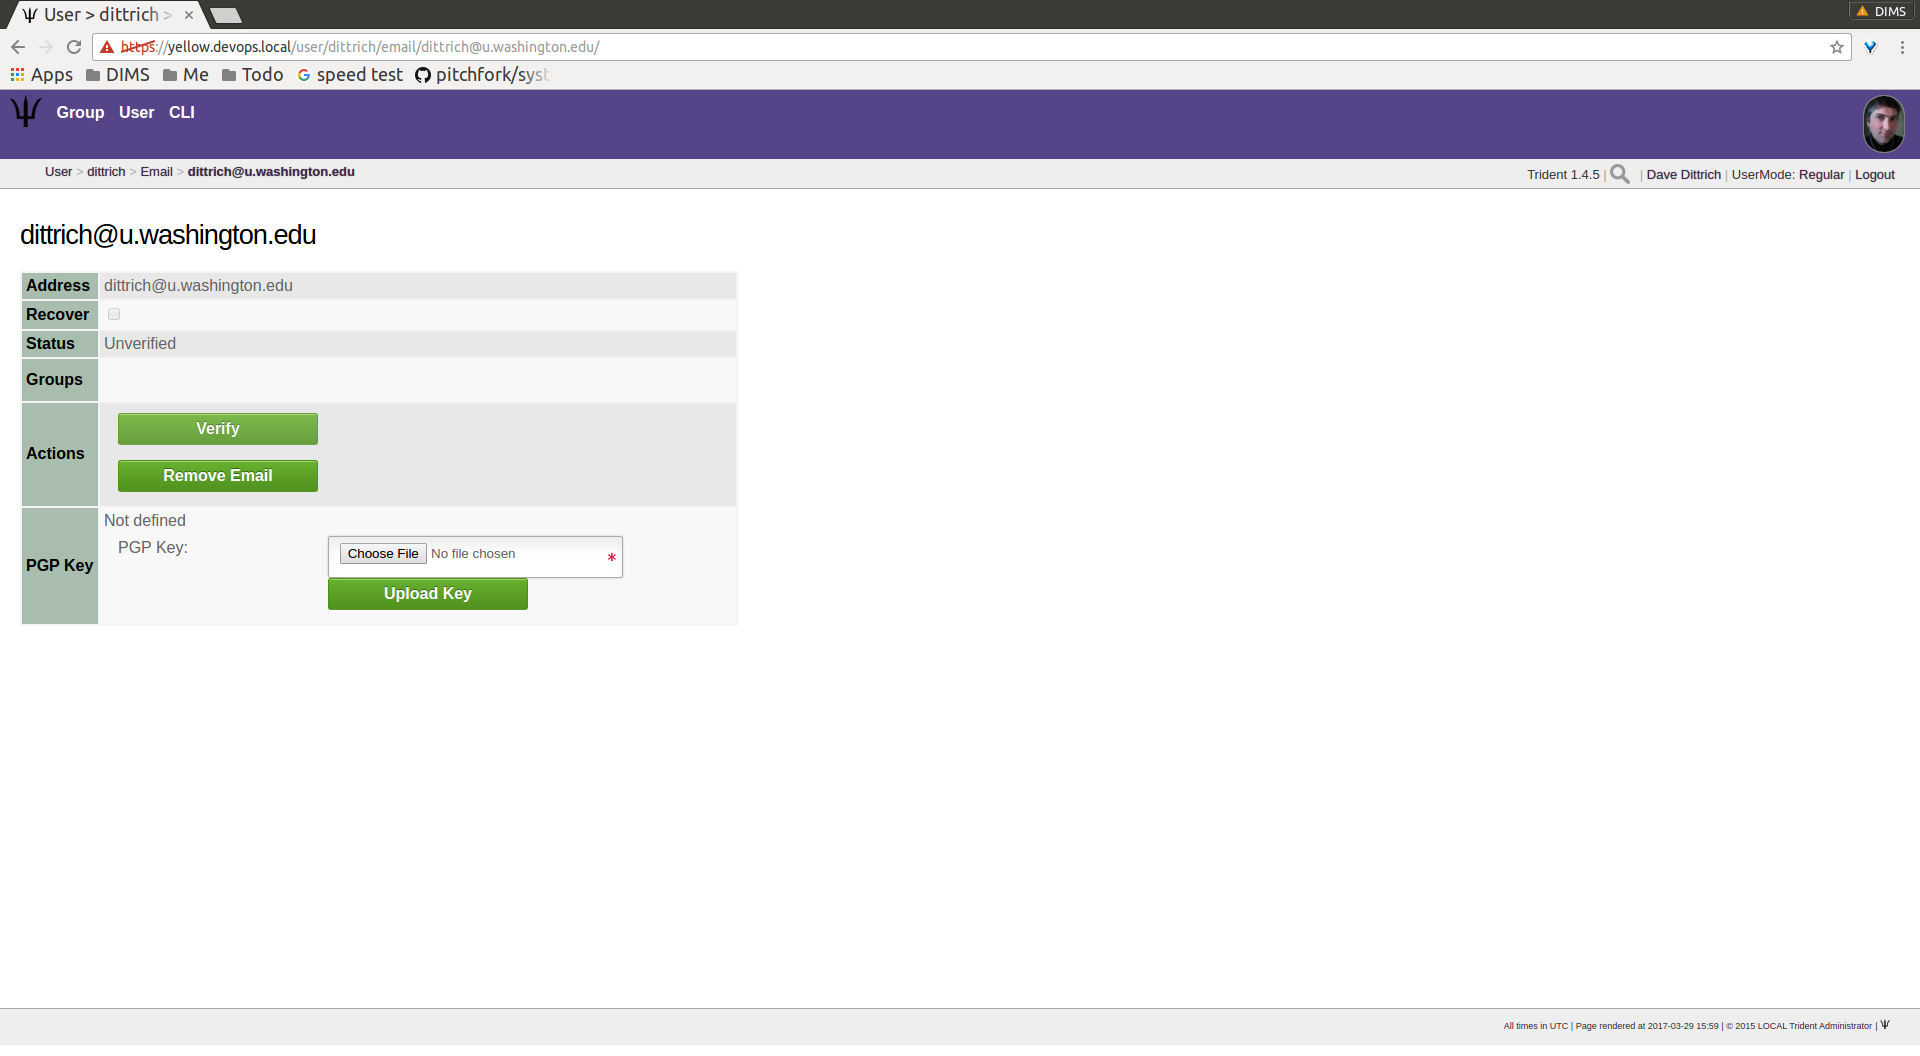
New email attributes
A member must verify any new email addresses he manually adds.
Click the Verify button. This will send an email to the
provided address. The email will contain a verification code.
Copy and paste the code in the Verification Code field,
and click the Confirm button (Figure Verify email).
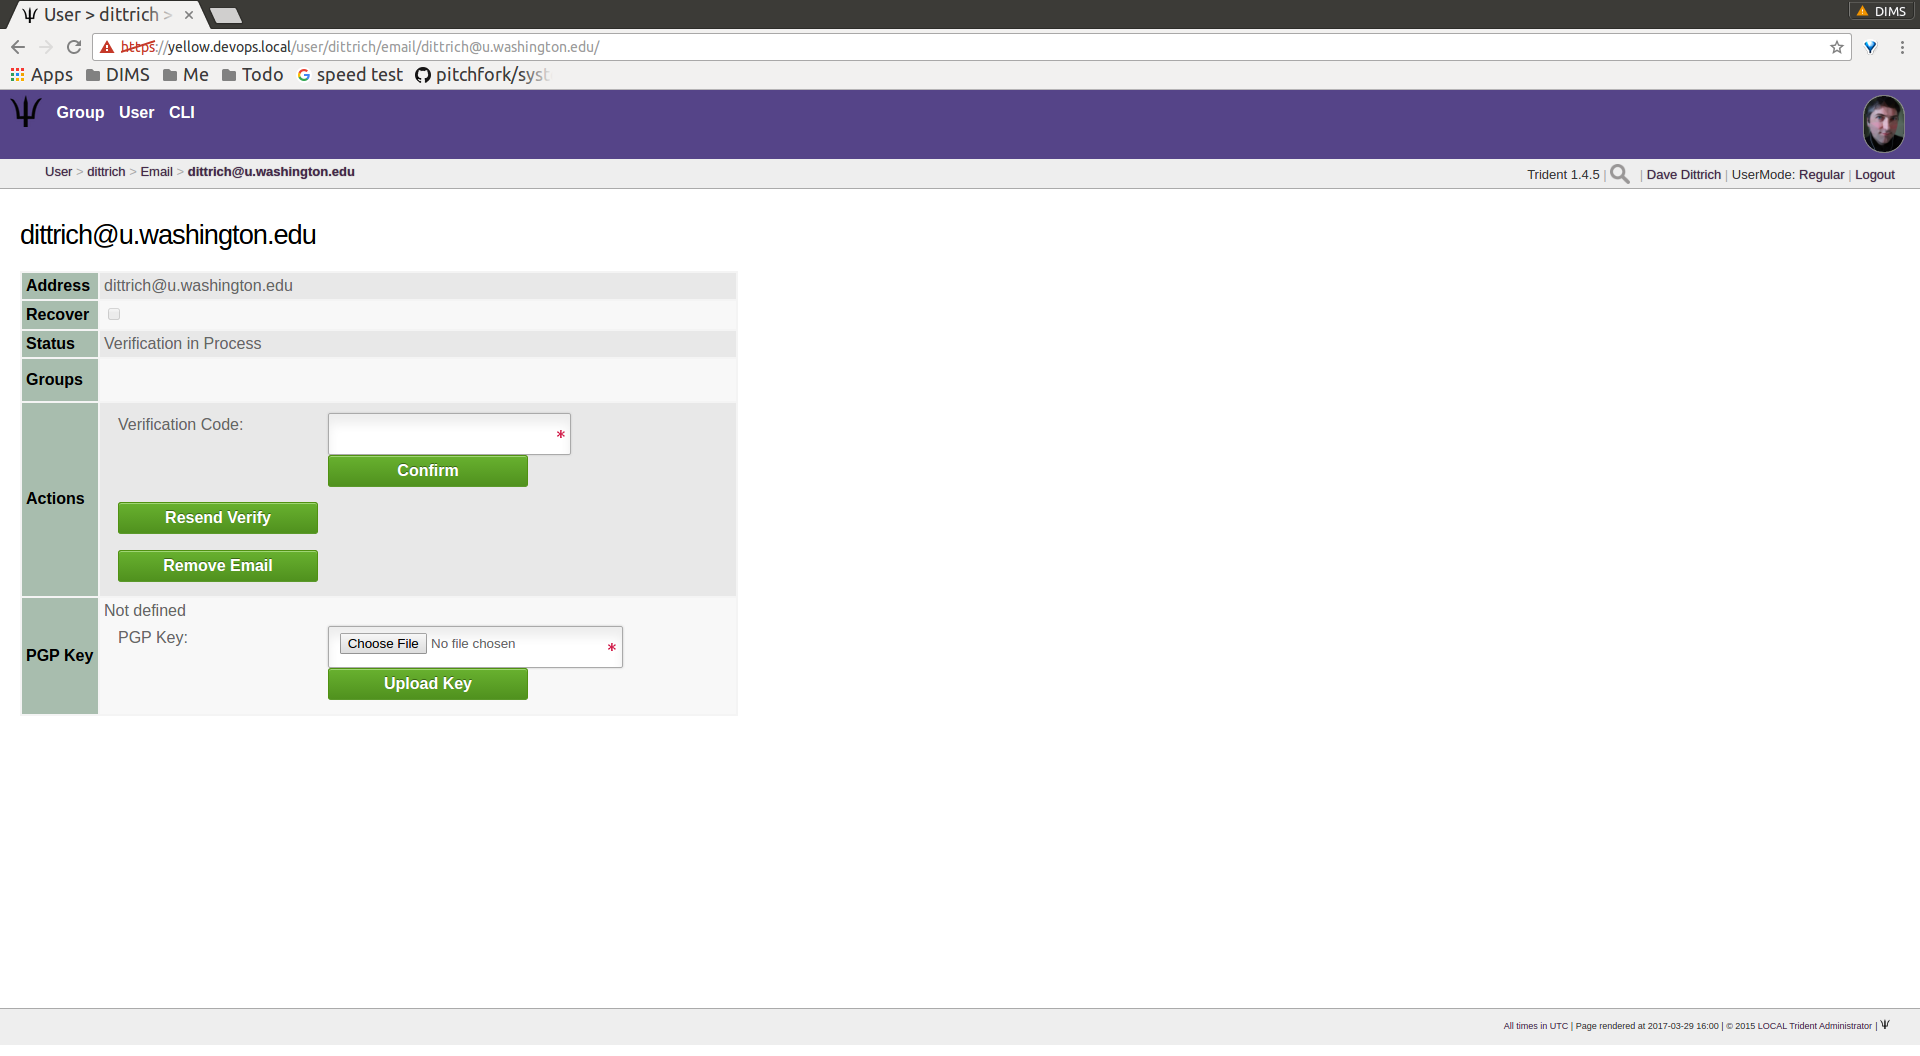
Verify email
Until the email address is verified, the list of email addresses
will retain an In Process status in the Verify column
(Figure New email status).
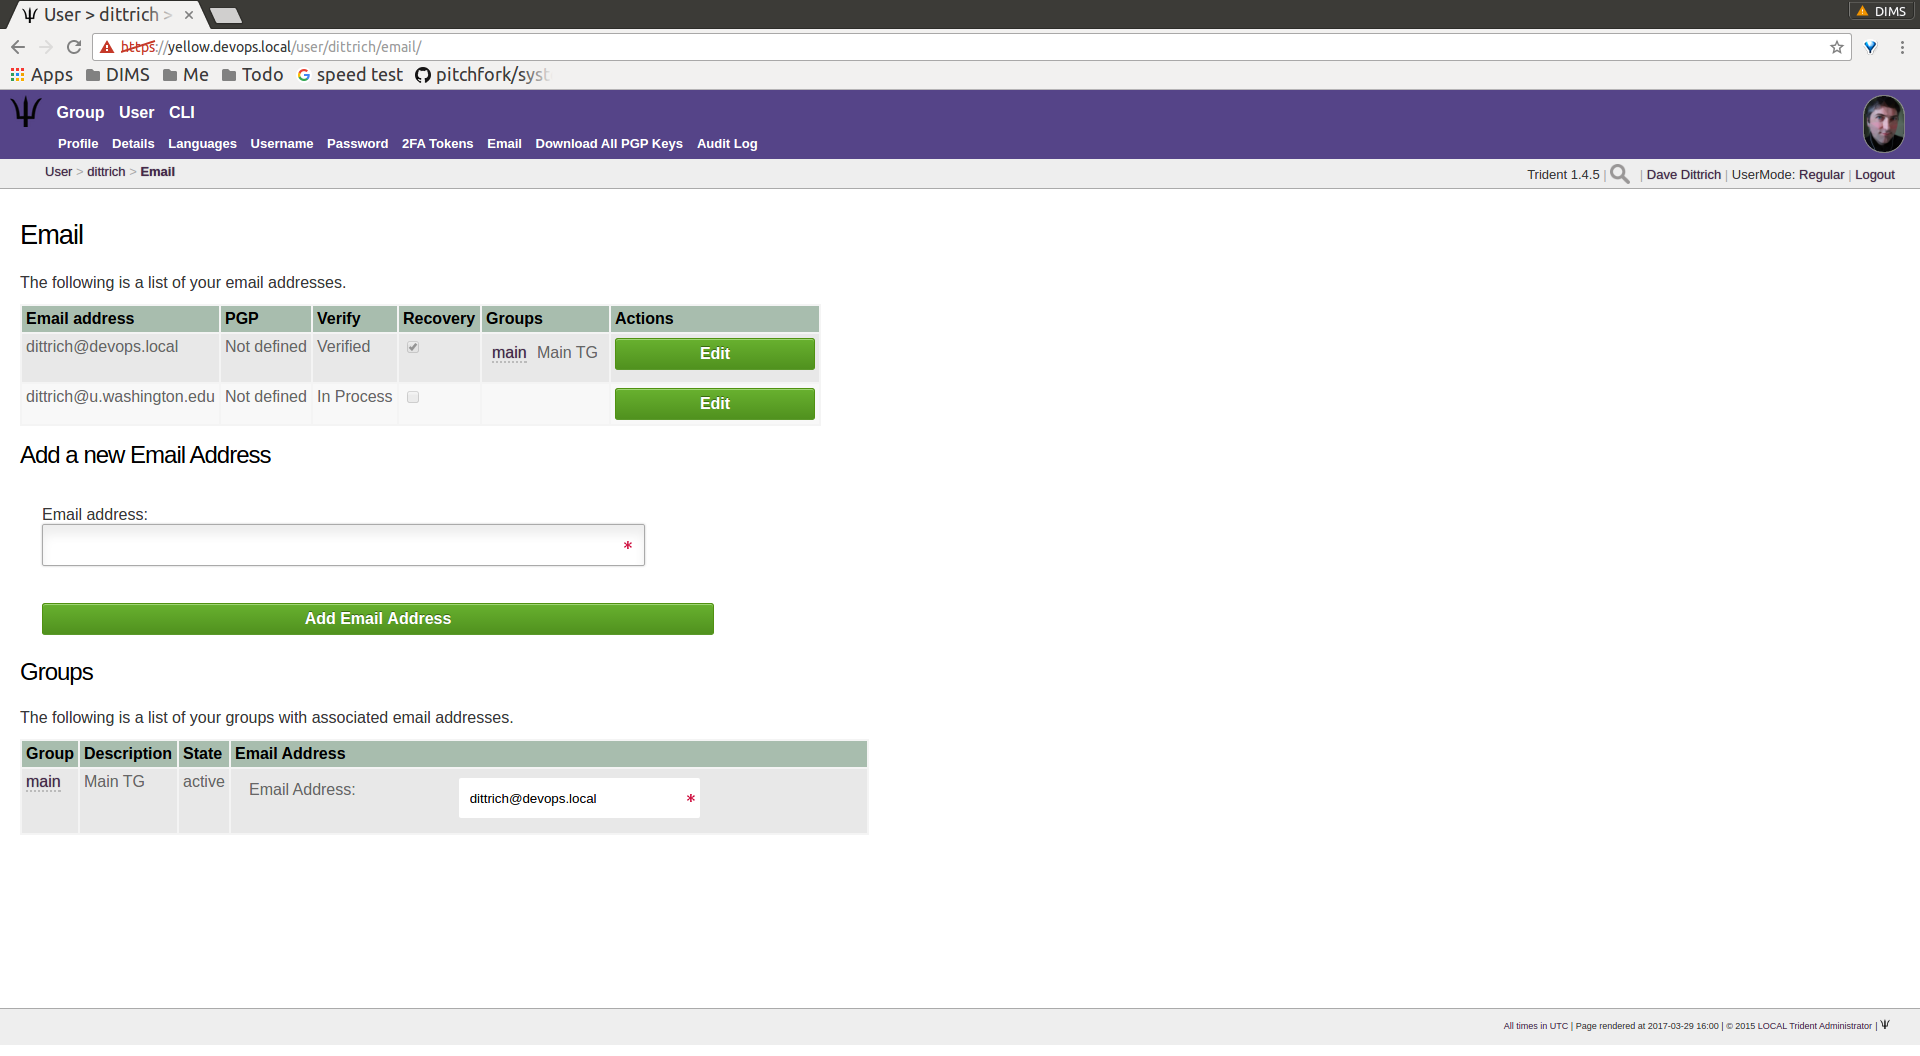
New email status
Remember, a recovery email address for an account can be set using the “Edit” screen. Only one address may be the recovery email.
Since the dittrich user has not confirmed his new email
address yet, let’s take a look at what happens when a user
does have multiple verified email addresses.
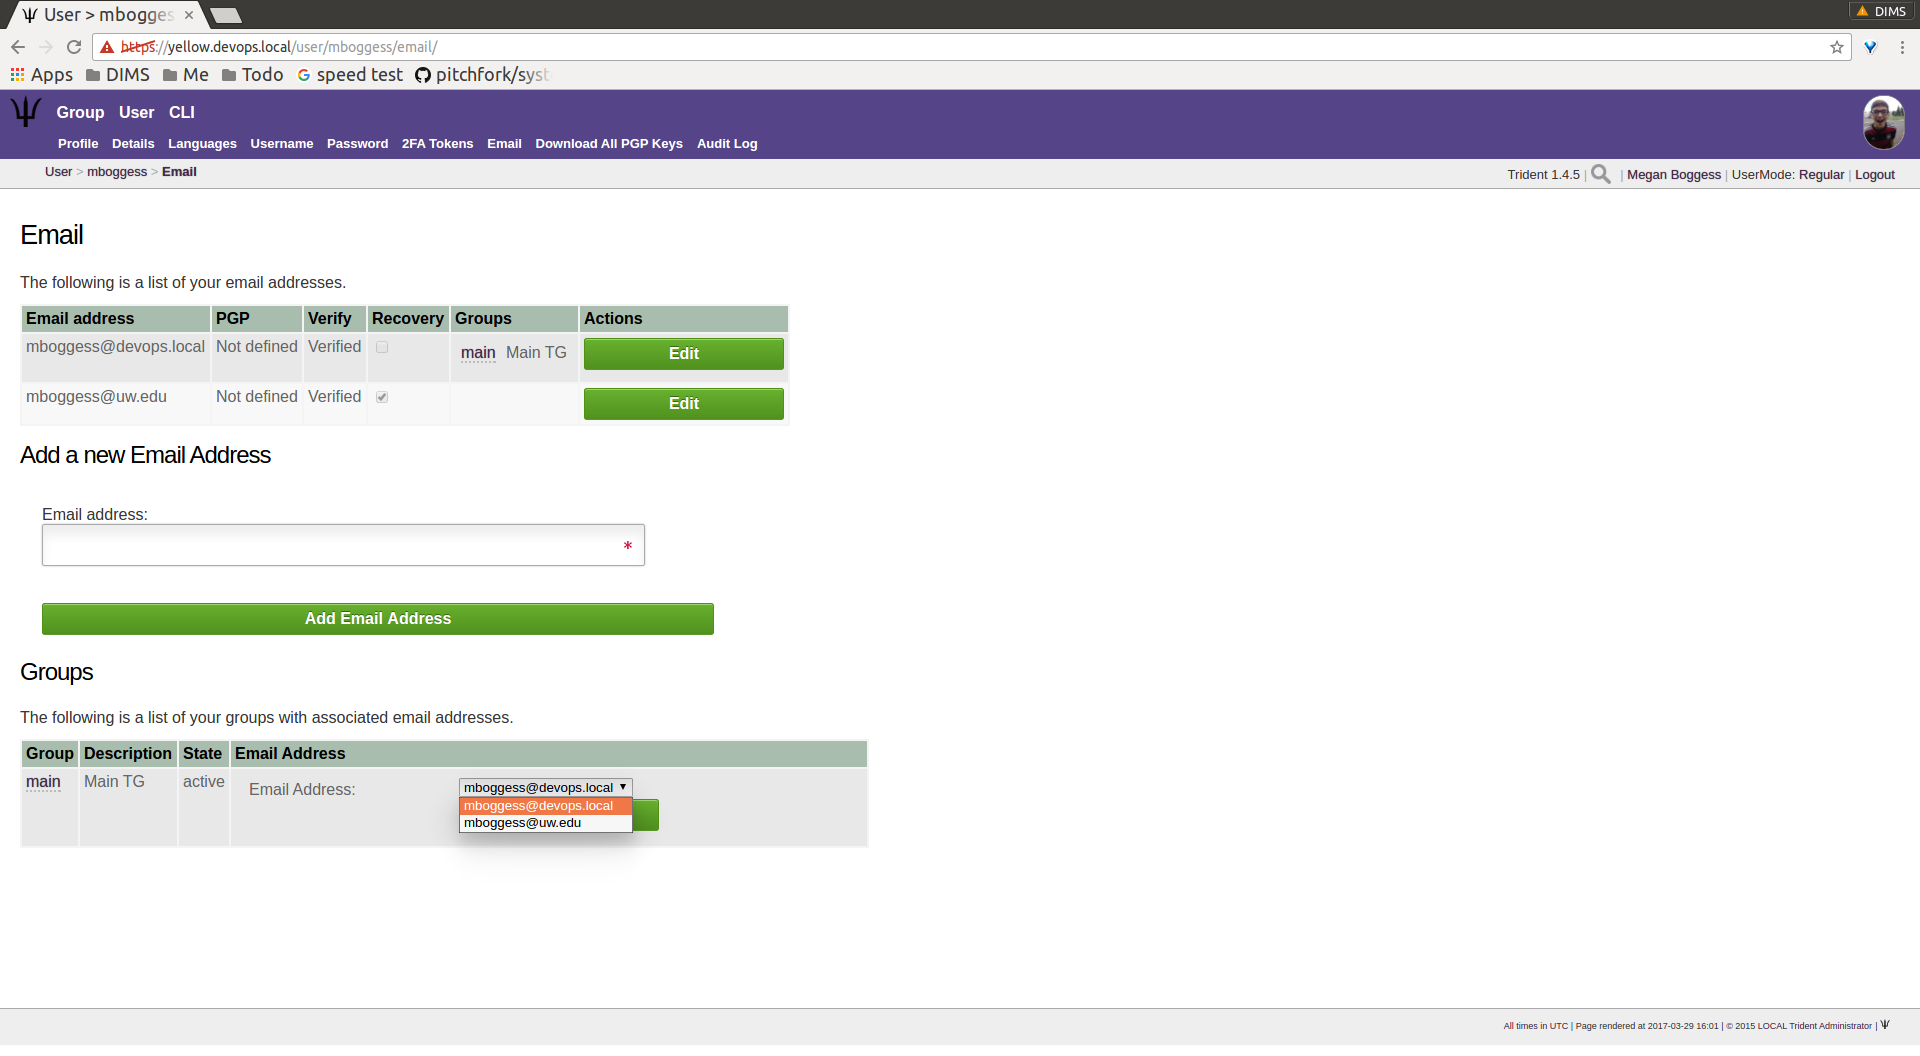
A user can choose which email address will be associated
with each trust group of which she is a member. In the case
of the user mboggess, she has two email addresses. Only
one address can be associated with a trust group at a time.
Since she has two email addresses, she must chose one to
be associated with the main trust group of which she is
a member (Figure Multiple emails).
Multiple emails
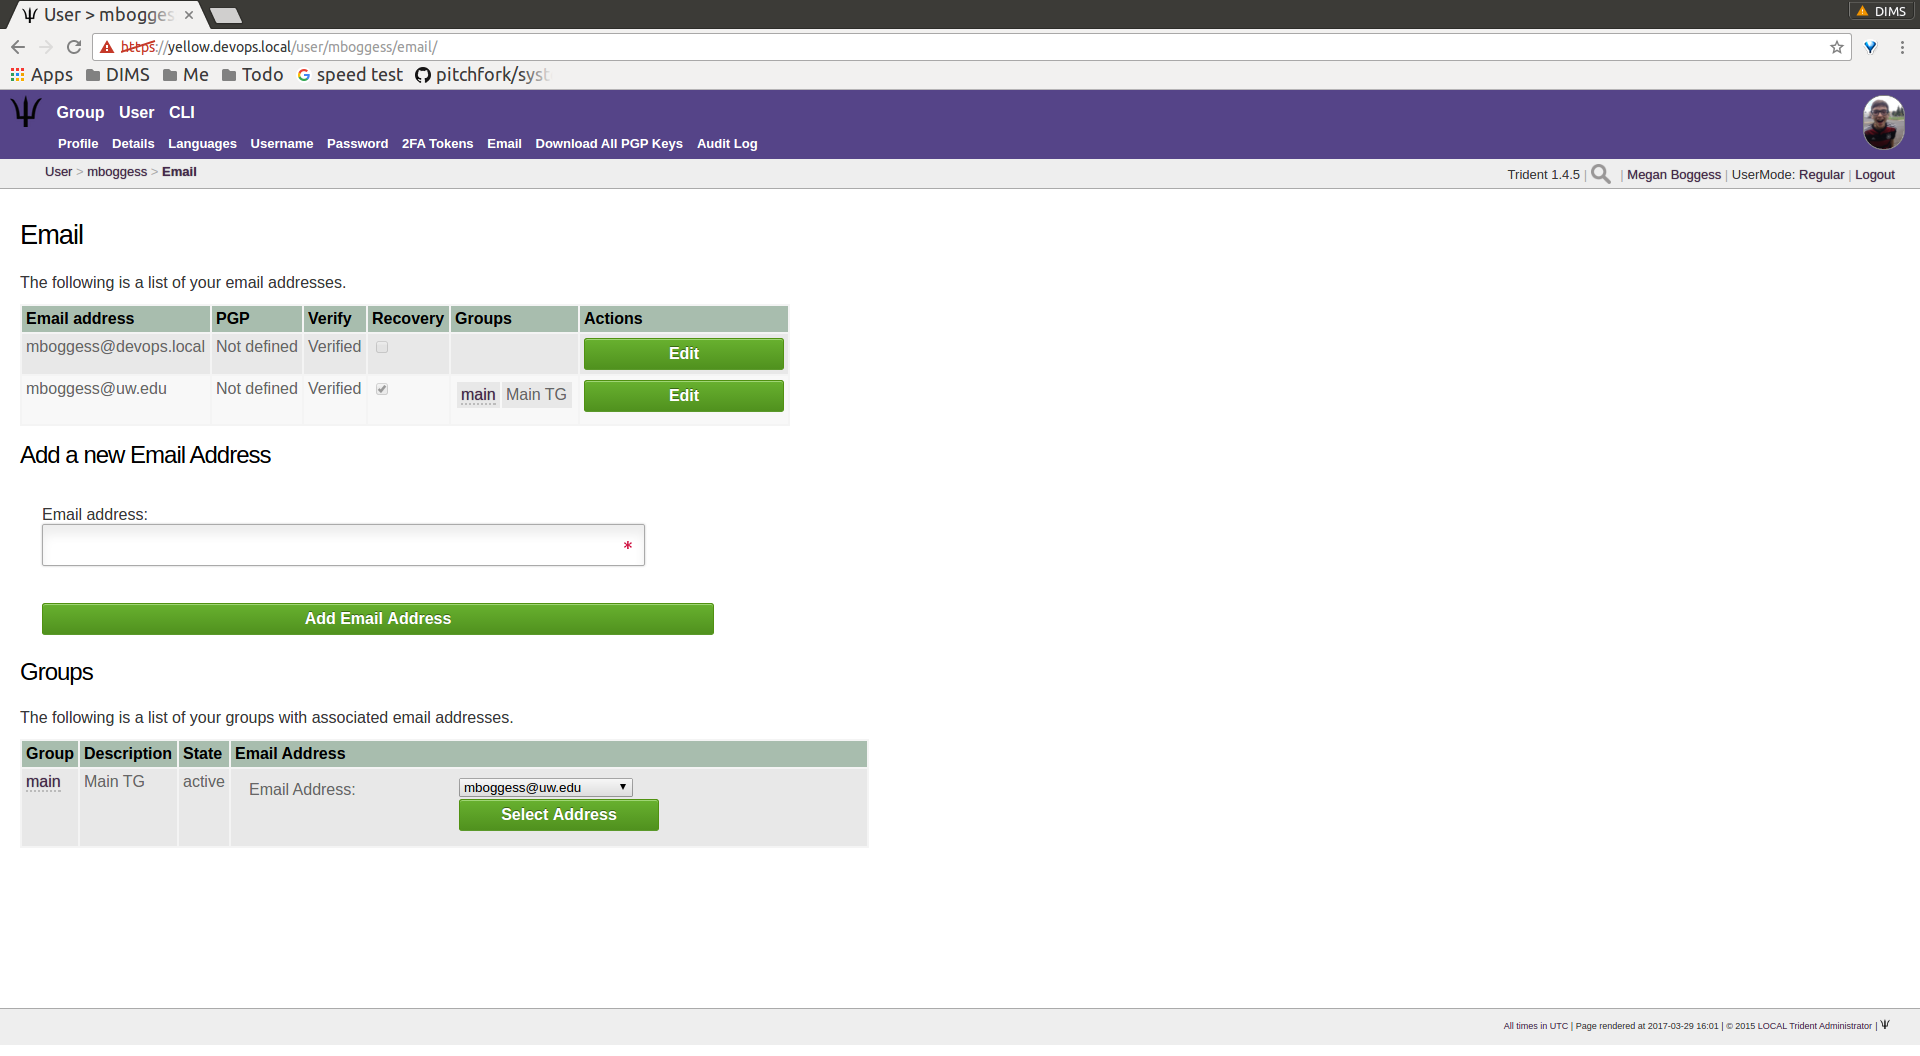
By choosing the second email address (the @uw email address)
to be the email address associated with the main trust
group, the list at the top of the page changes. It now
shows the @uw email address is associated with the main
trust group, as indicated by the Groups column in the
list (Figure Email-group association swap).
Email-group association swap
2.1.6. PGP Keys
PGP keys can be downloaded and uploaded. They must stay current for a user to be able to read any encrypted email sent via the trust groups of which the user is a member.
Note
For information on using PGP (or GNU Privacy Guard) keys for secure email communication, see the Free Software Foundation’s Email Self-Defense guide and Section Using GPG or PGP Encrypted Email of the Trident User Manual v 1.0.2.
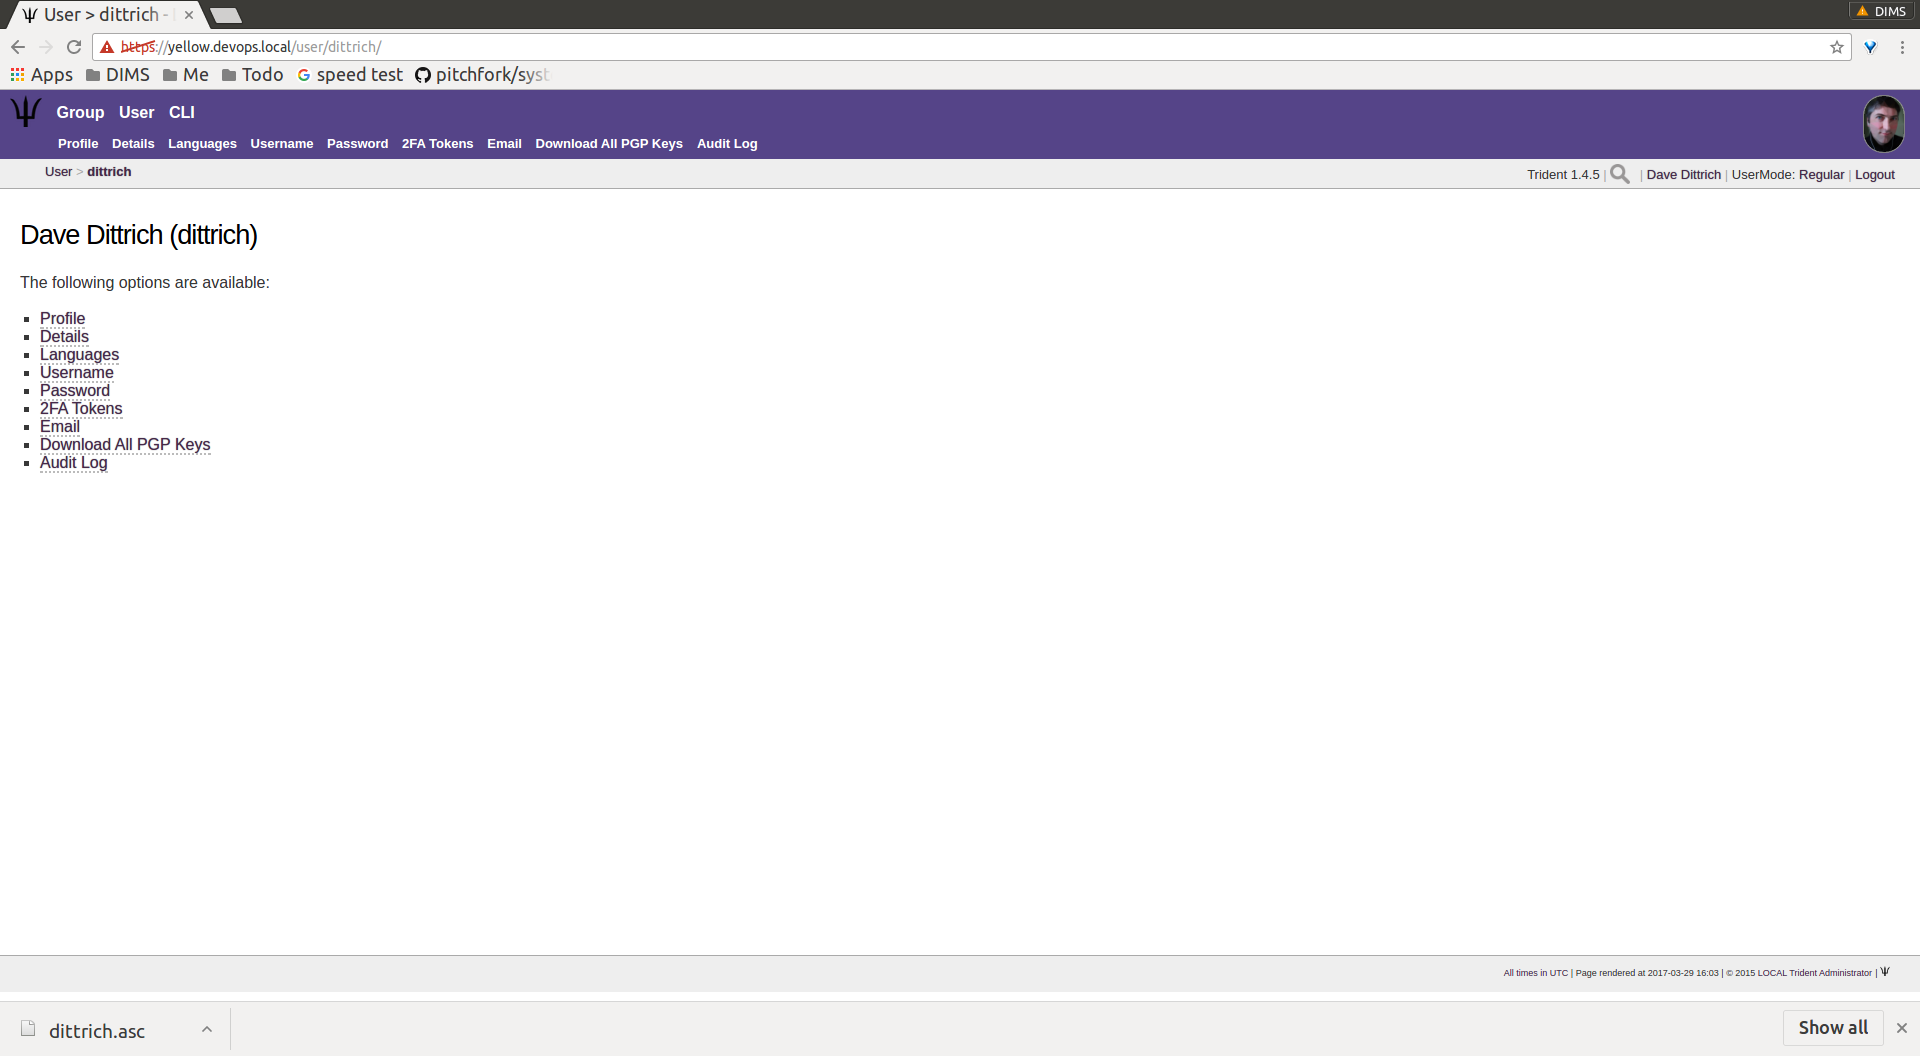
To download all PGP keys tied to any emails associated with
a user’s account, just click the Download All PGP Keys
tab in the second row at the top of any User page, or
click the Download All PGP Keys link in the list of
links on the user’s home page (Figure Download PGP keys).
Download PGP keys
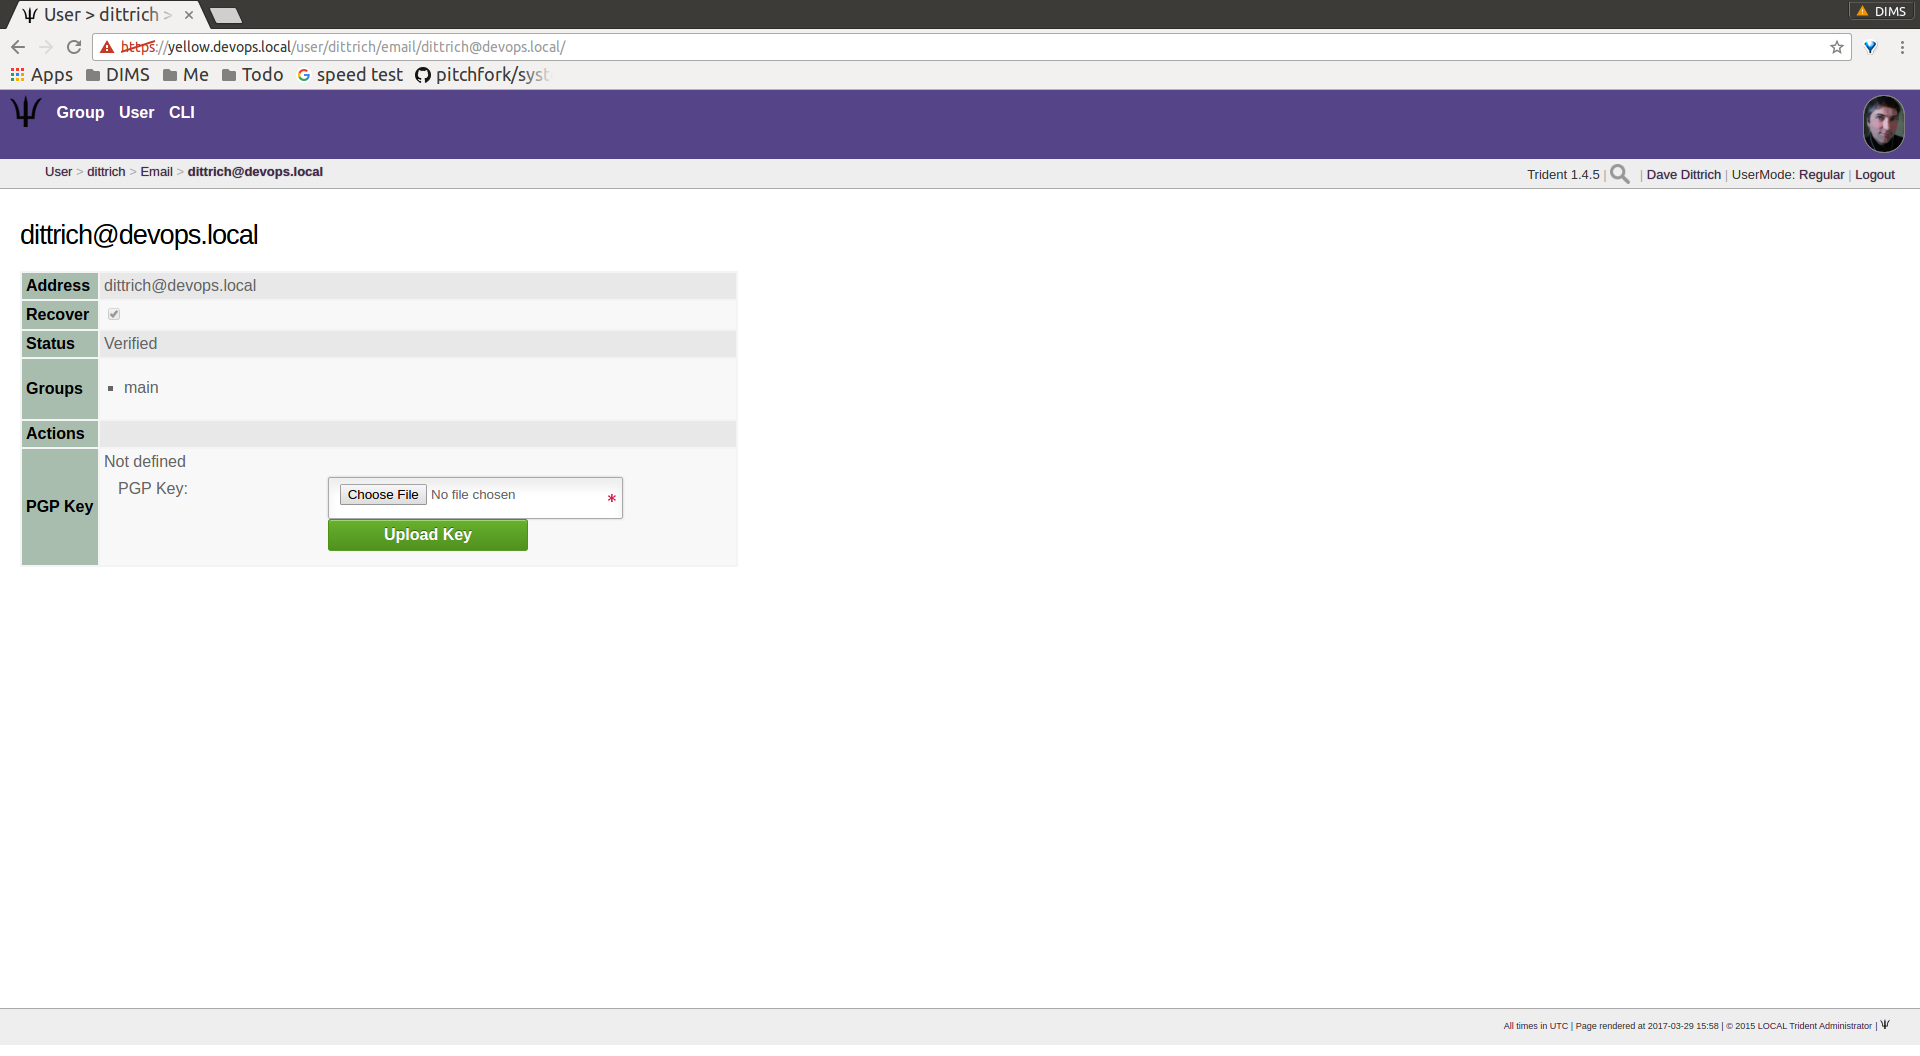
To add PGP keys, return to the Email page. Click the Edit
button in the row of the email address with which a new PGP
key should be associated. In the PGP Key row, choose the
PGP key file. Then click the Upload Key button
(Figure Upload PGP key).
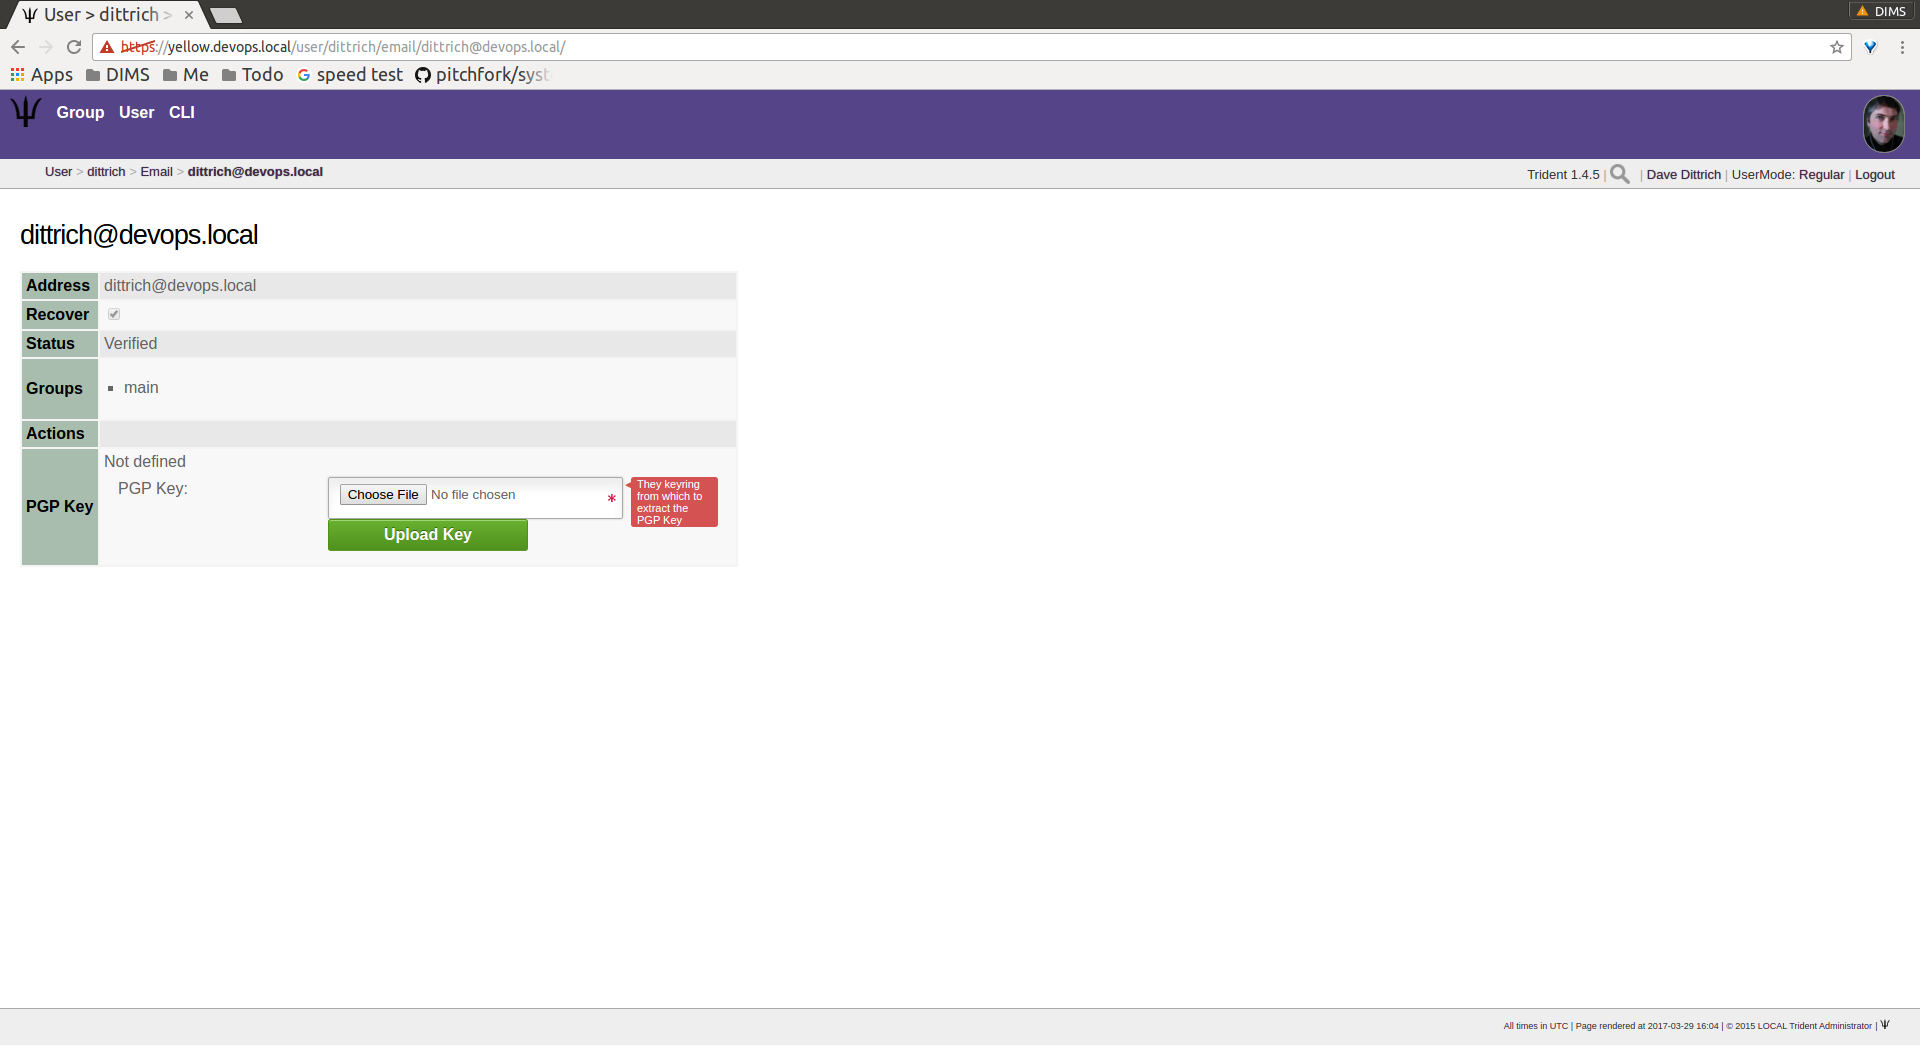
Upload PGP key
2.2. Group Management
This section will cover group activities and attributes a member of a trust group may view or manage. The user must be a member of a trust group to be able to access any of the following pages.
2.2.1. Viewable Group Attributes
This subsection will cover attributes viewable from the
Member, Airports, Contacts, and Vouches
tabs.
First of all, to view a list of groups of which a user is a
member, click the Group tab in the top row of any page
(Figure Trust group list).
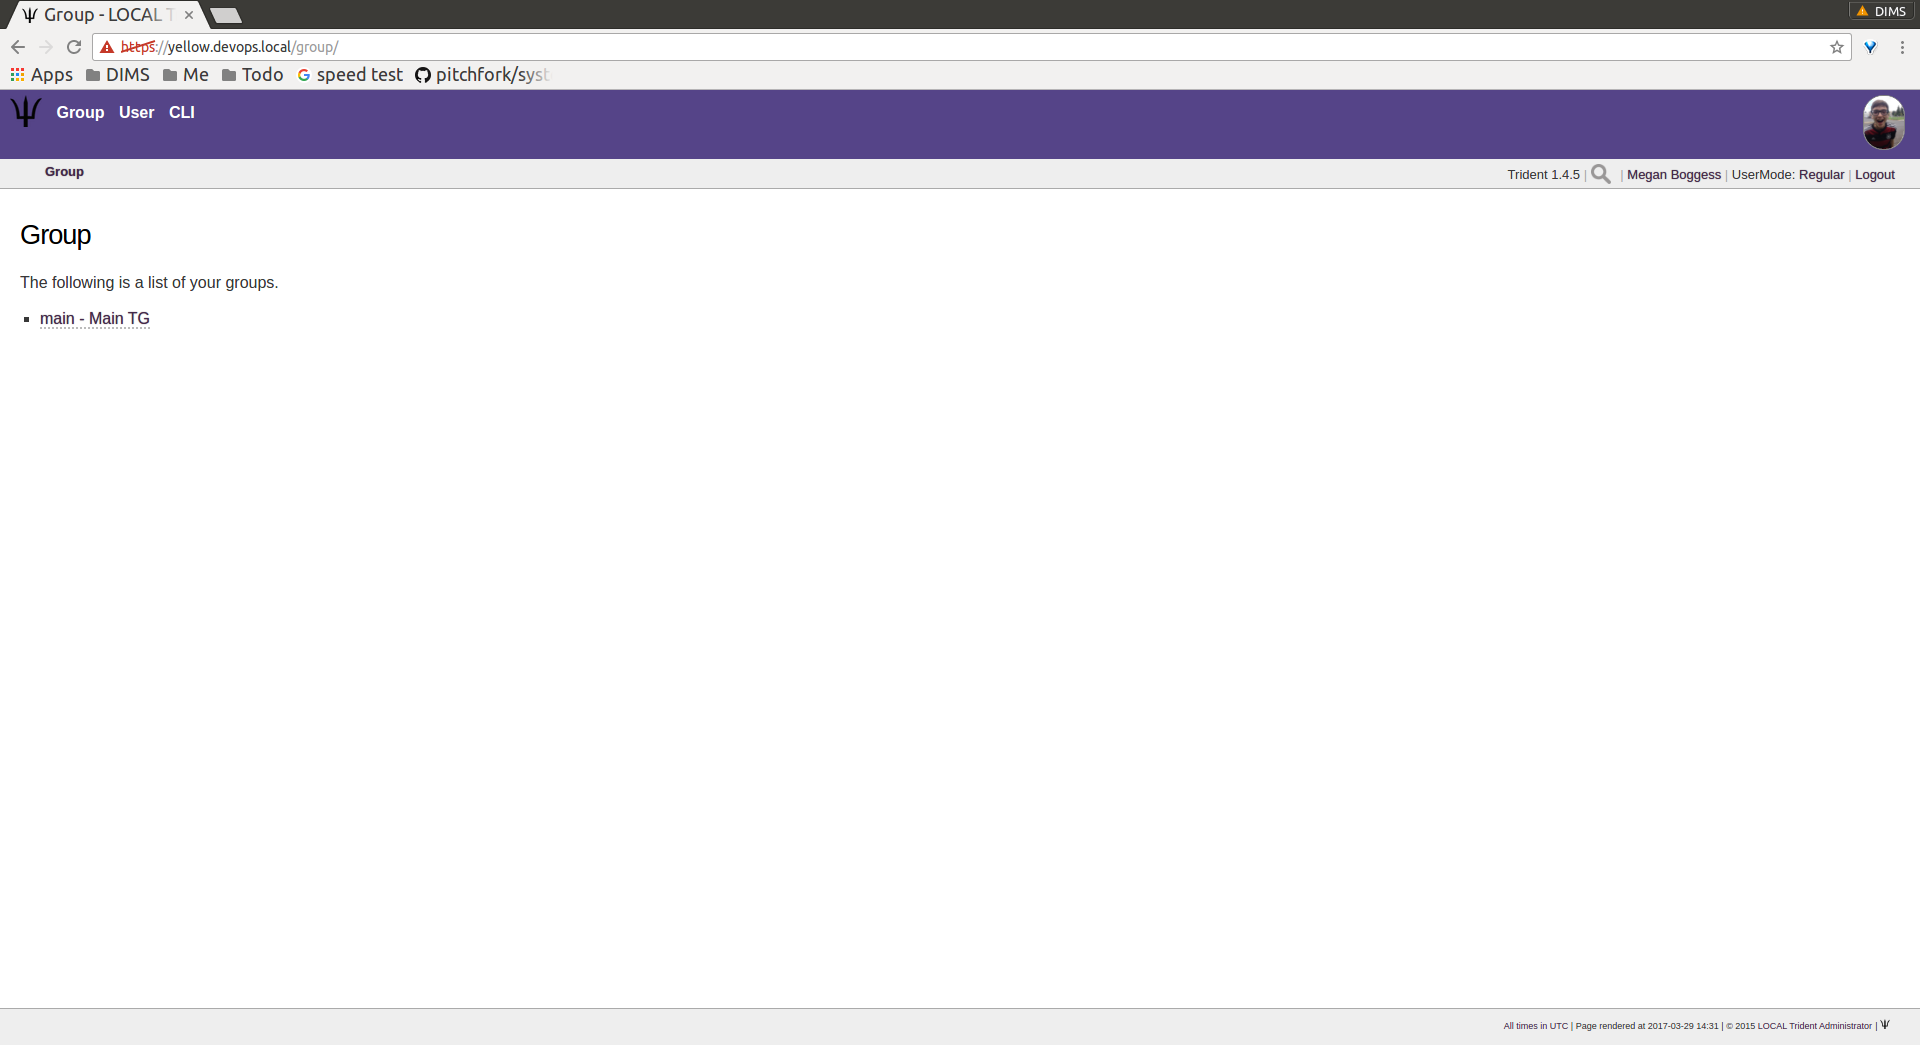
Trust group list
To see more information about a certain group, click one of the links in the list (Figure Trust group attributes list).
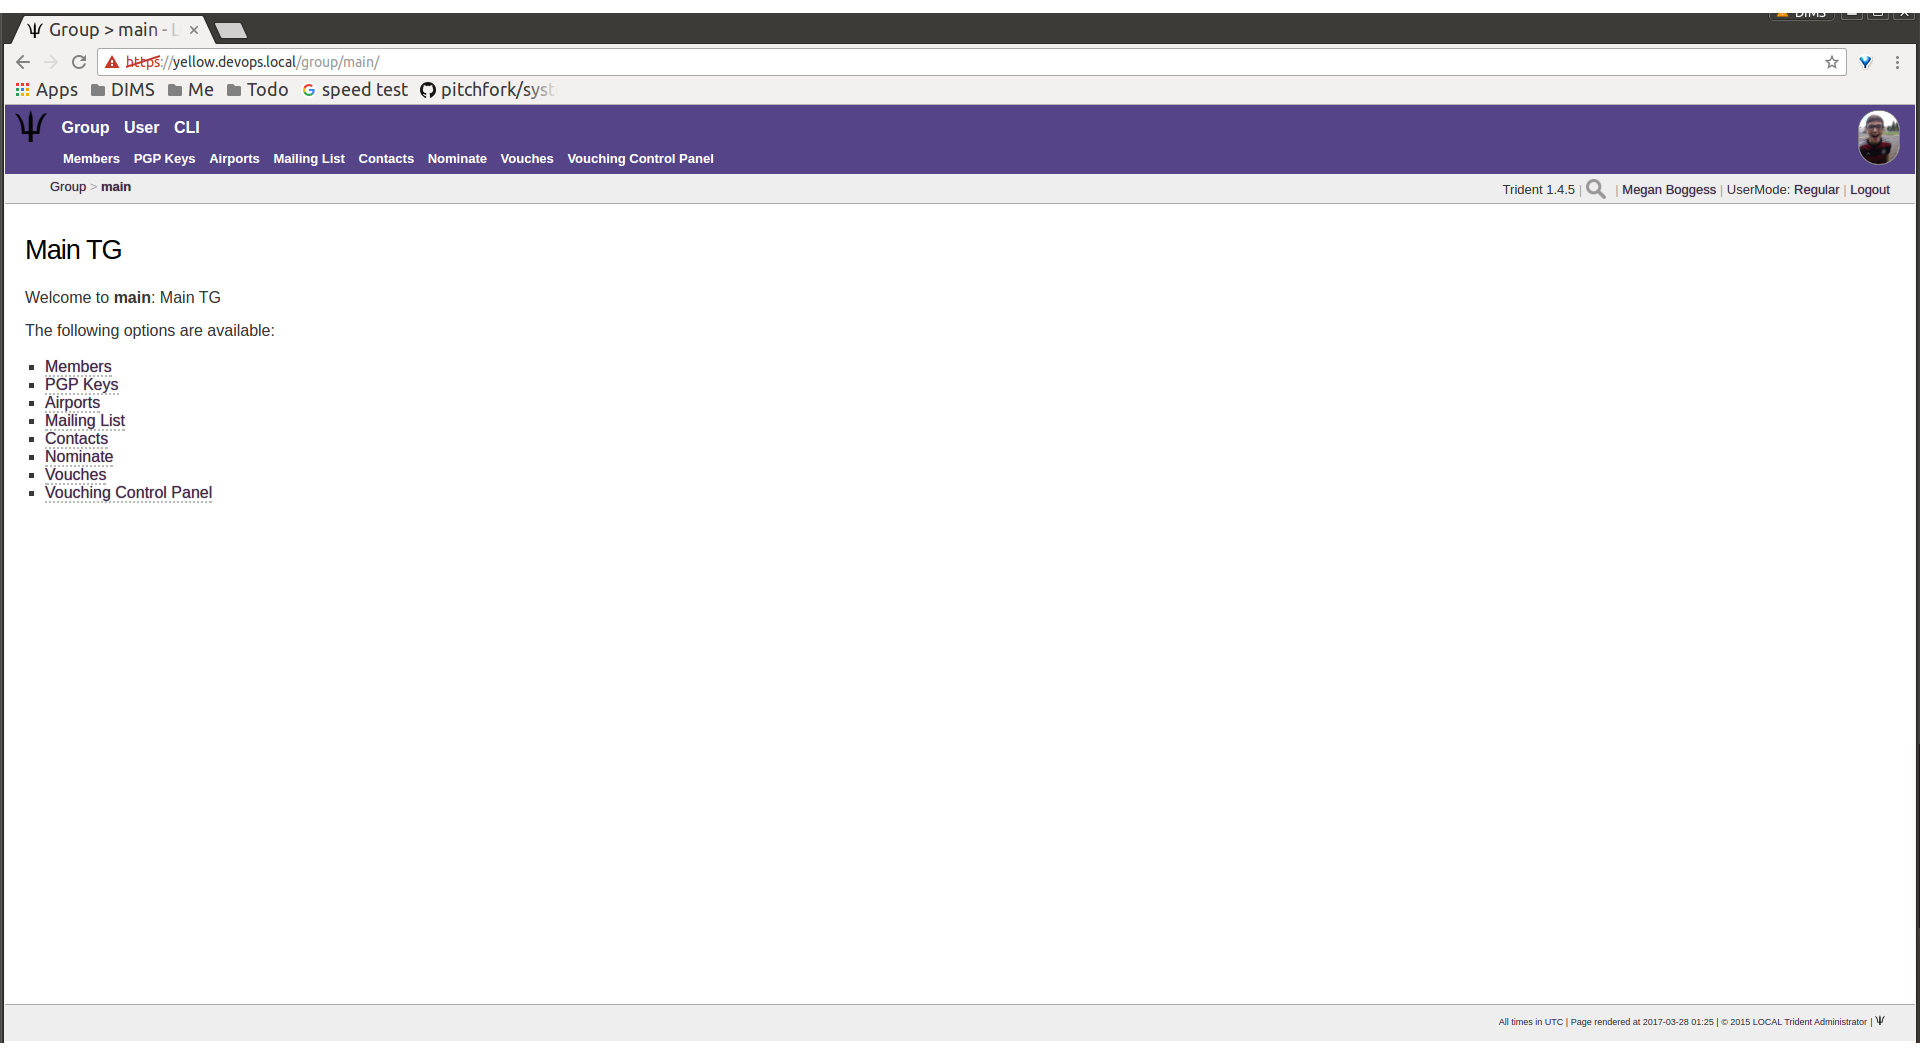
Trust group attributes list
This presents a page with a list of links to all attributes viewable or manageable by the member. There are some activities the member may take part in, such as nominating and vouching for new group members, but, for the most part, a regular member may only view group attributes. Regular members are not allowed to change attributes about the group or its members. One notable exception is that regular members are allowed to nominate new users to a trust group and vouch for current members of a trust group. Nominating and vouching will be covered in Section Figure Vouching for Trust Group Members. For now, let’s go over the attributes viewable by members.
The first link on the group home page, or the first tab in
the second row of all group-related pages, is titled
Members. Click either the link or the tab to go to a
page listing all members in the current trust group
(Figure Trust group members list).
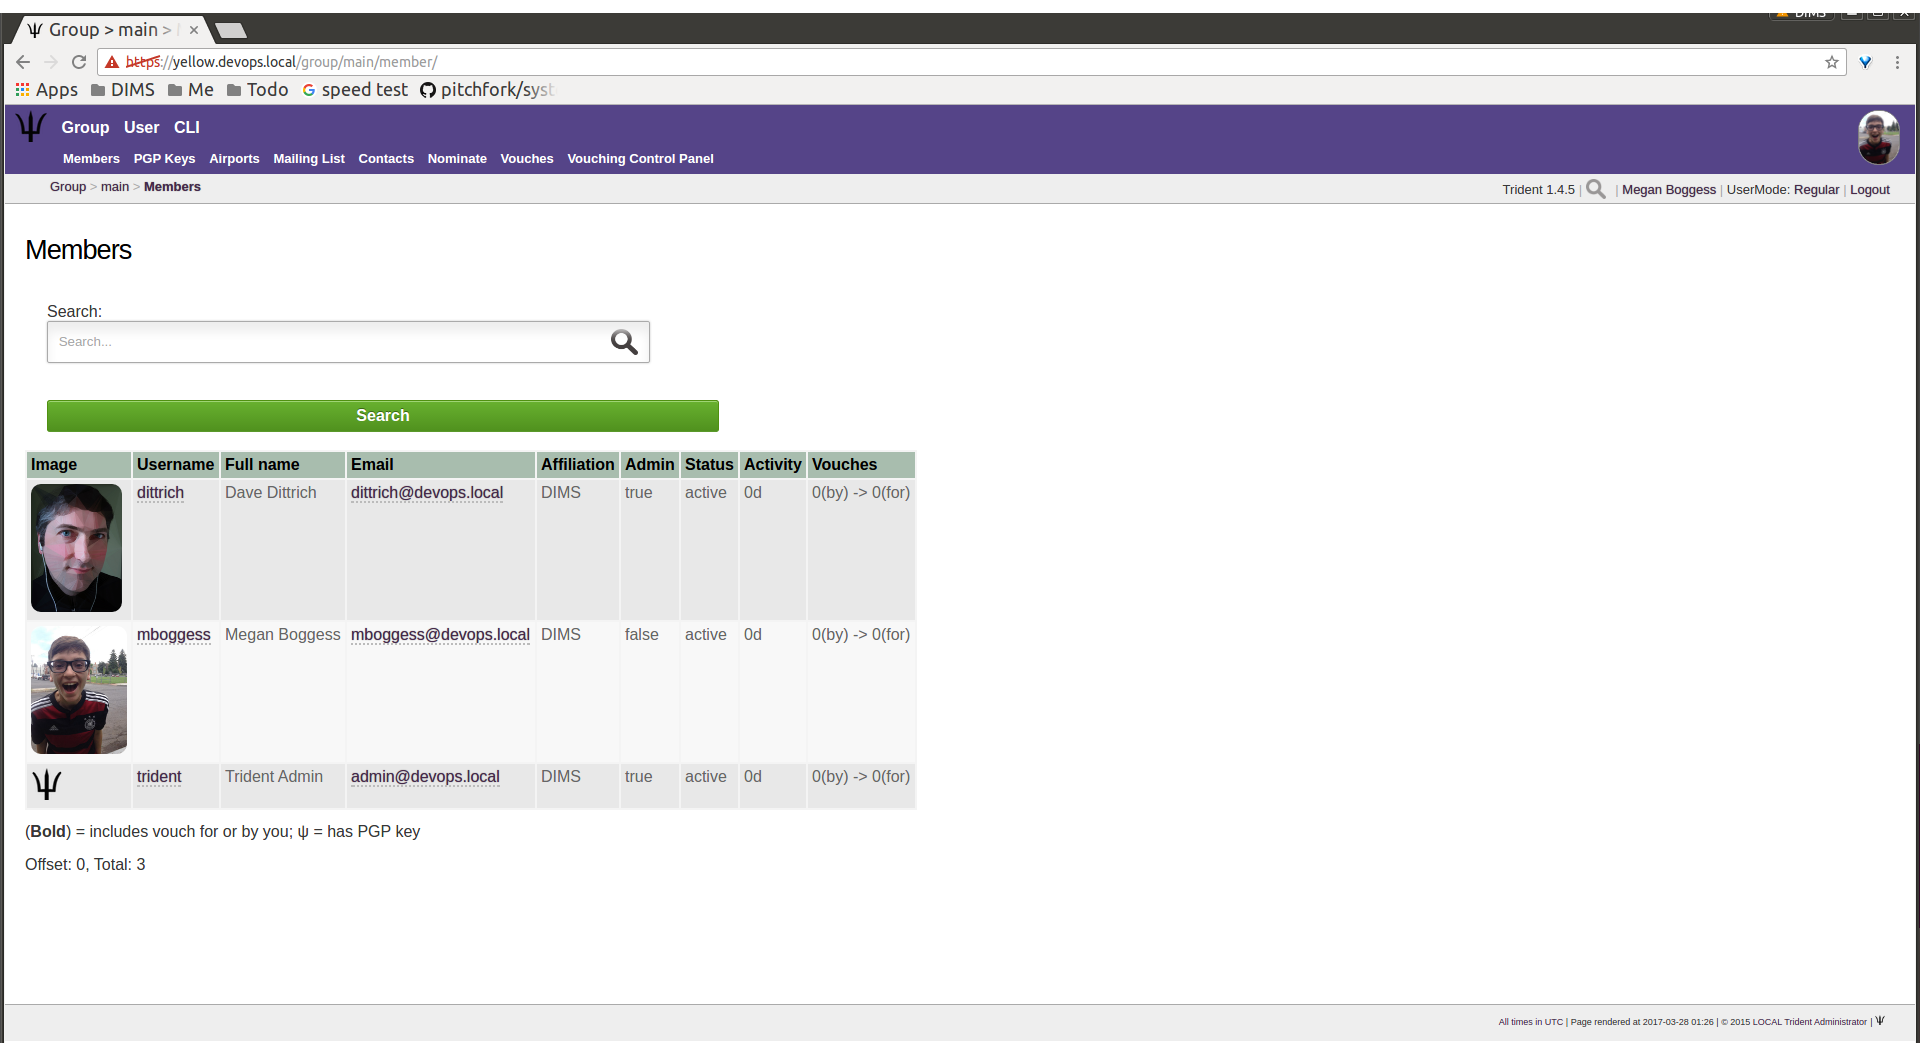
Trust group members list
Click on any member’s username link to view their profile (Figures Member profile, top, Member profile, middle, Member profile, vouches for).
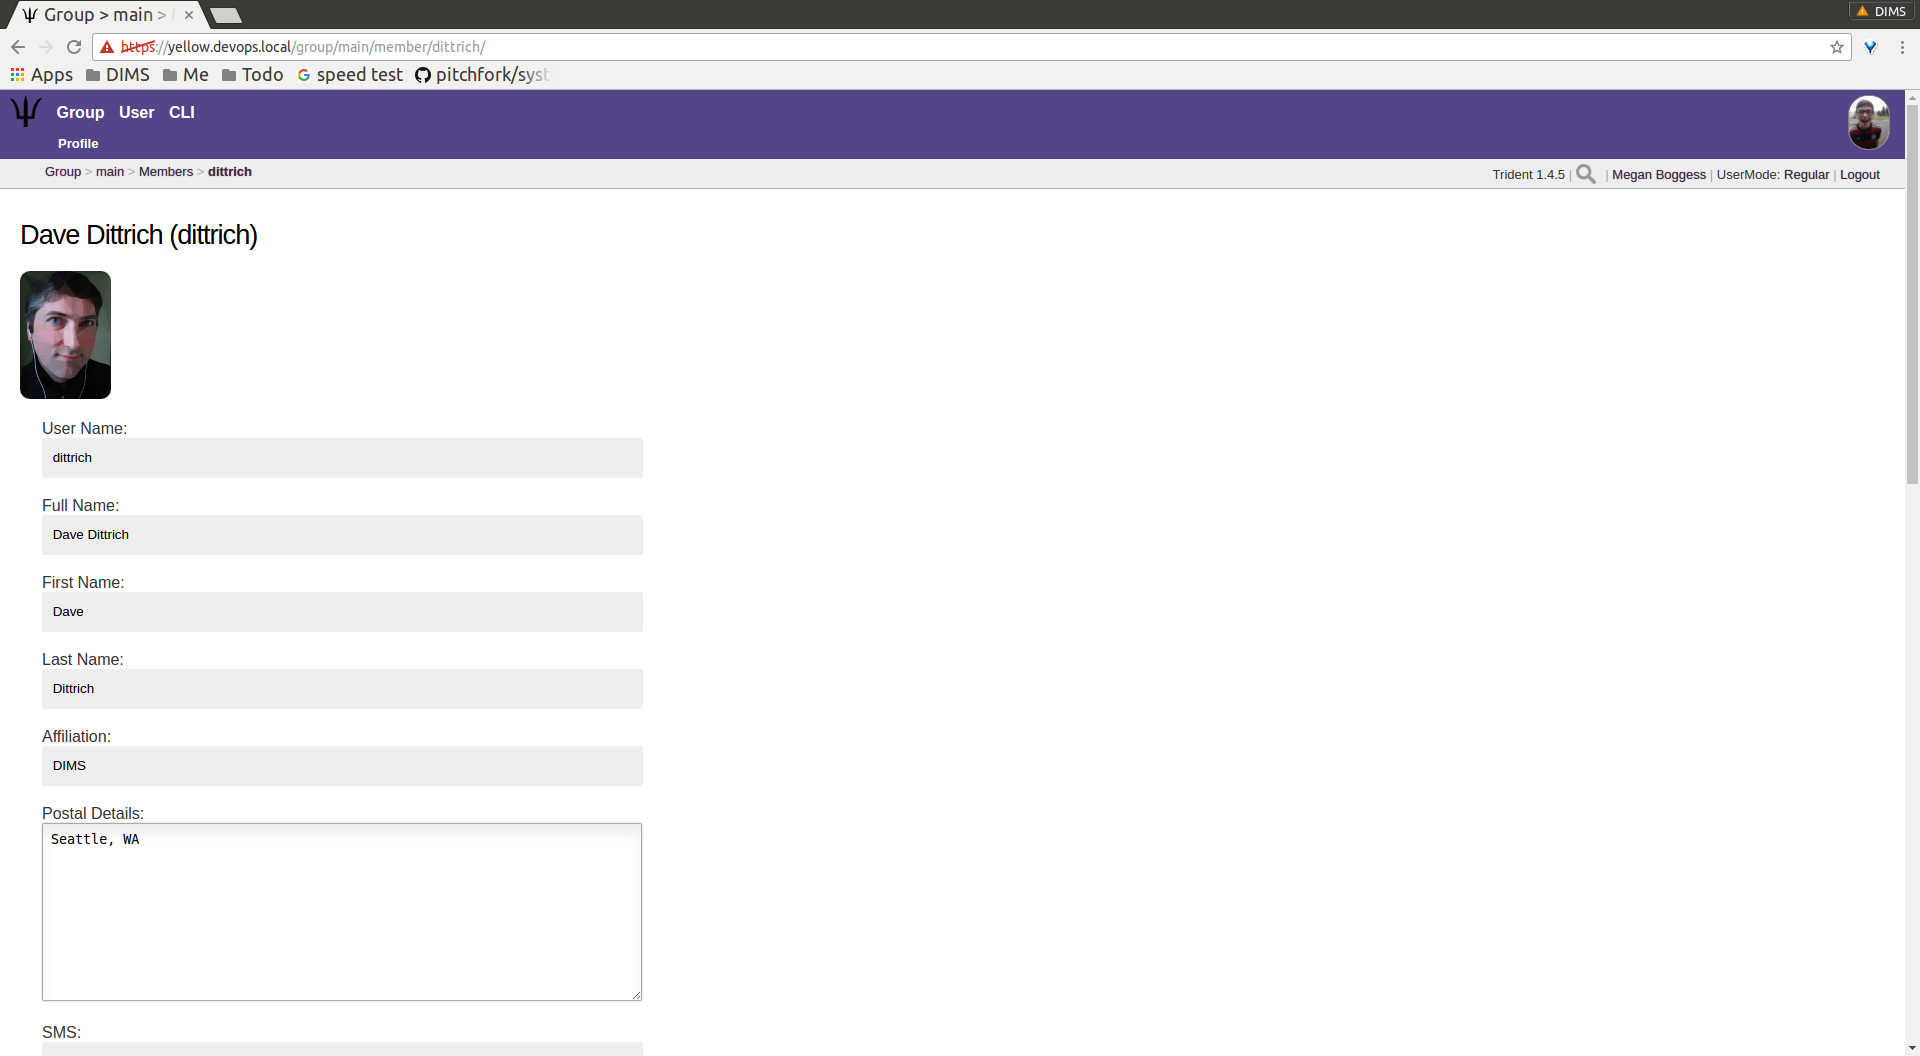
Member profile, top

Member profile, middle
Member profile, vouches for
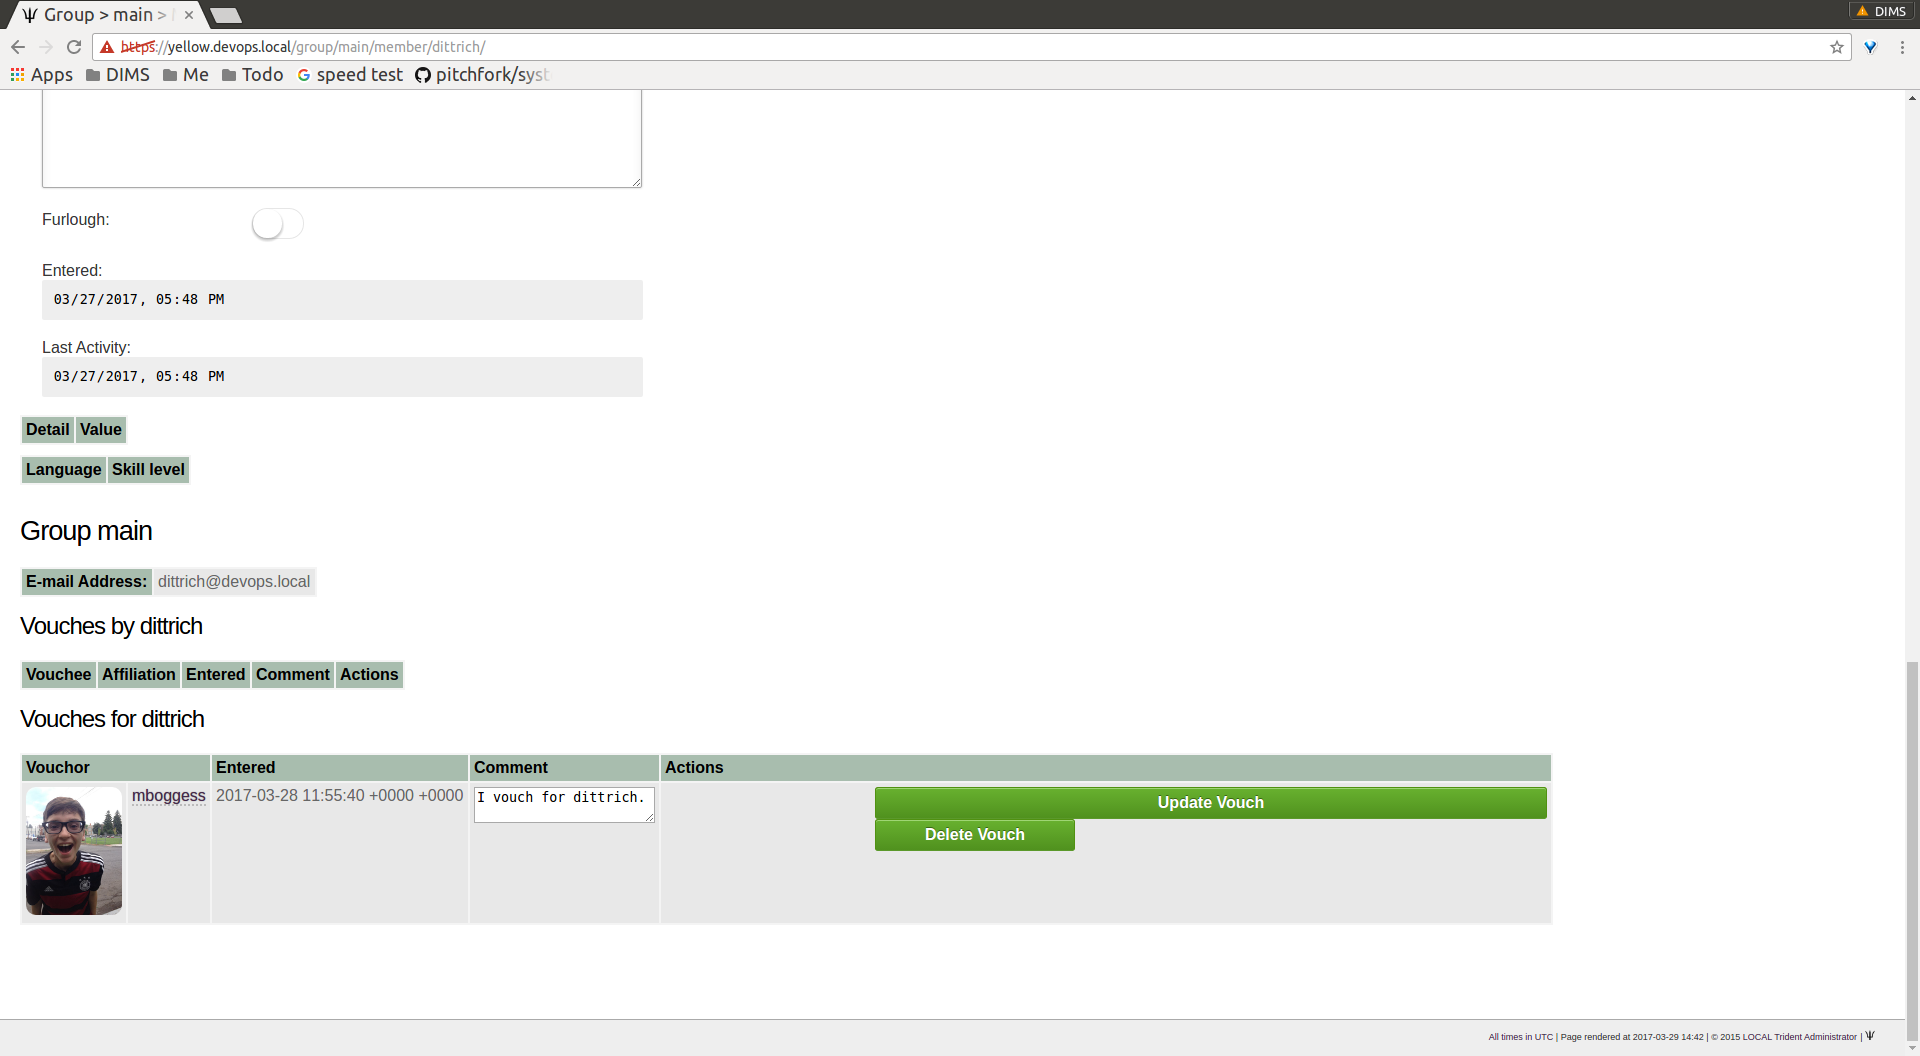
Within a trust group, any member’s profile is viewable. At
the bottom of the profile, there are lists of vouching
activities of which the current member has been a part:
vouches he has made or vouches other members have made for
him. In the above example, another user vouched for the
user dittrich, but he has not yet vouched for anyone.
In this next example, the user trident has vouched
for another member, but has not yet been vouched for by
any other member (Figure Member profile, no vouches for).
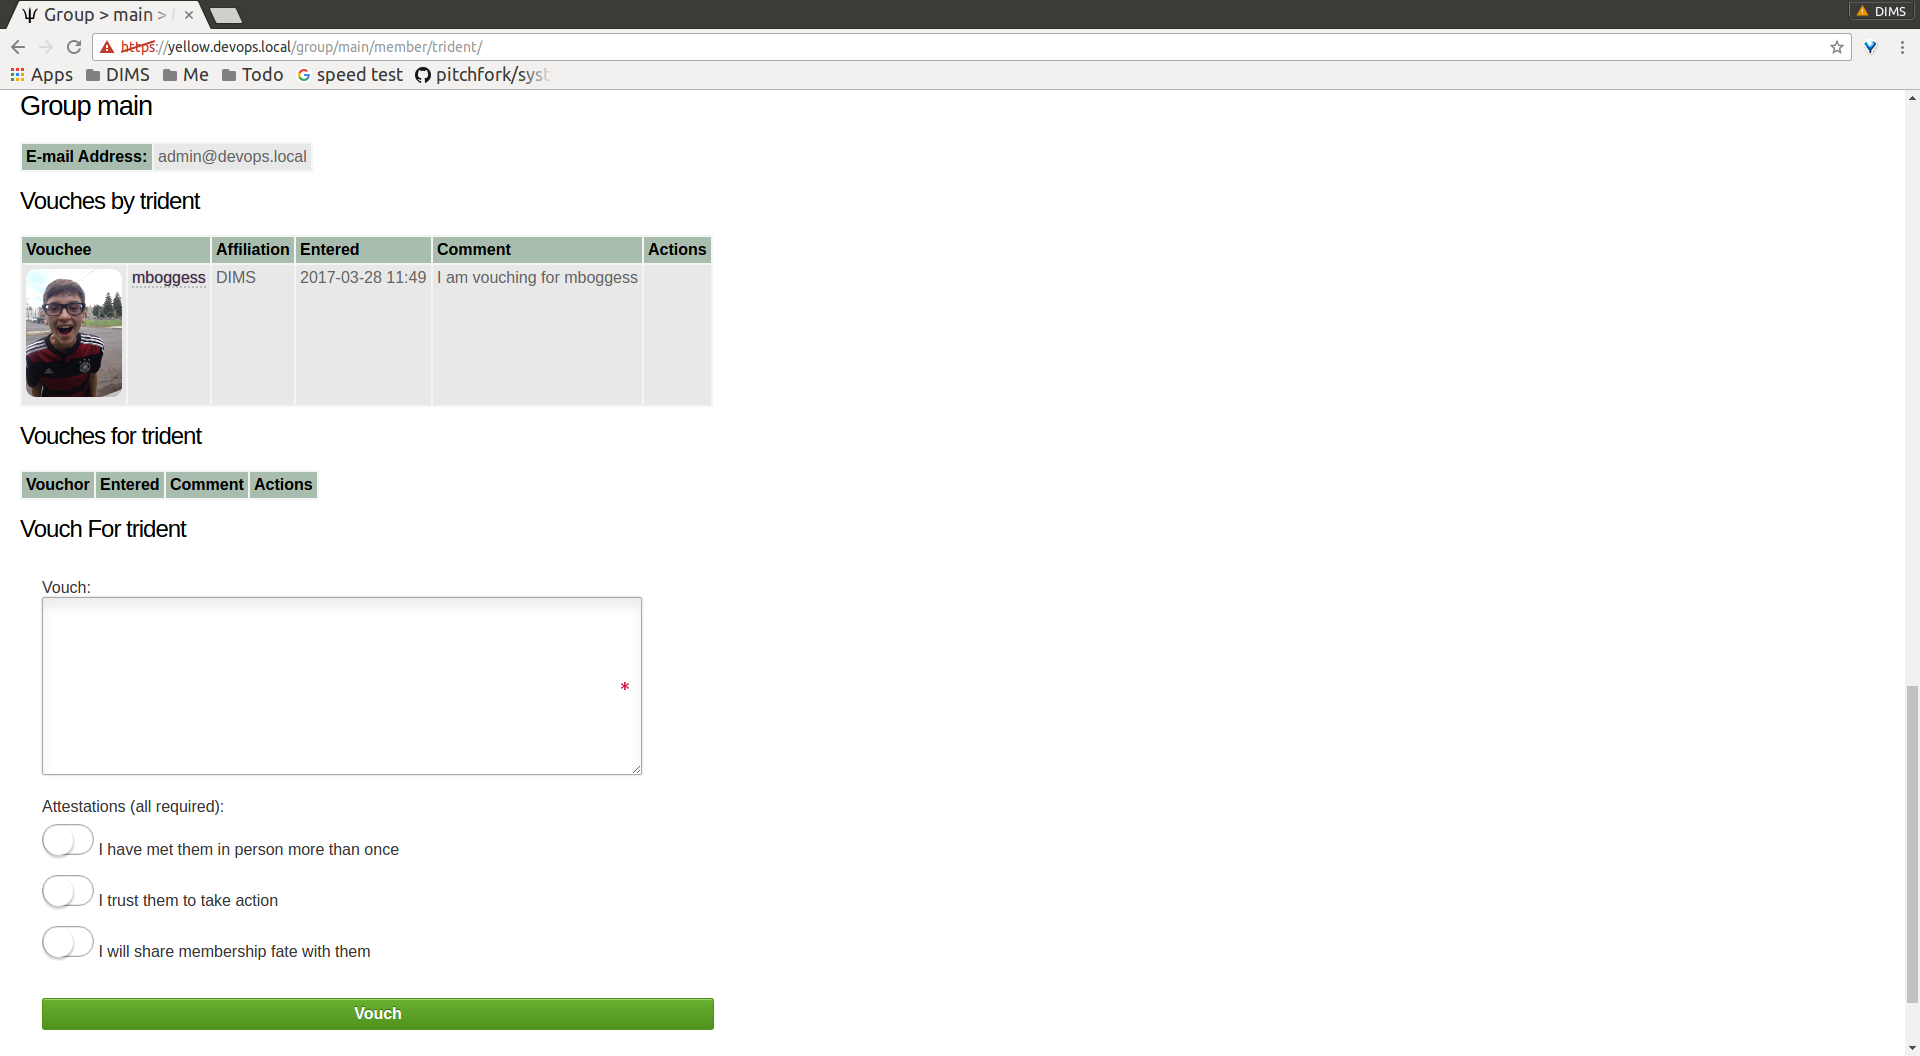
Member profile, no vouches for
The Airports page (Figure Airports list) shows a
list of airports members of the current trust group indicate
as the airport nearest to them.
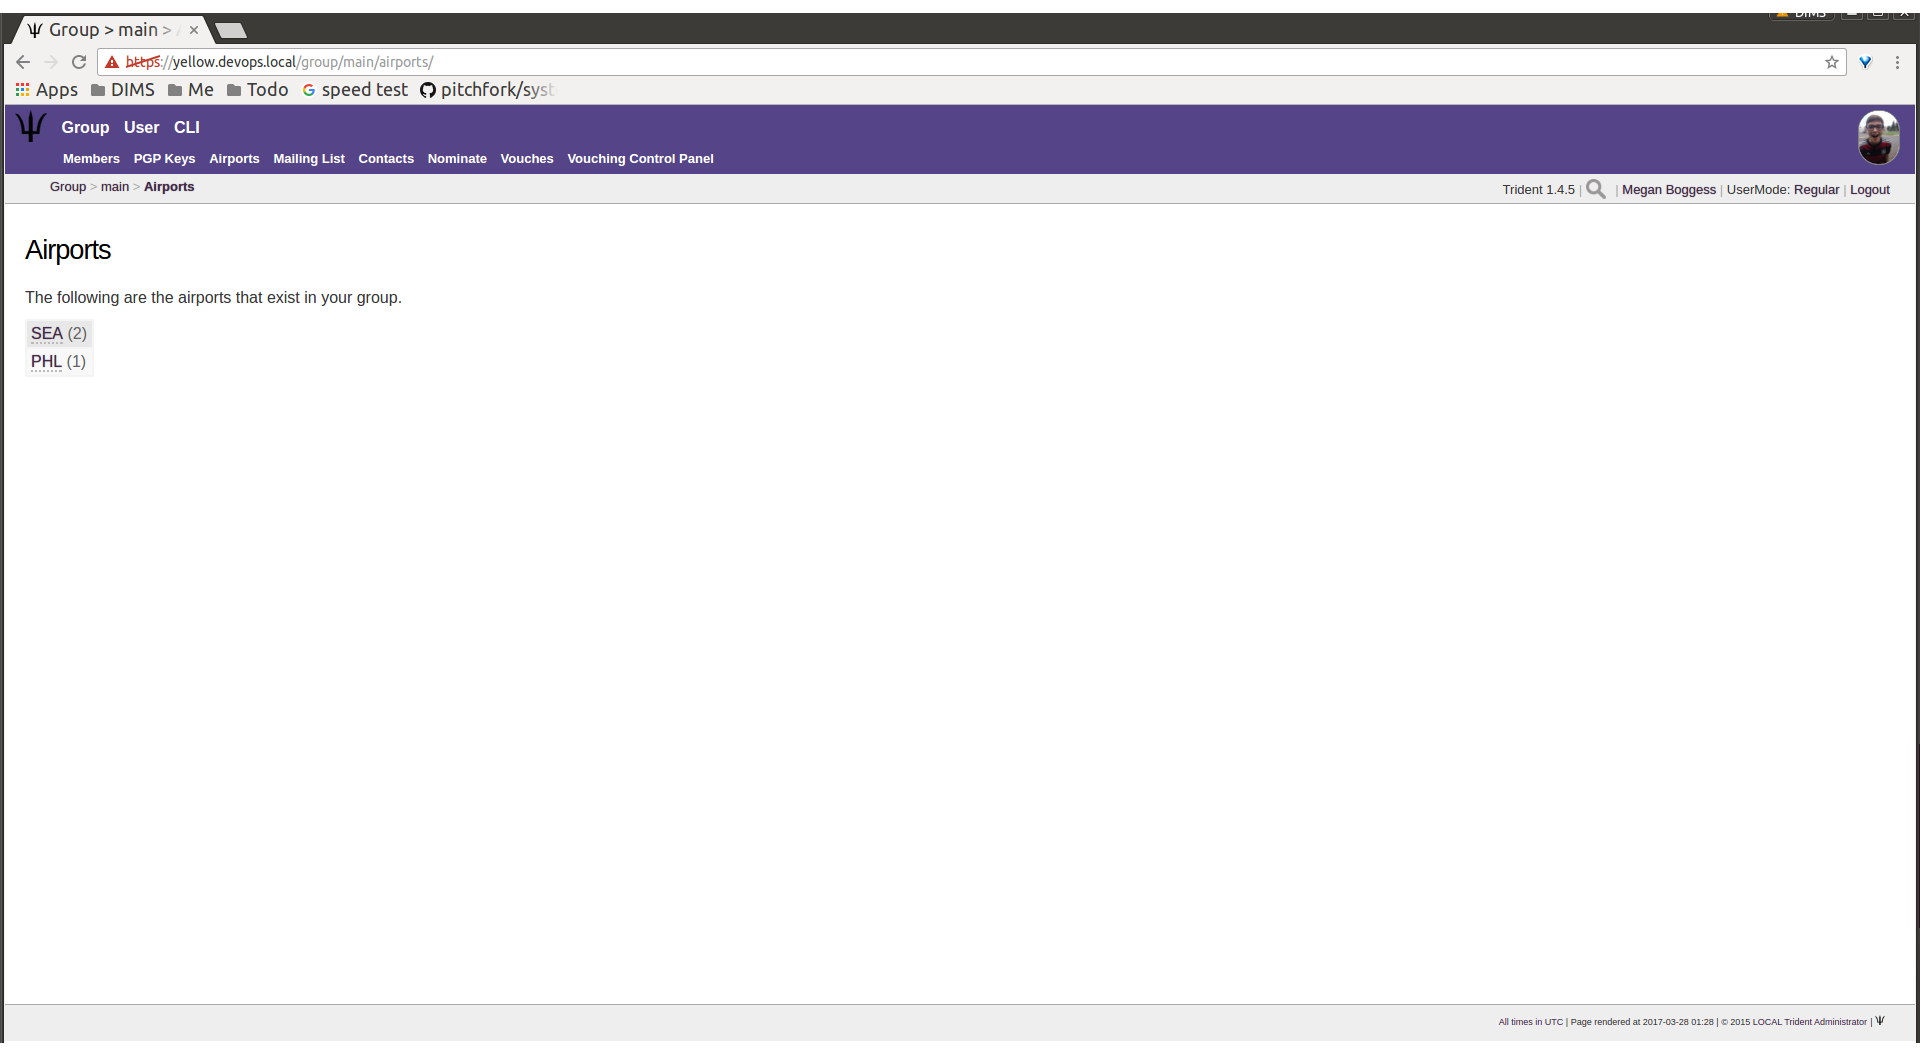
Airports list
Click on any airport abbreviation in the list, and a new page will open with a list of members who have indicated the airport is the airport nearest to them (Figures Members with PHL airport and Members with SEA airport).
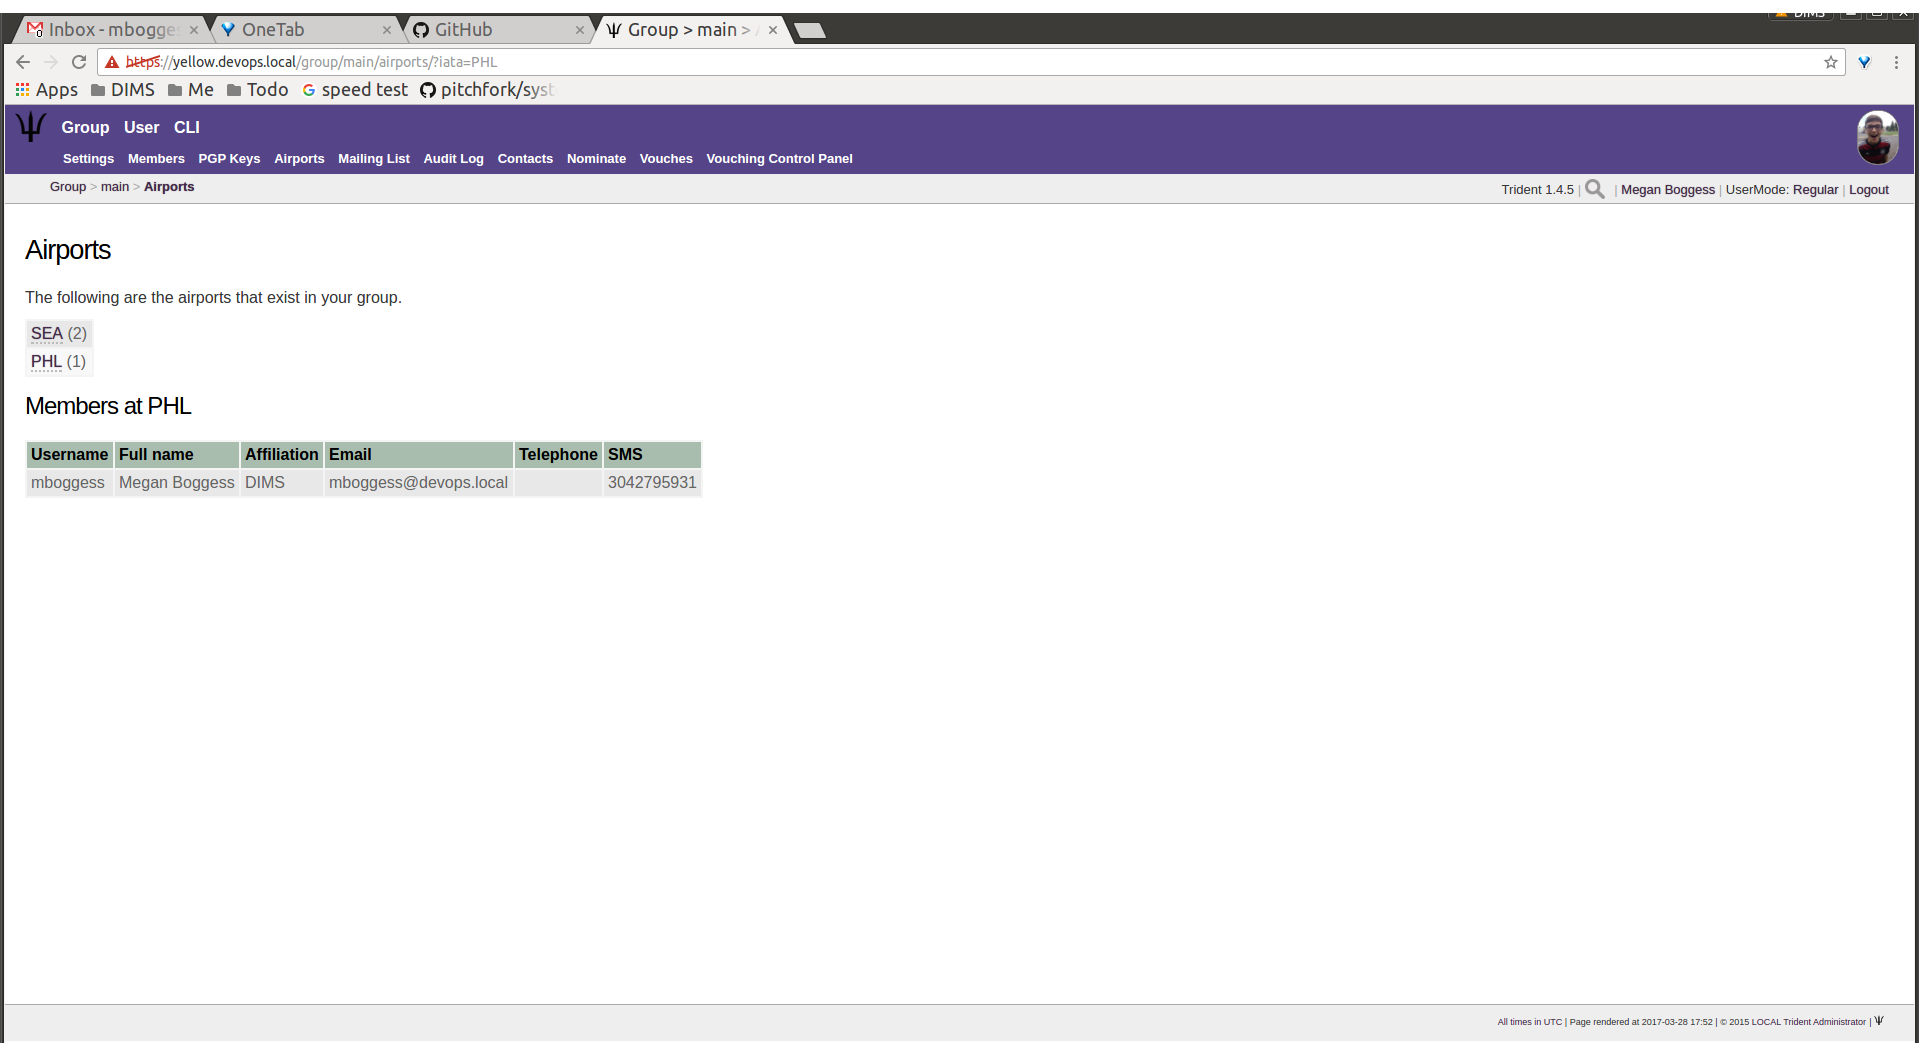
Members with PHL airport
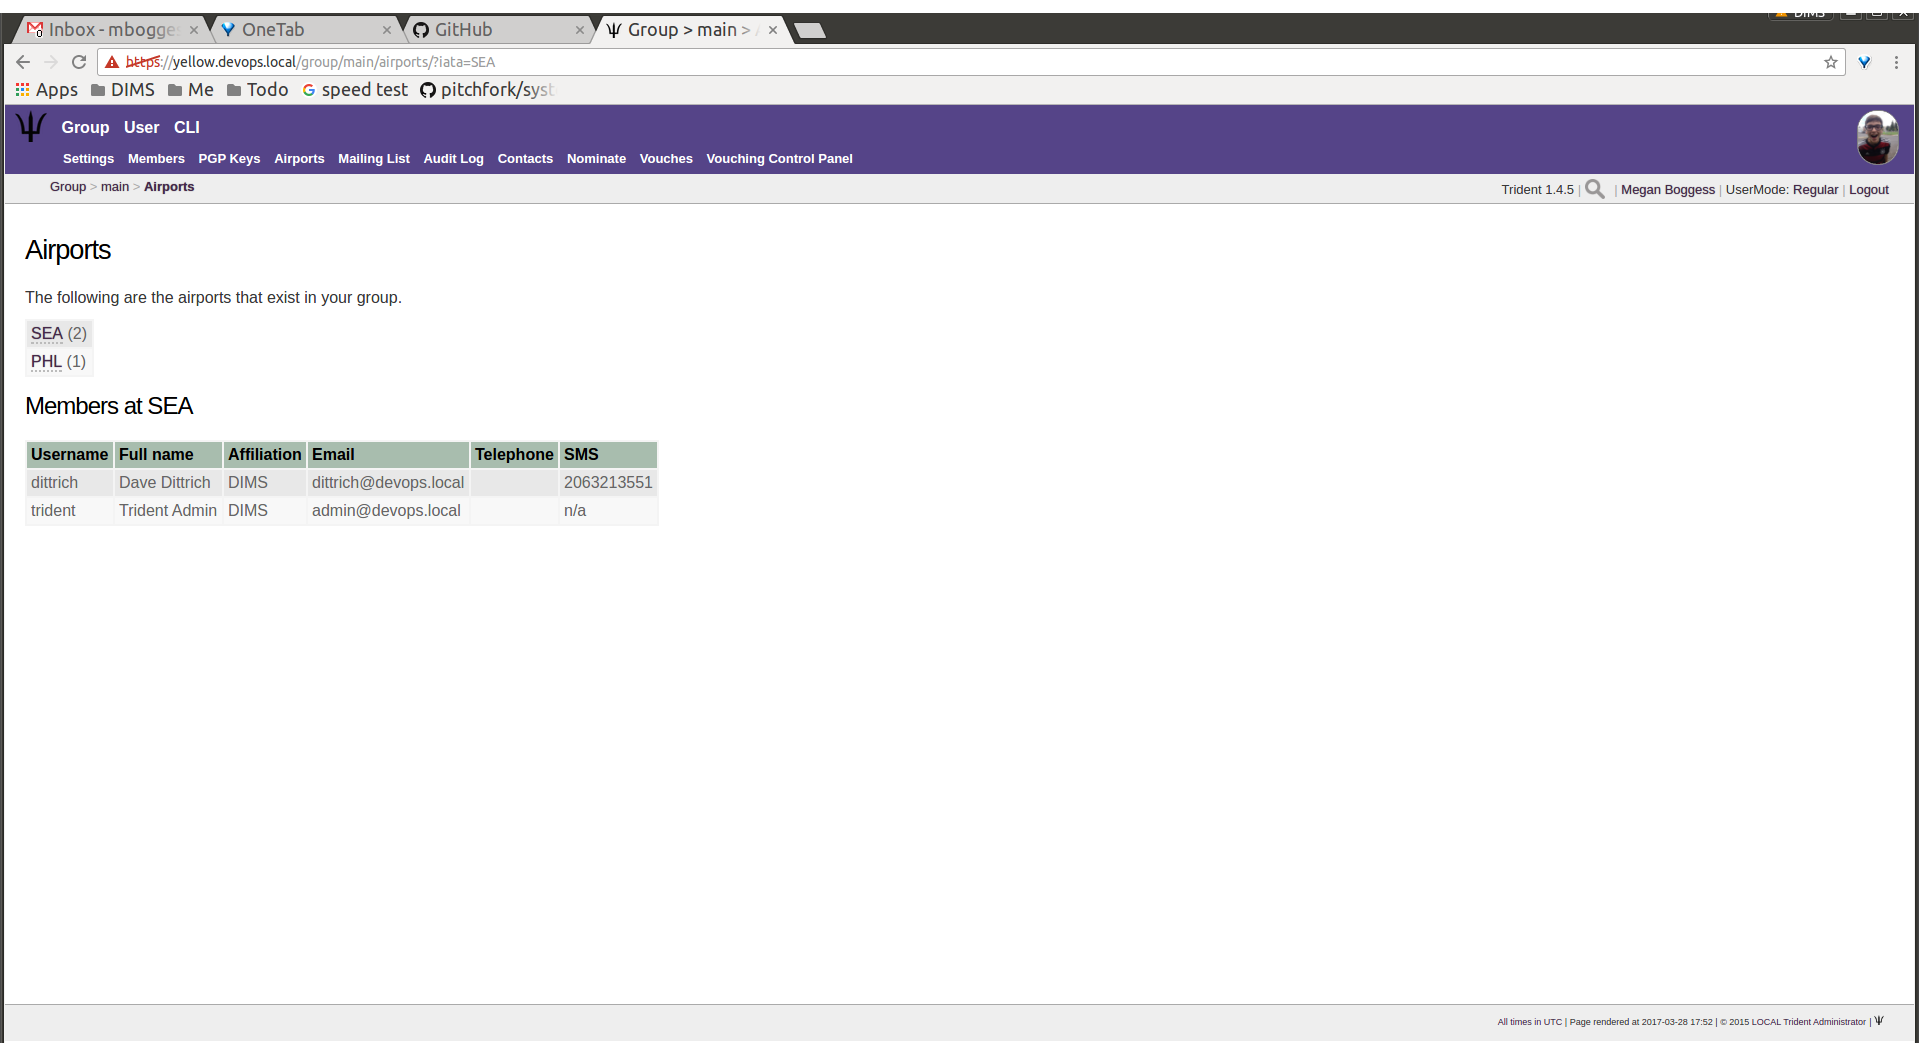
Members with SEA airport
The Contacts page (Figure Member contact list) shows a list
of members of the current trust group with their contact
information, including affiliation, email, telephone, and SMS.
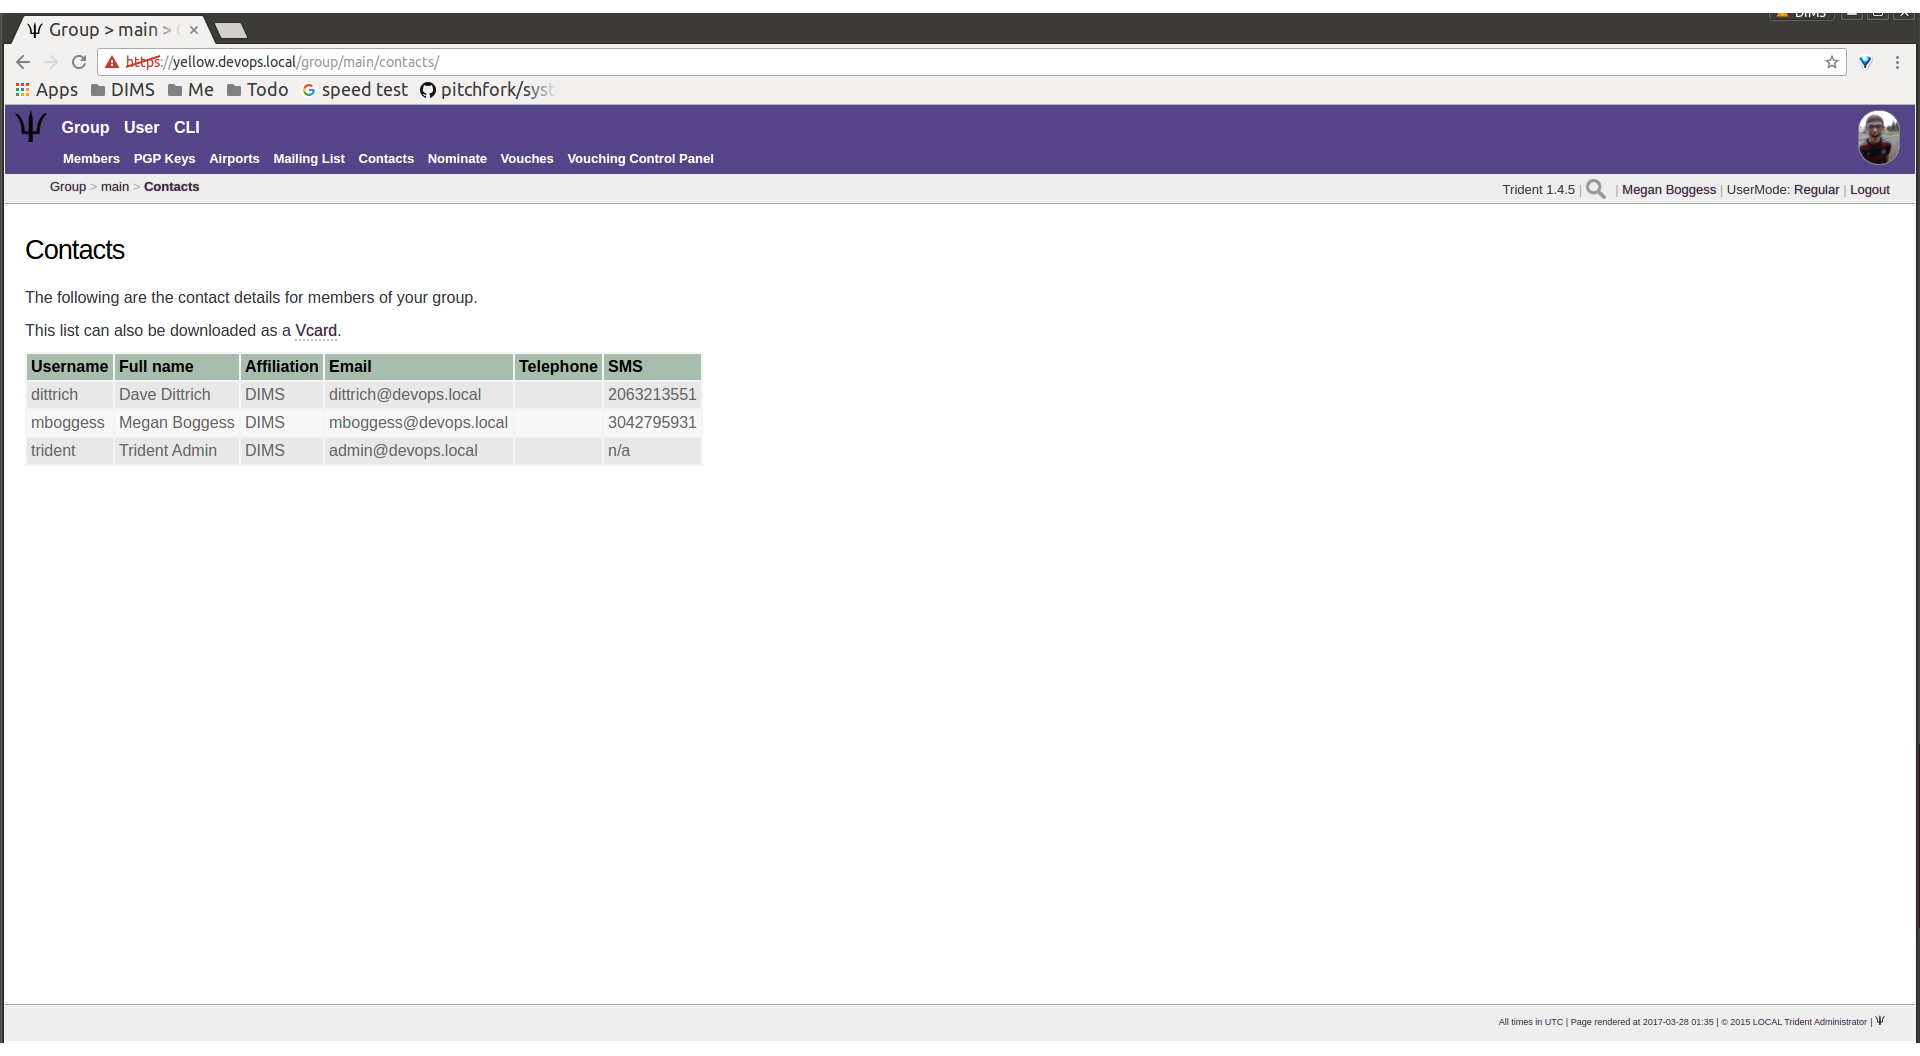
Member contact list
The Vouches page shows a list of all vouches made for
members of the current trust group. This list indicates who
was vouched for and by whom and on what date the vouch was
made.
If no vouches have been made yet, the page will be mostly blank (Figure No vouches):

No vouches
Once at least one vouch has been made, a list will appear (Figure Vouches made):
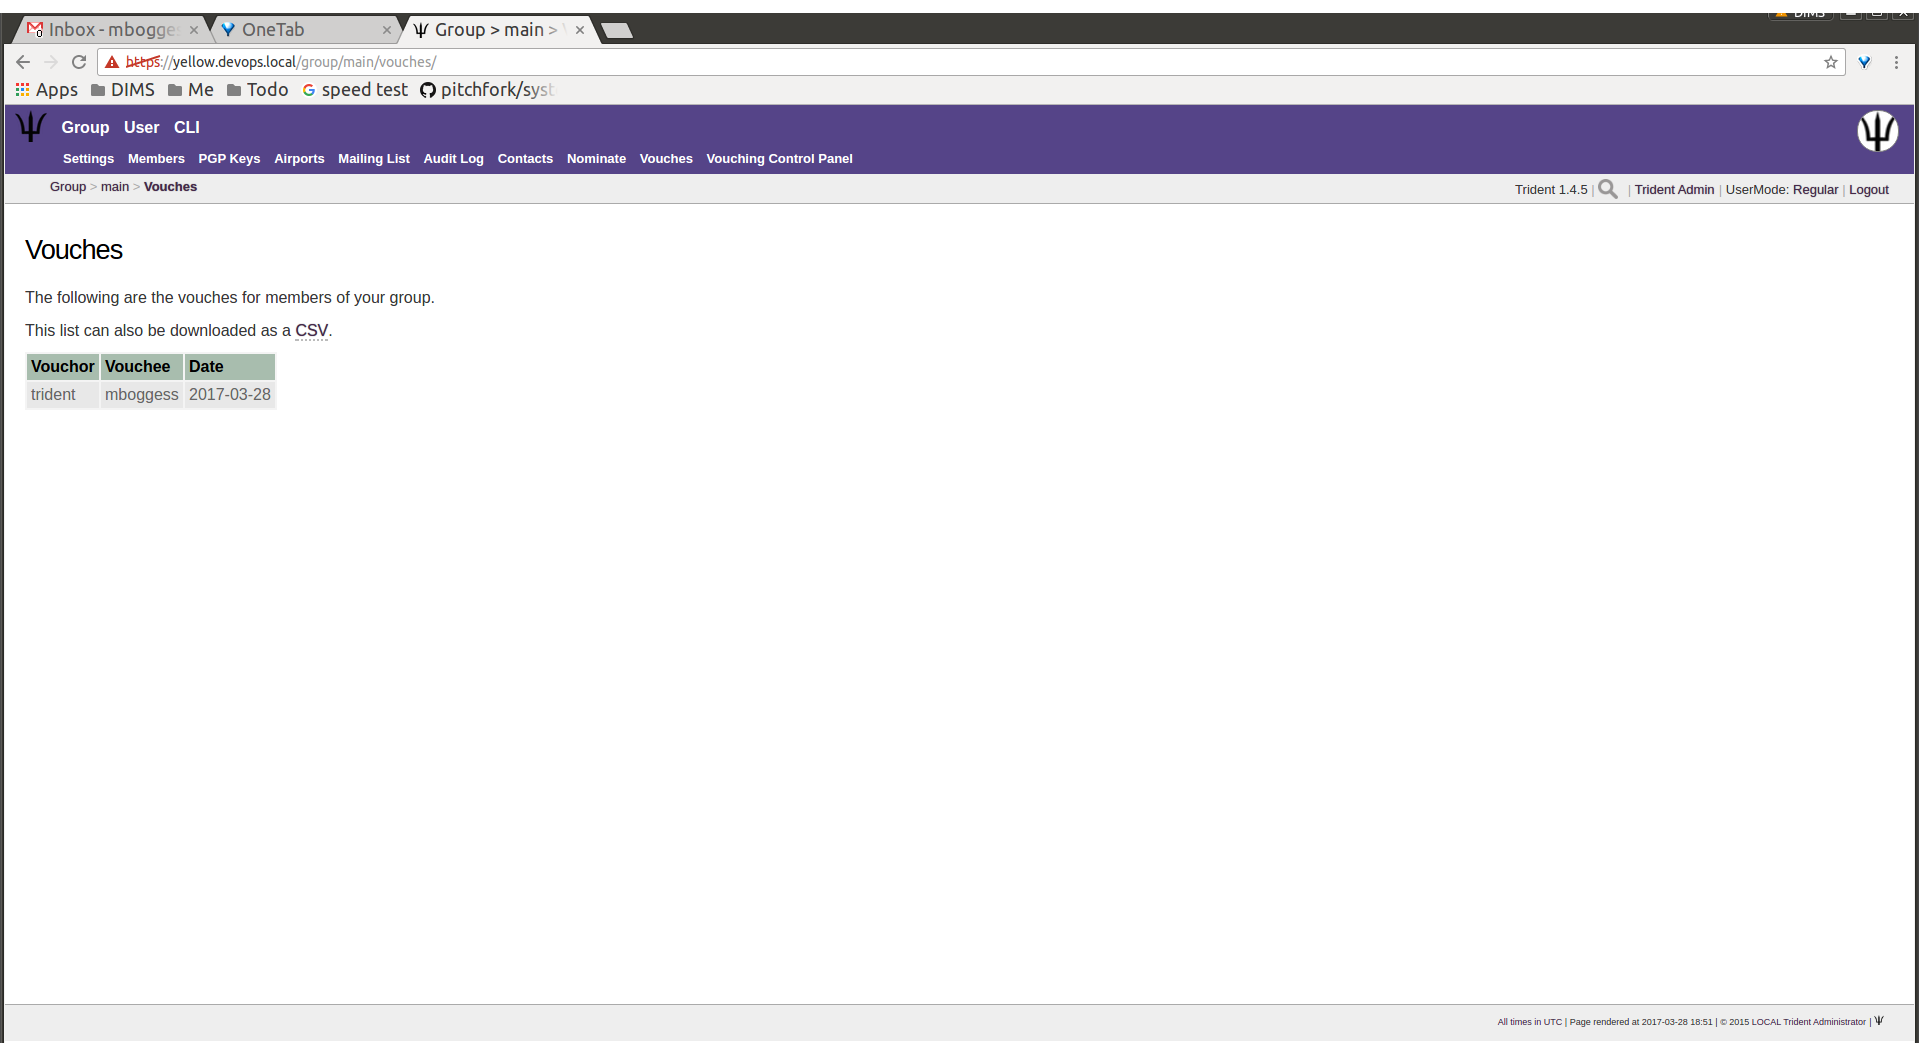
Vouches made
2.2.2. Manageable Group Activities
This subsection will cover attributes and activities
manageable from the PGP Keys, Mailing List,
Wiki, Files, Nominate, and Vouching Control
Panel tabs or links. Remember, the tabs will be found in
the second row at the top of any group-related page and the
links can be found listed on the group’s main page.
The PGP Keys tab or link doesn’t actually open a new
page, it just downloads all PGP keys for the current trust
group (Figure Download PGP keys).

Download PGP keys
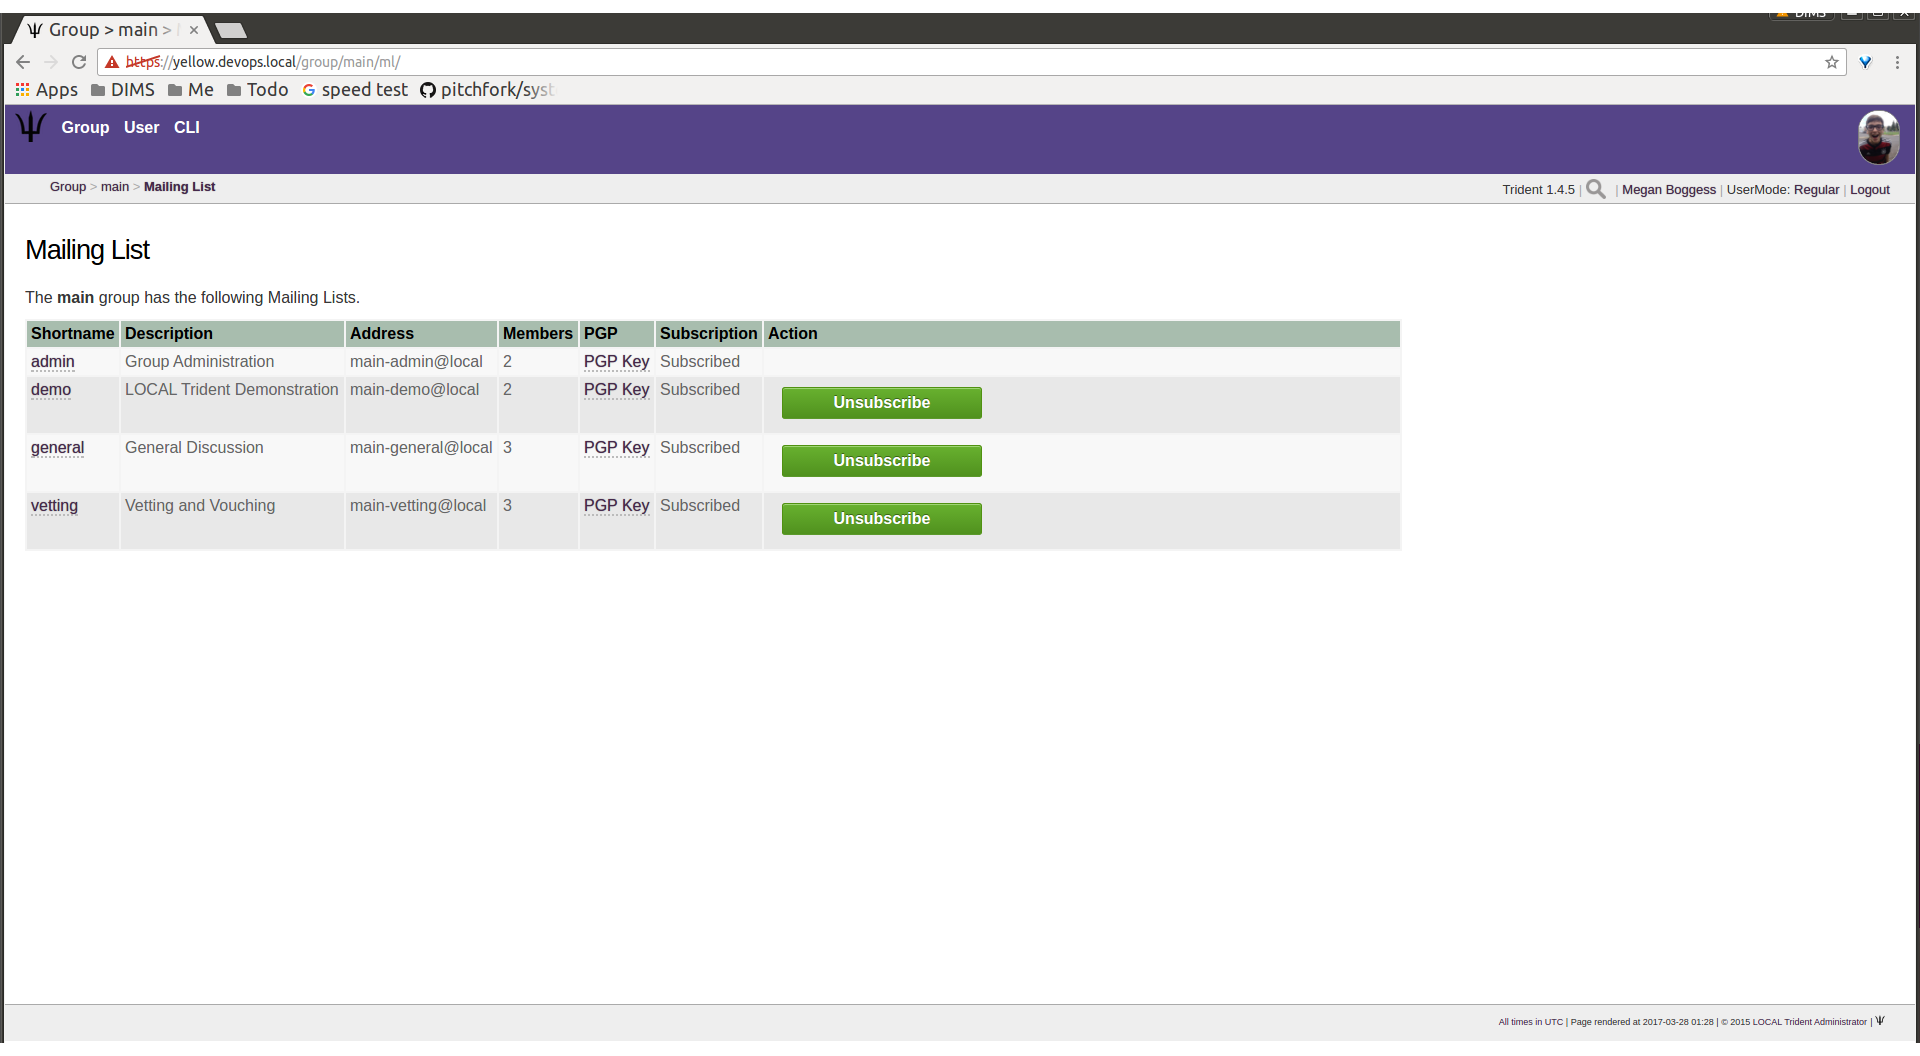
The Mailing List tab or links opens a new page listing
the current trust group’s mailing lists and information
about them (Figure Mailing lists list).
Mailing lists list
Click the link found in any row of the Shortname column
to access a page listing members on that mailing list.
Click the link in any row of the PGP column to download
the PGP keys for that mailing list
(Figure Download list PGP keys).
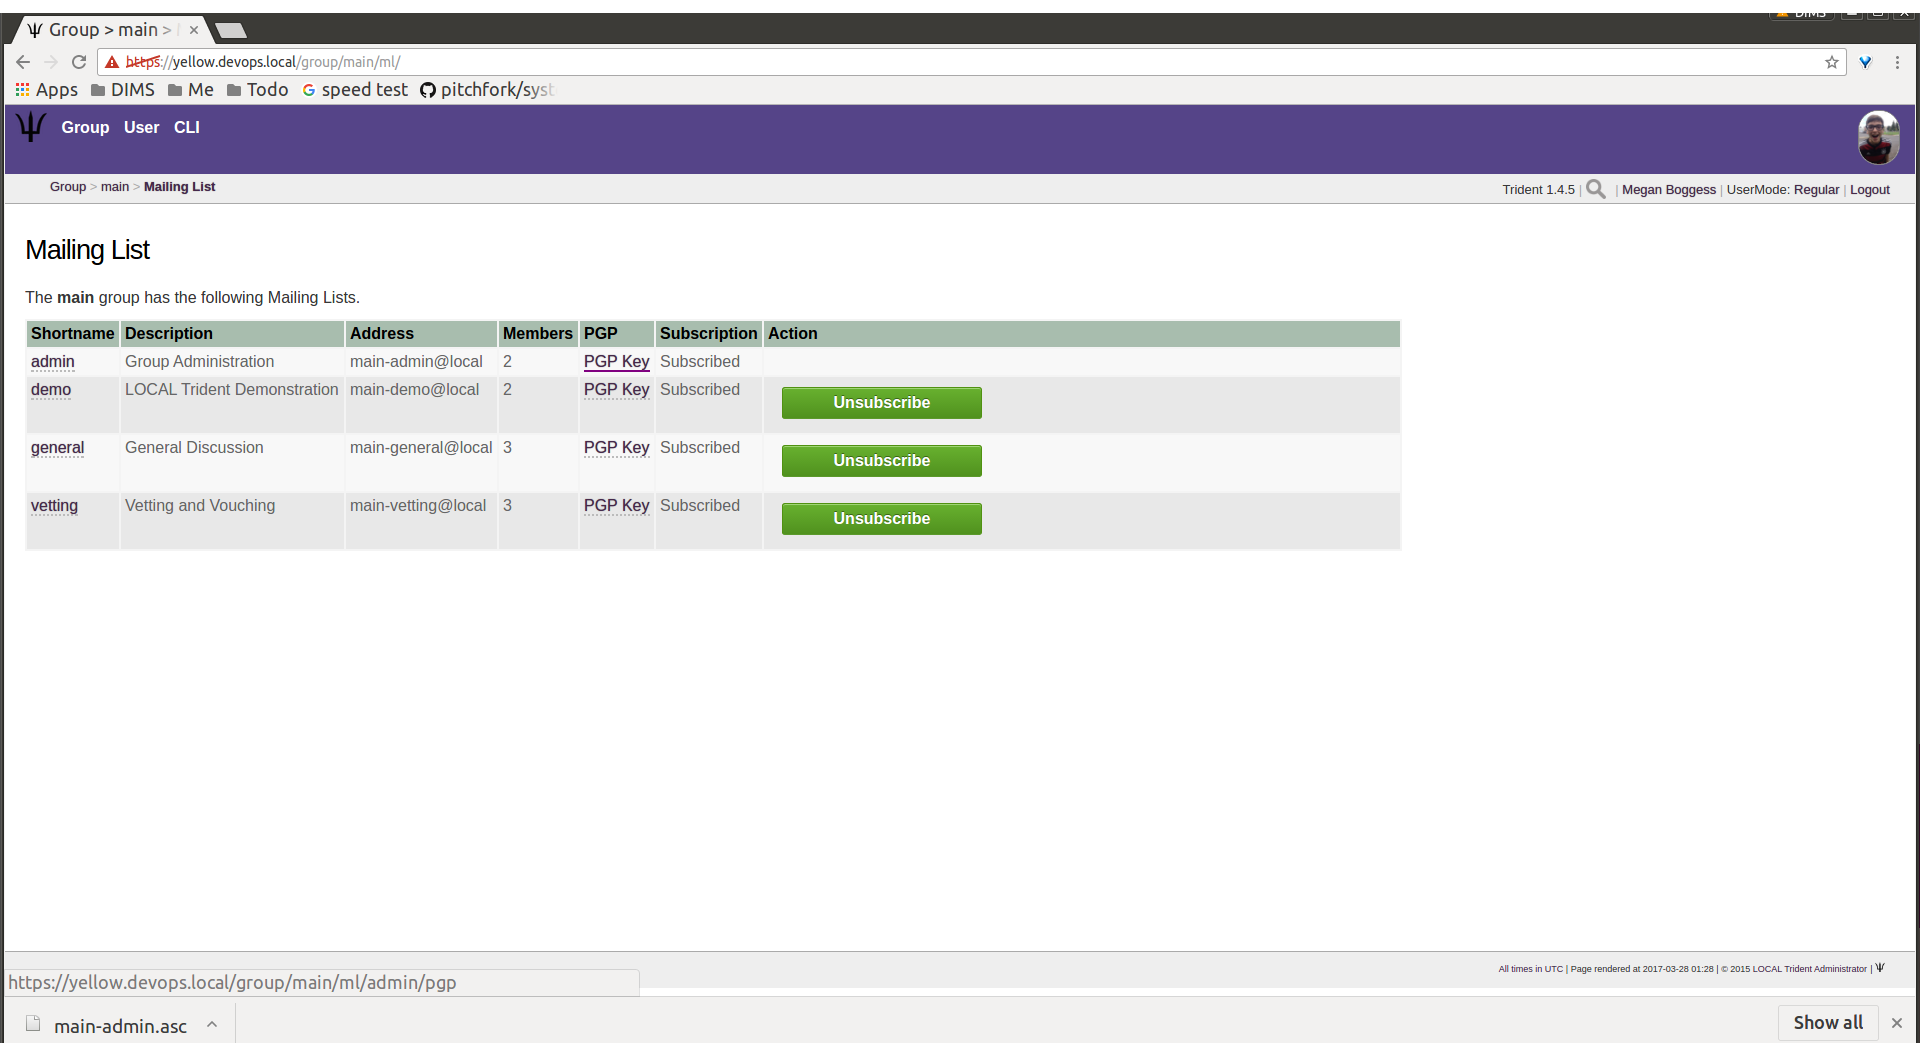
Download list PGP keys
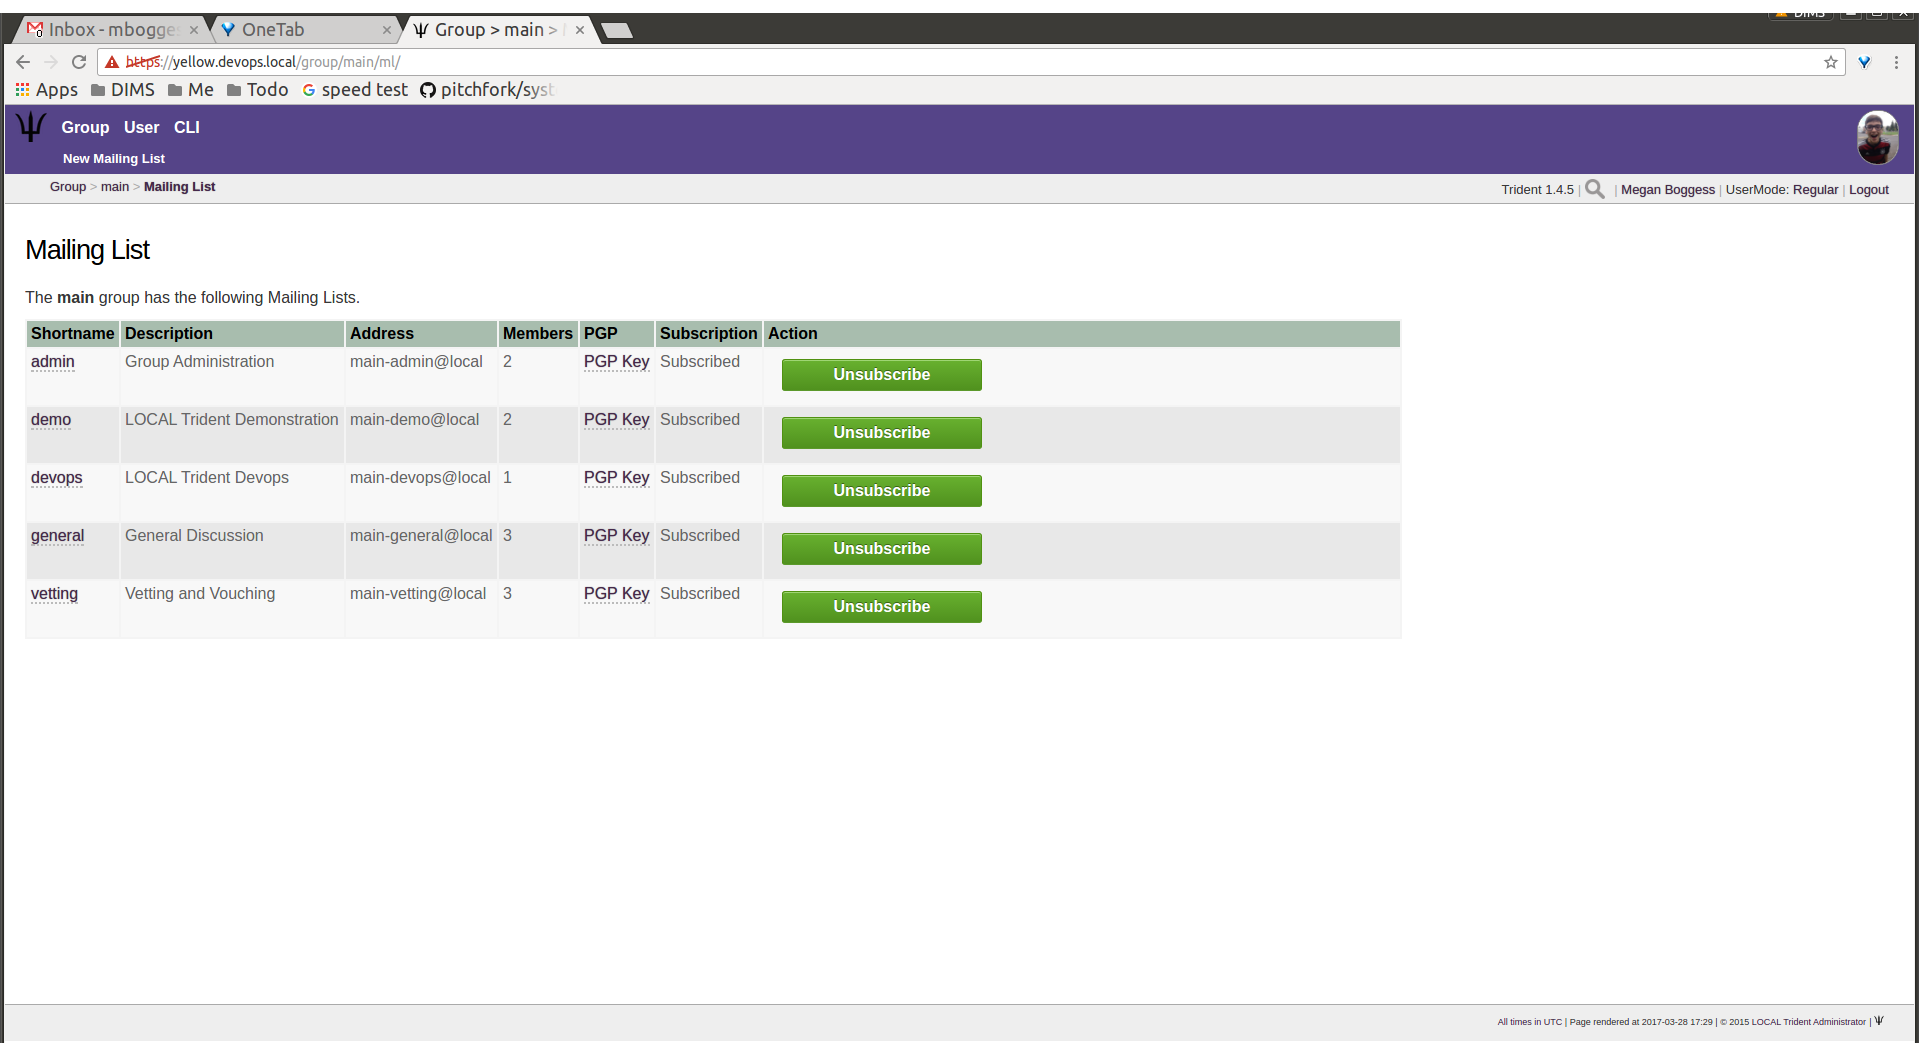
When new mailing lists are added, trust group members may
have to manually add, or subscribe, themselves to the list.
Click the Subscribe button found in the Action column
of the mailing list in order to subscribe
(Figure Subscribe to new mailing list).

Subscribe to new mailing list
Likewise, to unsubscribe to a mailing list and not receive
email from that list any more, click the Unsubscribe
button in the Action column of the mailing list from
which to unsubscribe (Figure Unsubscribe from mailing list).
Unsubscribe from mailing list
To return to either the user or group perspective, click the
User or Group tabs in the top row of the page. If
returning to a group, chose the group from the list of
available trust groups.
The Wiki tab or link opens a new page showing the wiki’s
home page (Figure Wiki home page). The second row at the
top of the page changes to be wiki-related tabs, rather than
group-related tabs.
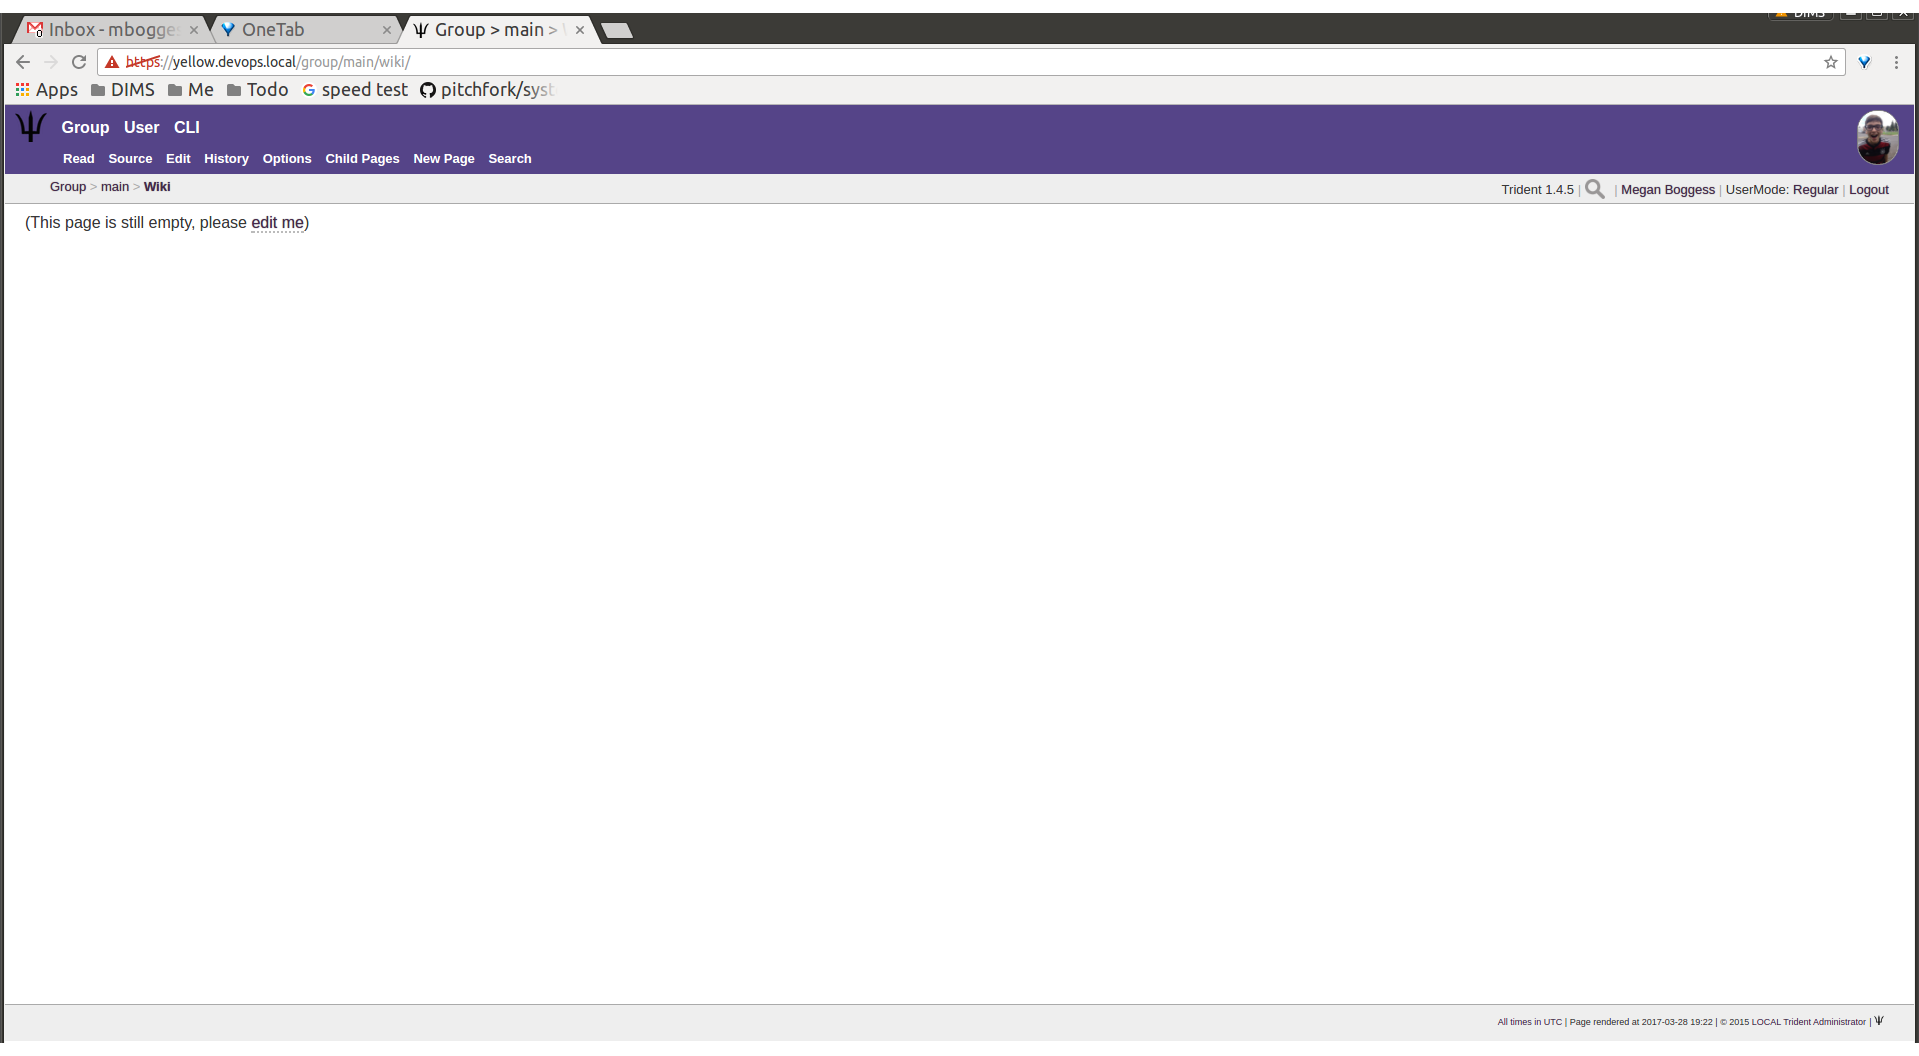
Wiki home page
If no content has been added to the wiki before, as the
image Figure Wiki home page shows, click the edit me
link. This will open an editor (which is also the Edit
tab).
Any page available to edit will have an editor view similar
to what is shown in the image Figure Wiki editor. Once
all edits have been completed, add a summary in the Edit
Summary field, then click the Save Revision button.
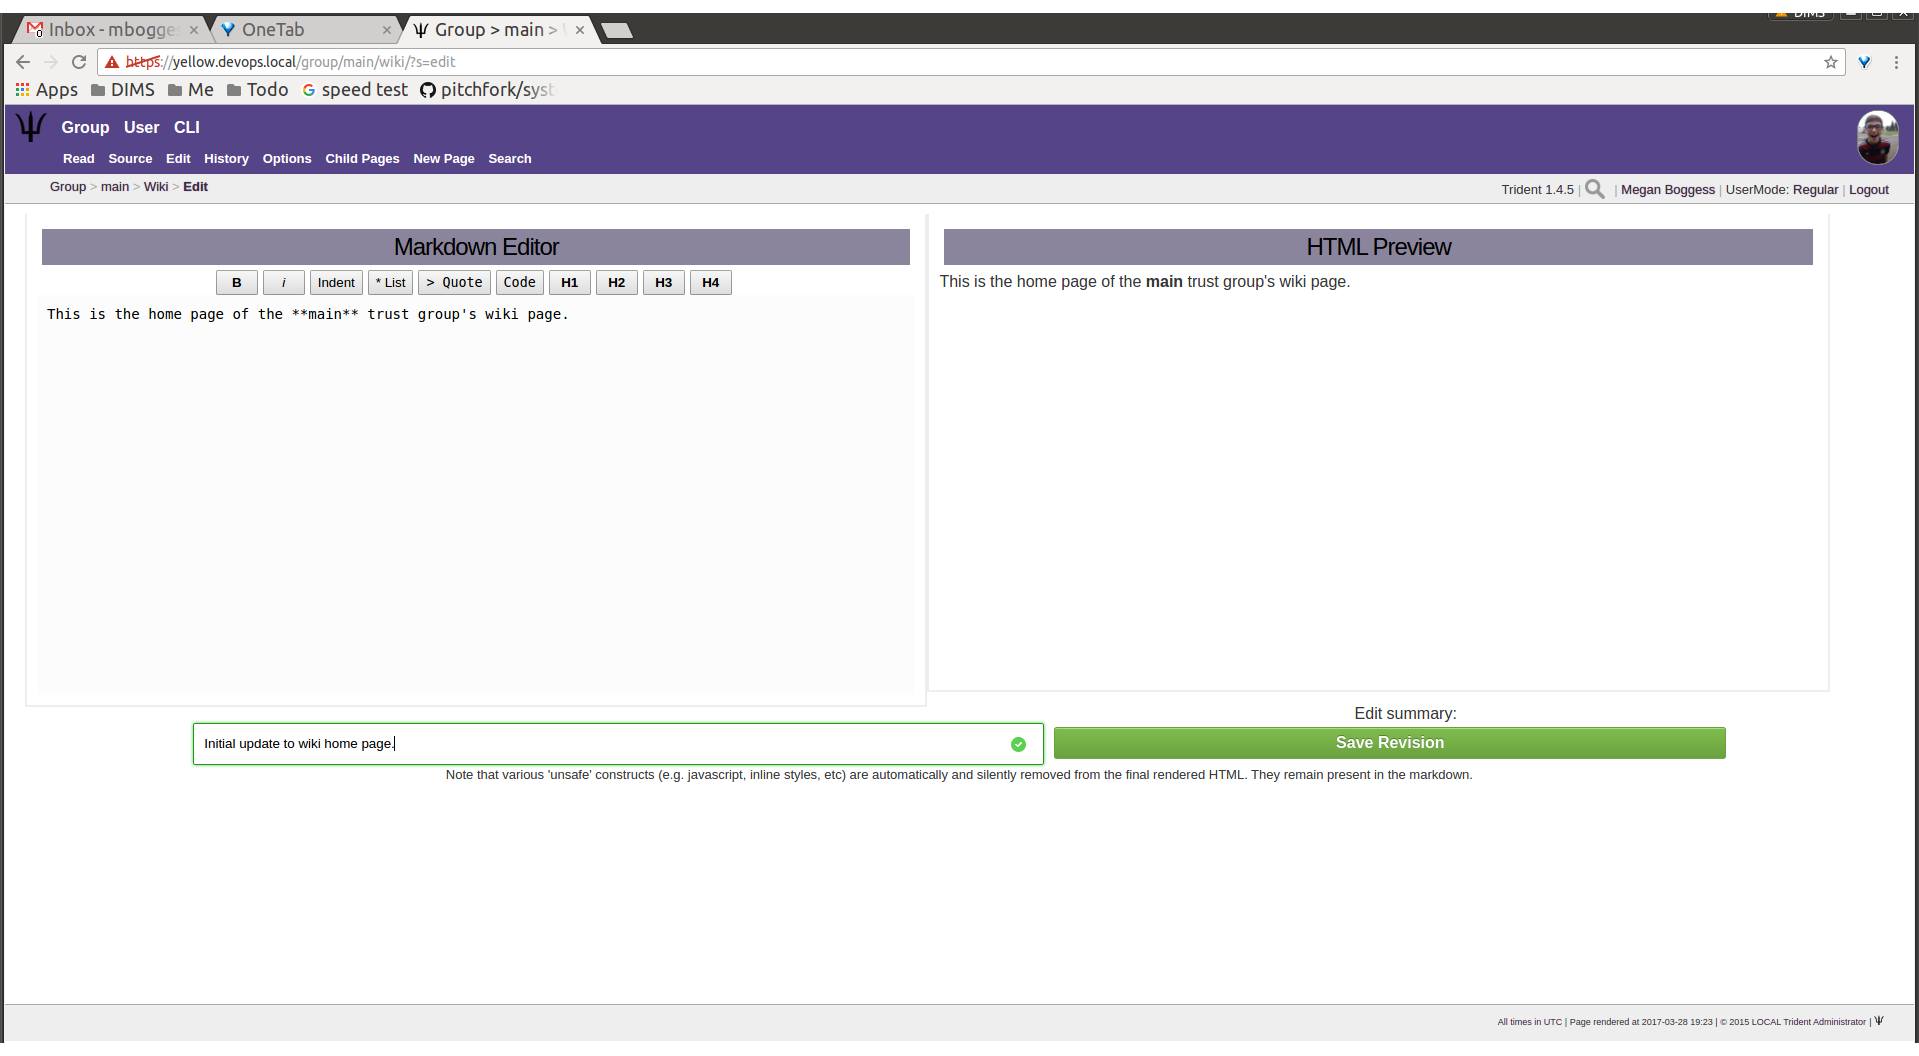
Wiki editor
Once the edit has been saved, a new page will be available to view, with the edits made (Figure Wiki edit made).
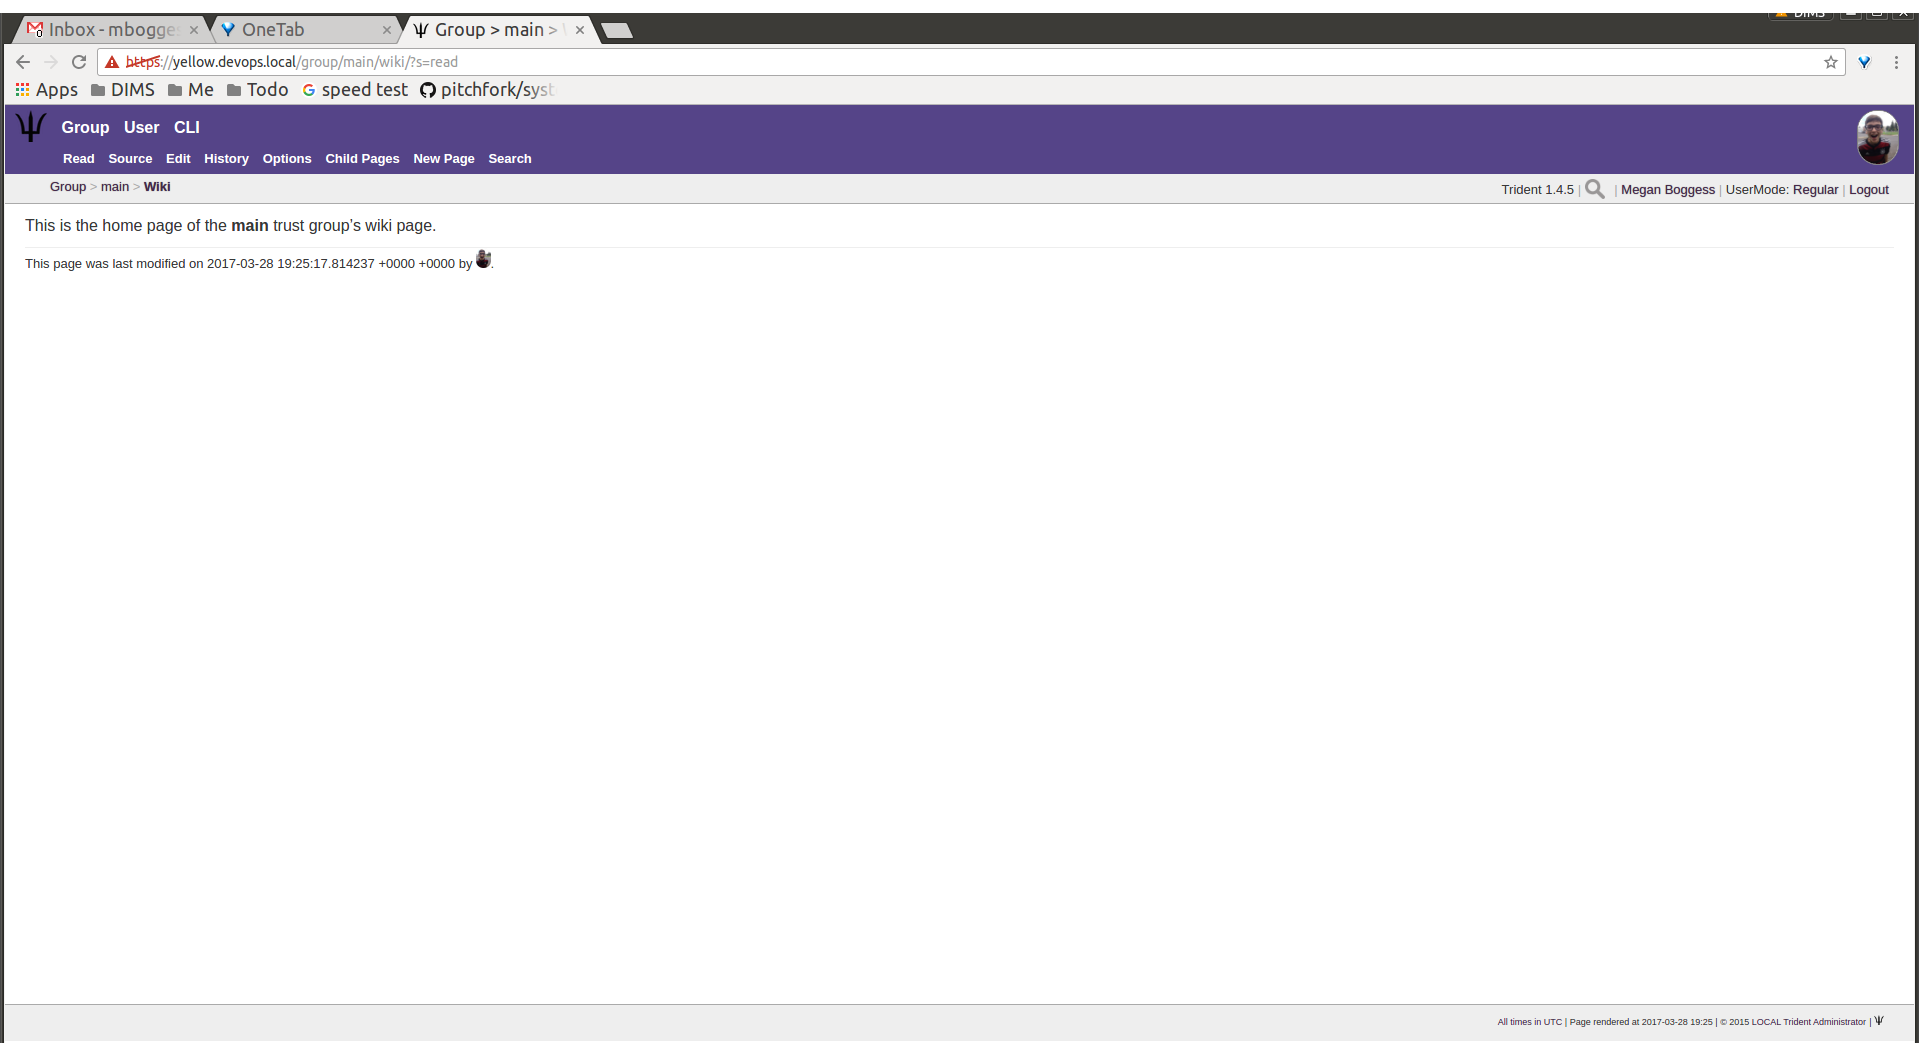
Wiki edit made
Use the Source tab (Figure Wiki source) to see the
markdown source and its HTML preview for the wiki home page.
This page will also contains a link to the raw markdown file.
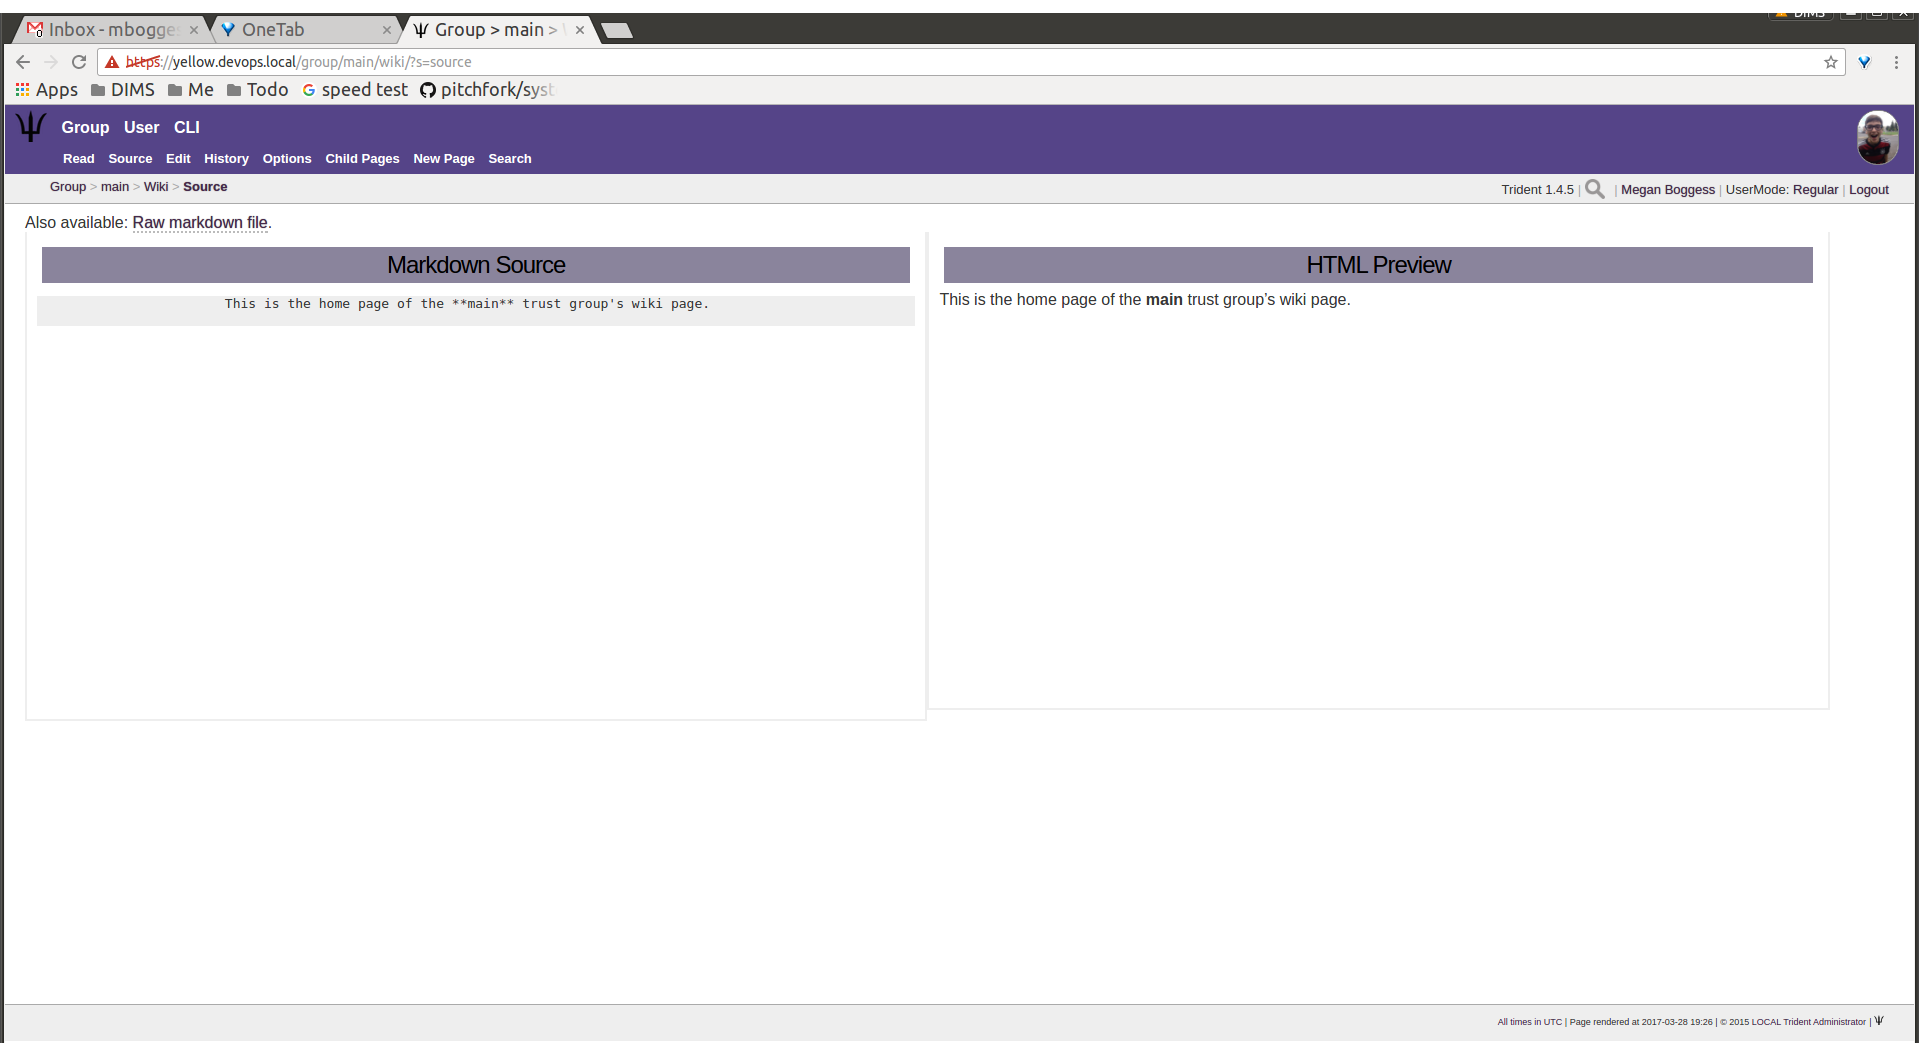
Wiki source
To see a history of edits made to the wiki, use the
History tab (Figure Wiki edit history).
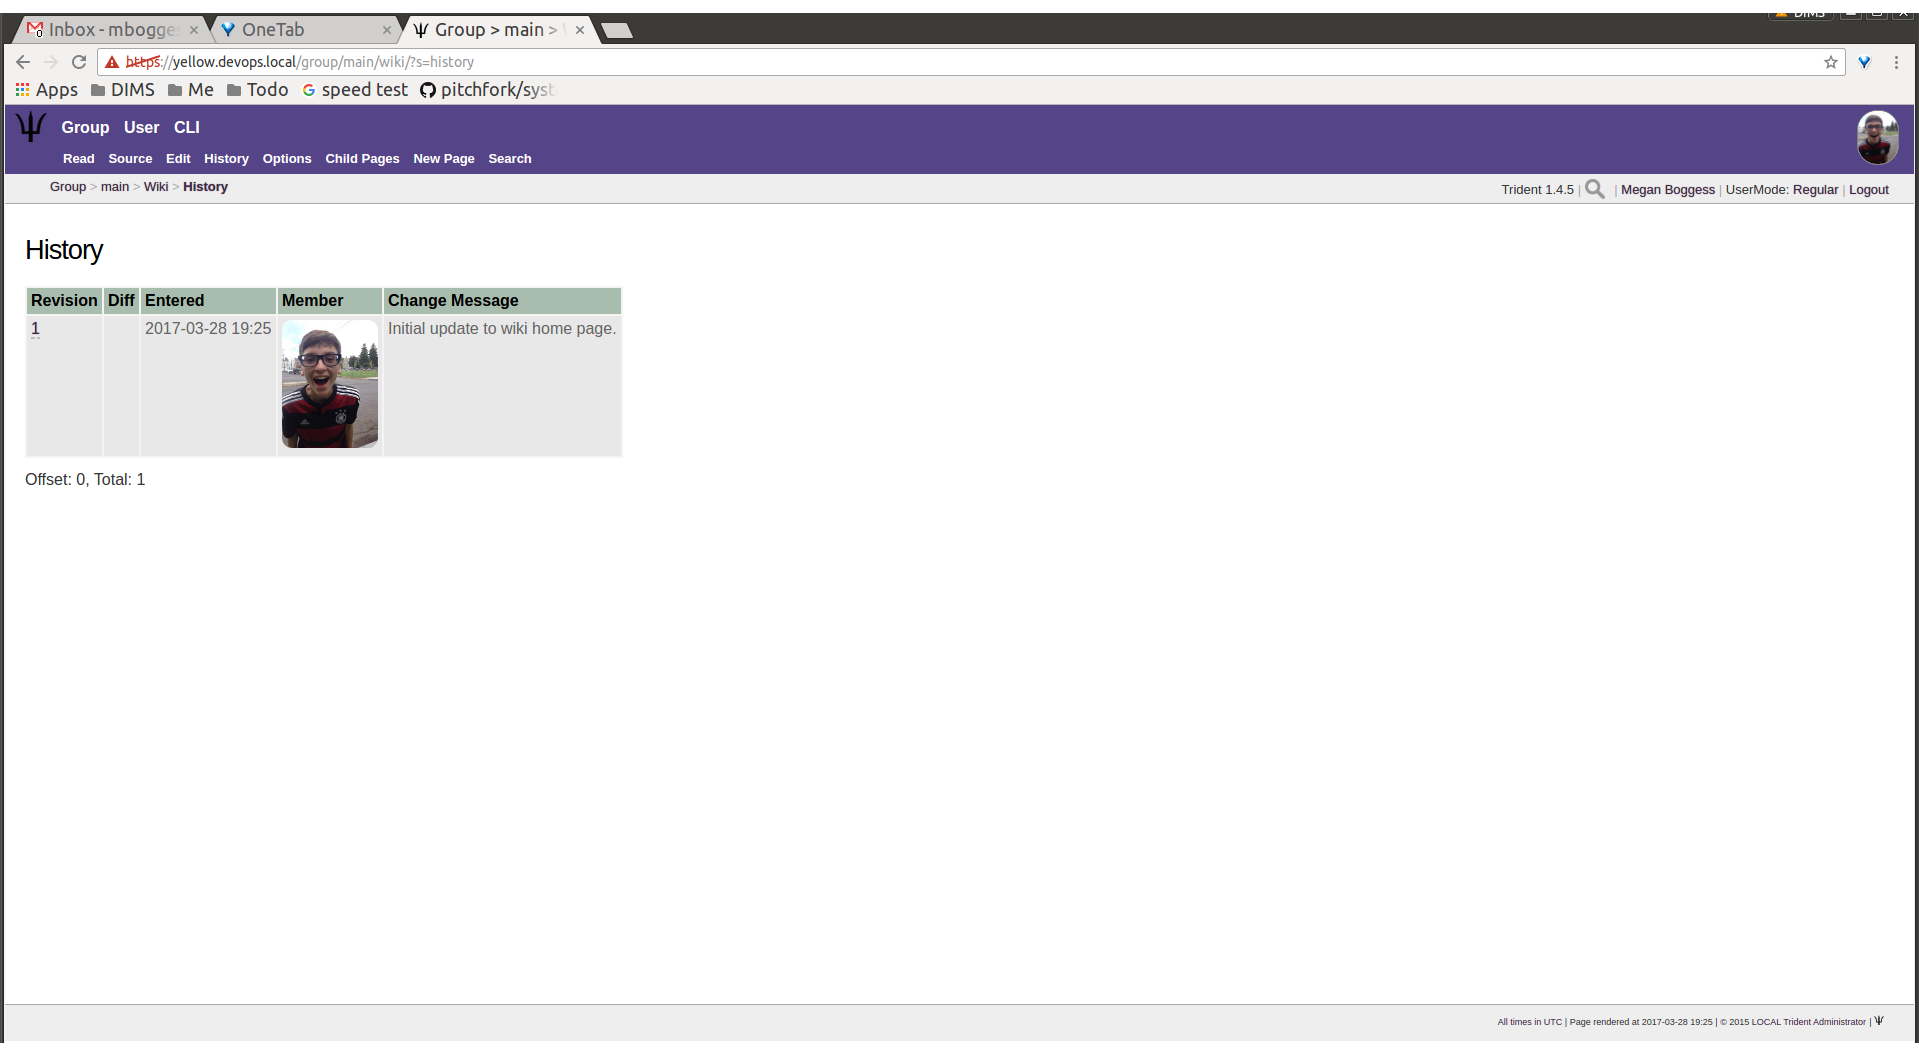
Wiki edit history
The next tab, Options, pages can be moved, deleted,
and/or copied (Figures Wiki options, top,
Wiki options, bottom).
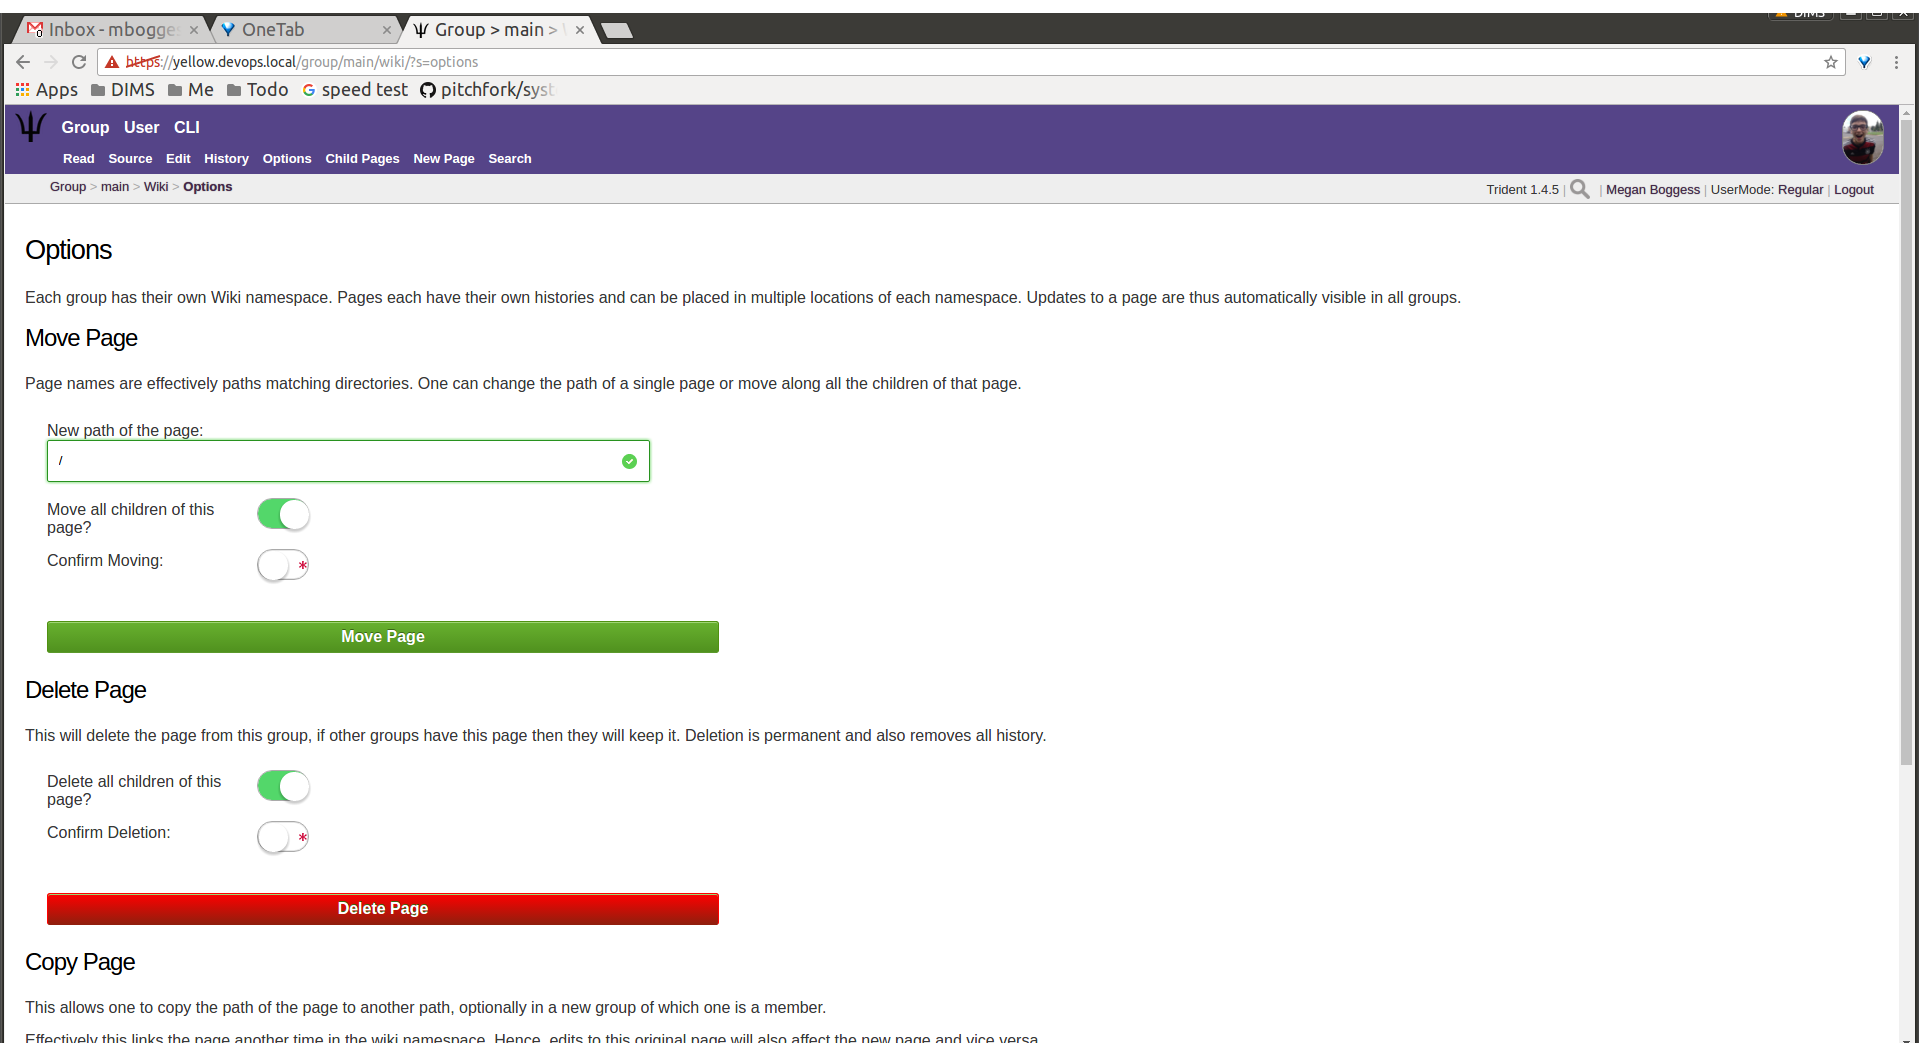
Wiki options, top
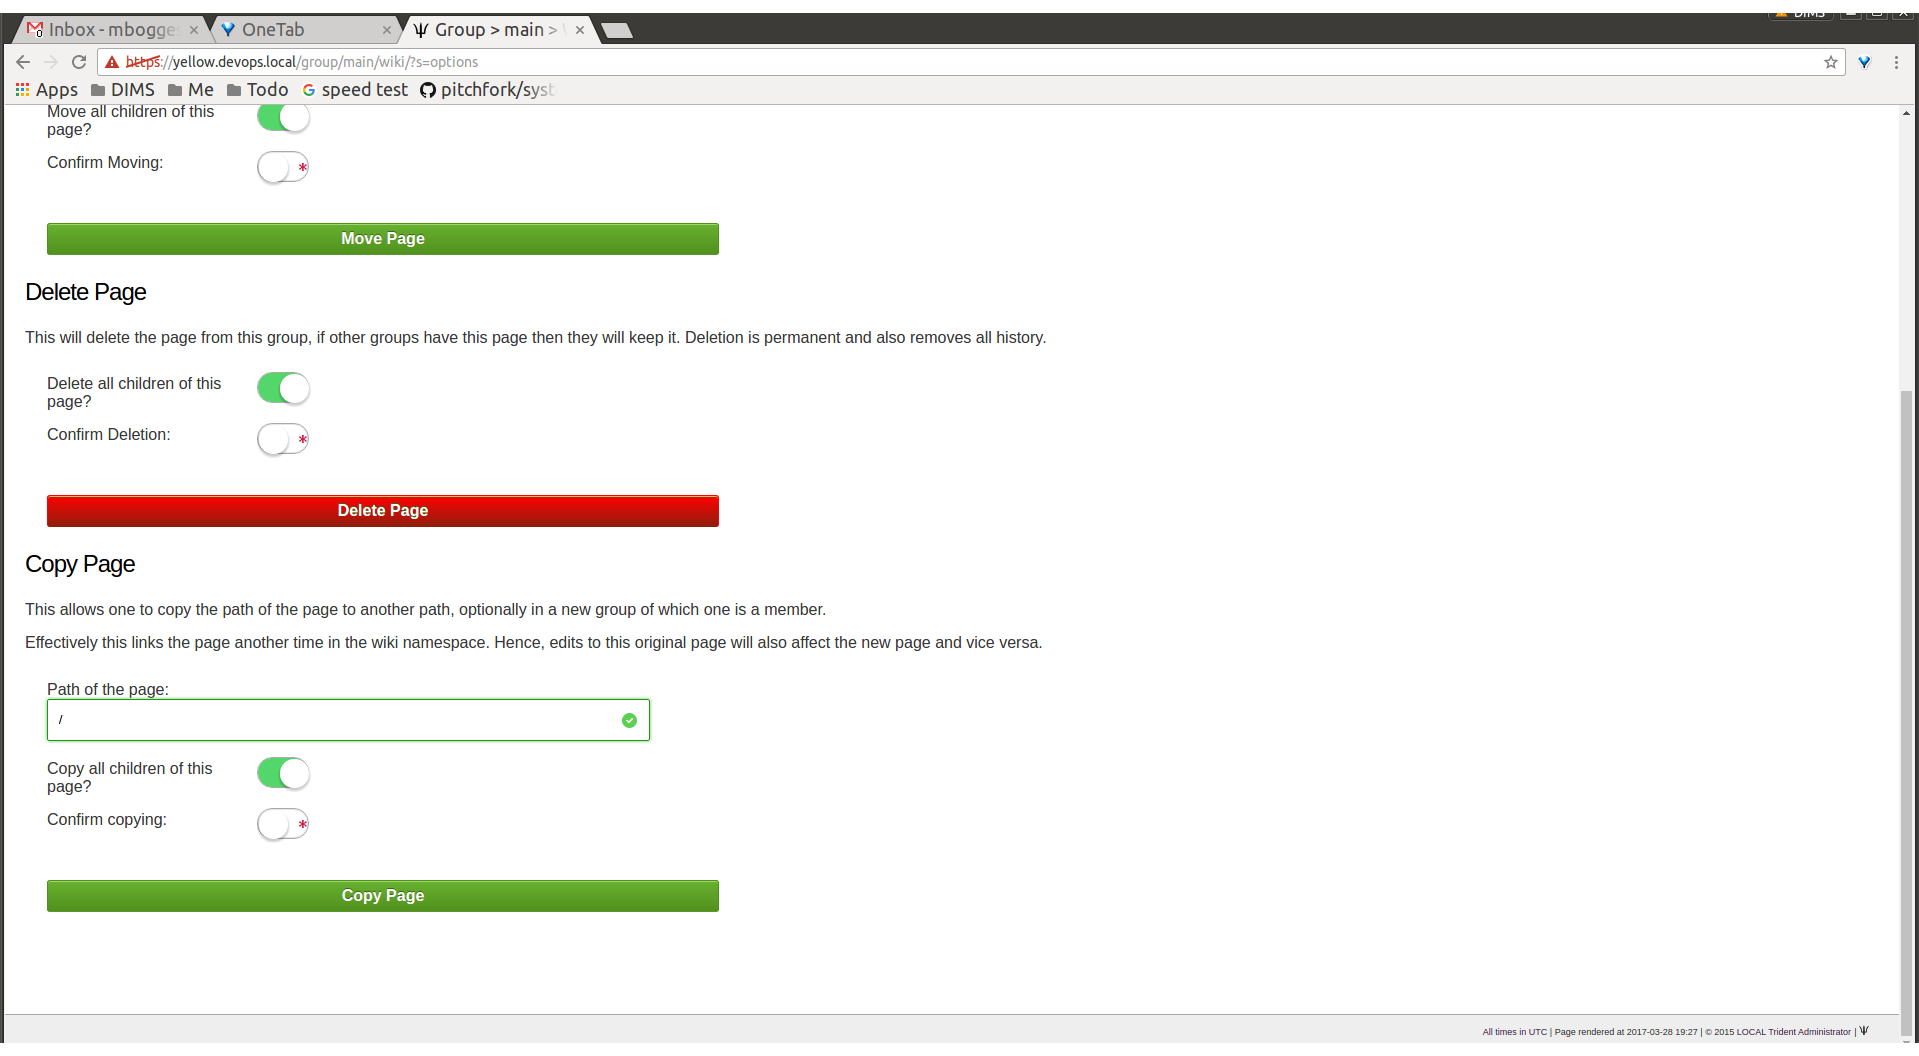
Wiki options, bottom
The Child Pages tab (Figure Empty child pages) lists
any child pages of the wiki. Click on the Path links to
list any child pages of that root page. Click the View
link in the Action column to view any of the child pages.
If no child pages have been added, as is the case in image
Figure Empty child pages, just the root paths will be shown.
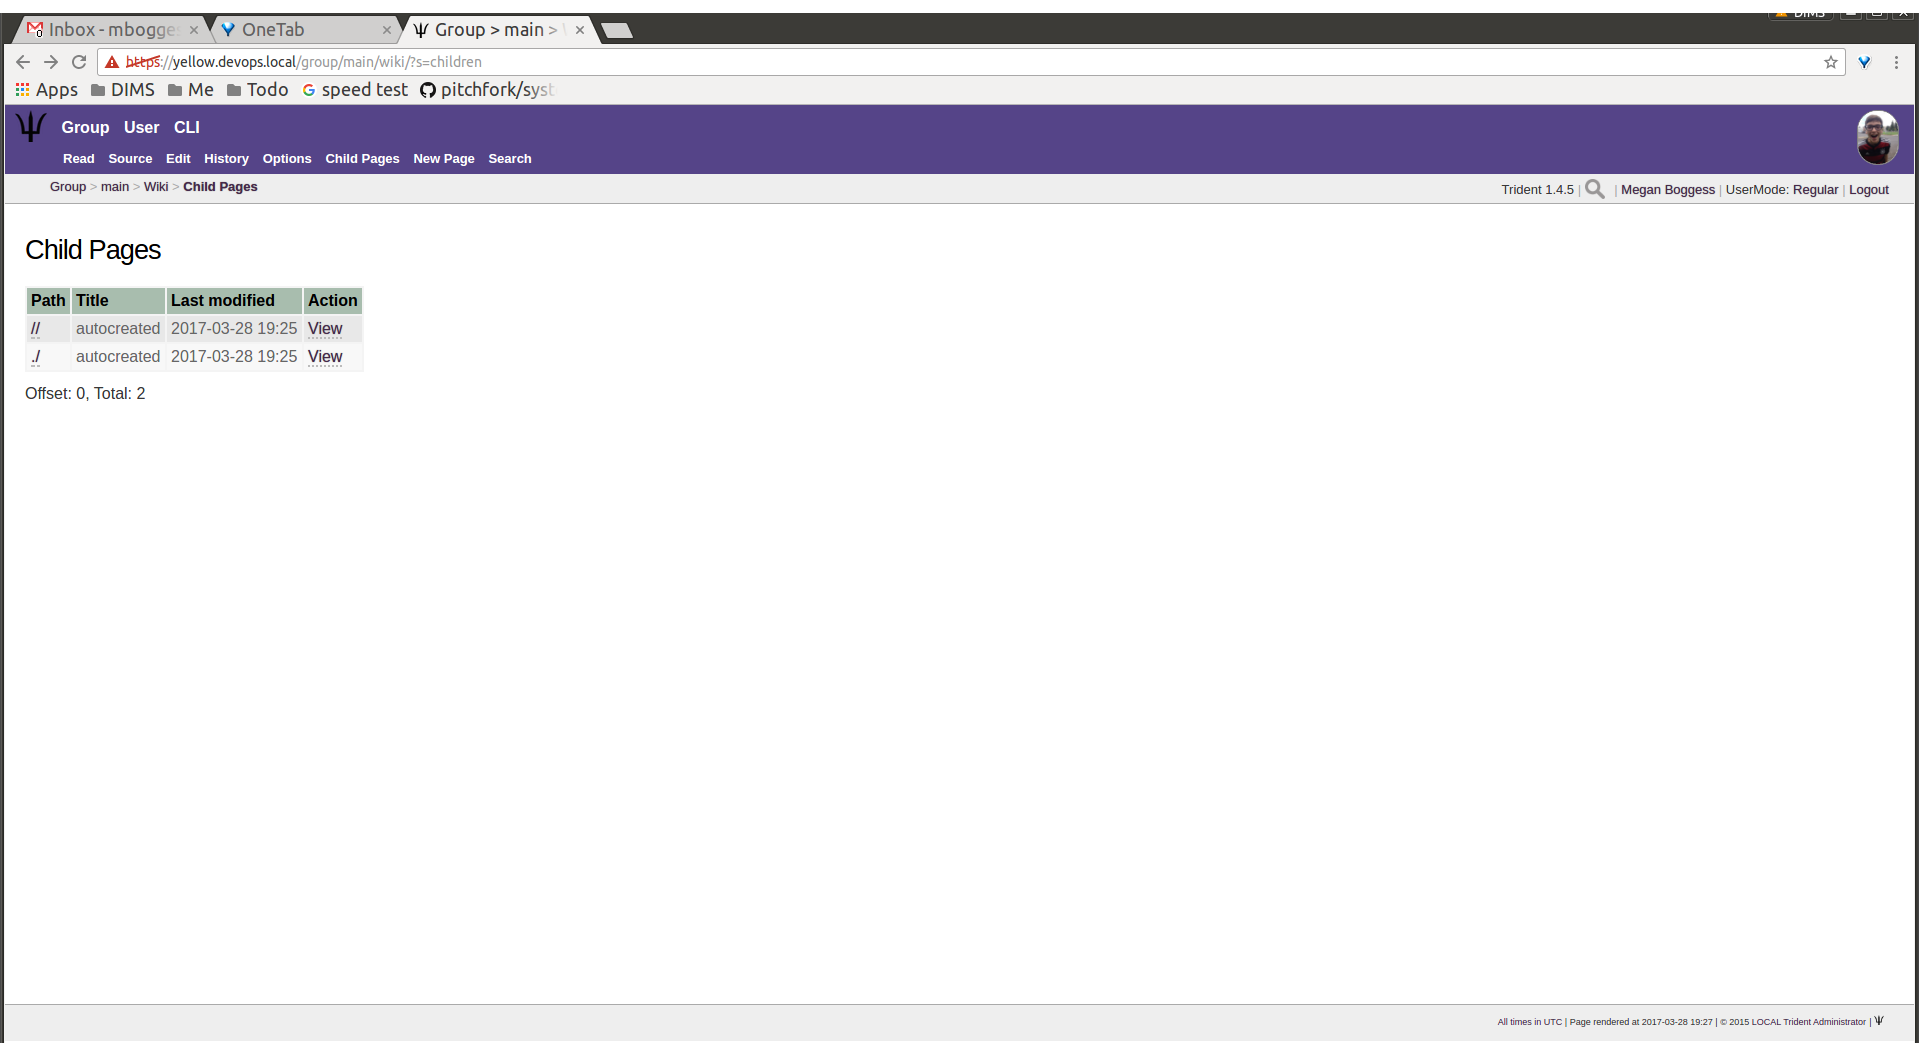
Empty child pages
To add more child pages, go to the New Page tab
(Figure Create a new page). Name the page, then click the
Create New Page button.
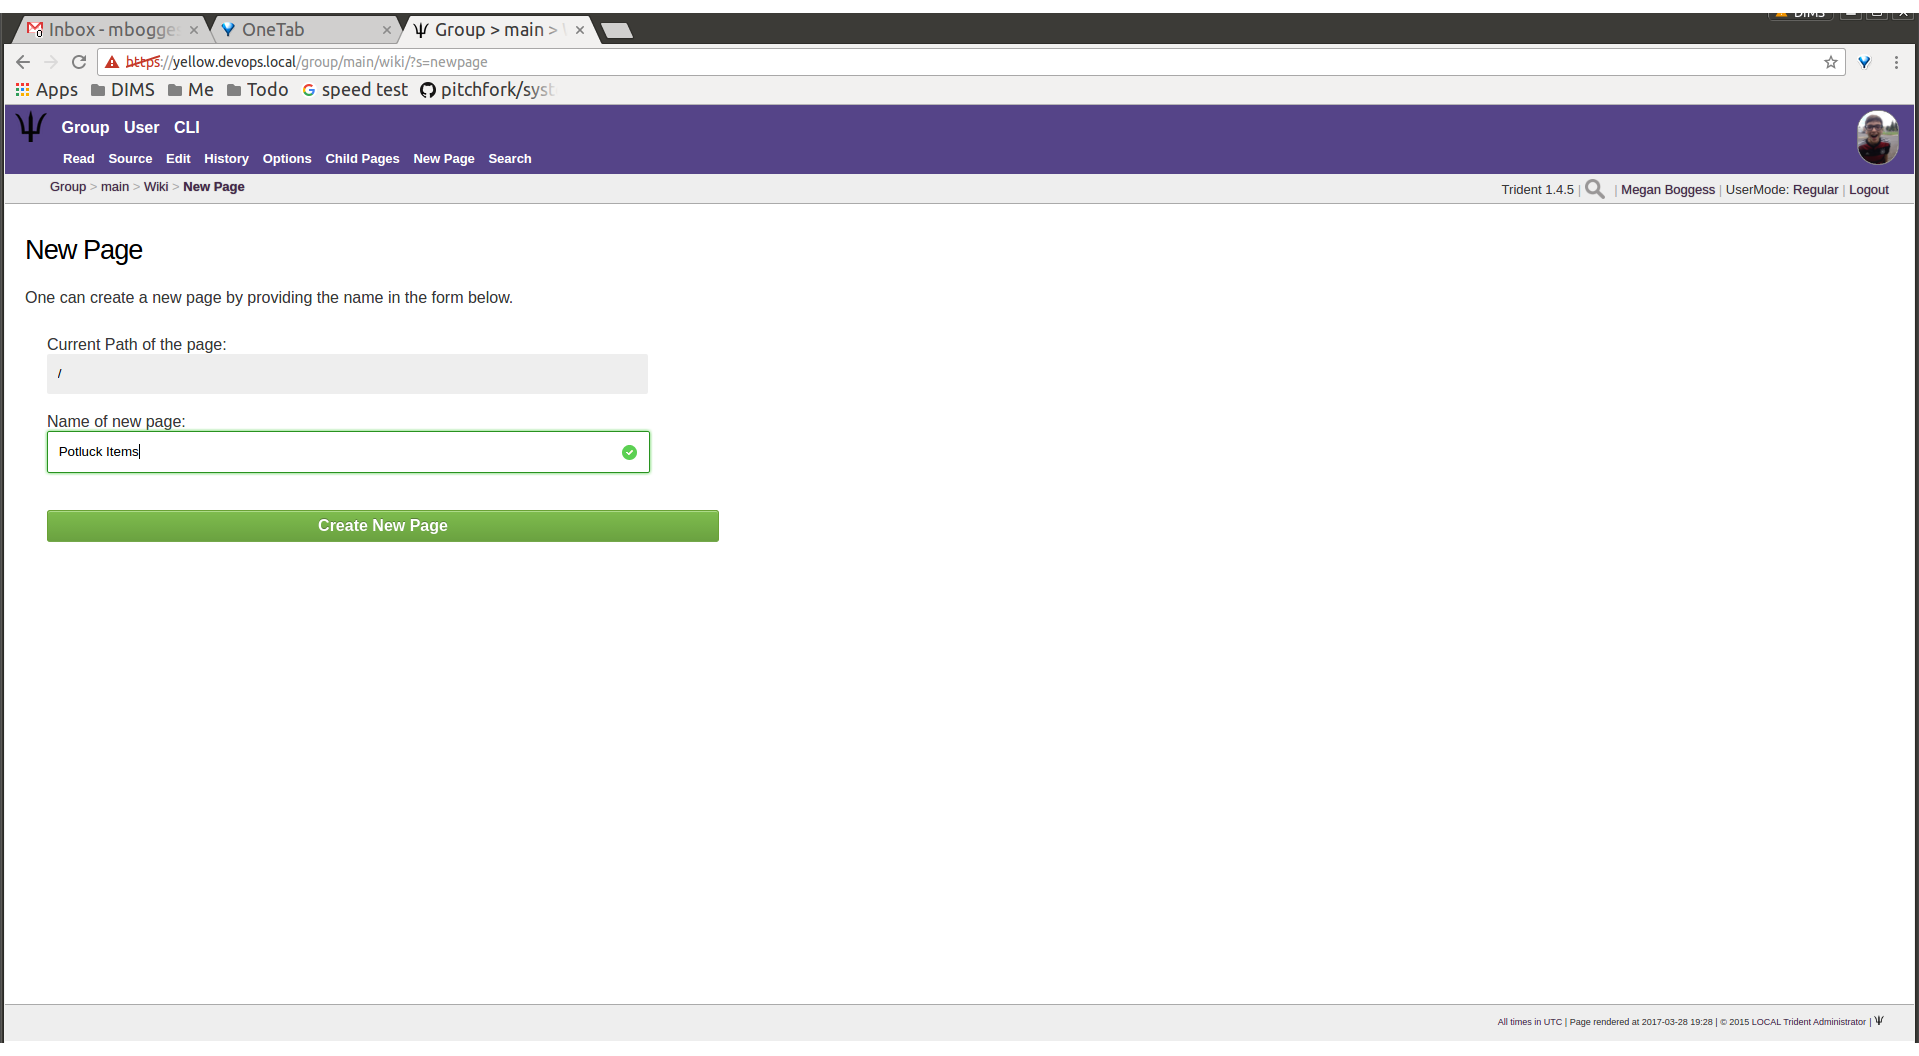
Create a new page
This will open an editor page where the new wiki page can be written (Figure Edit a new page).
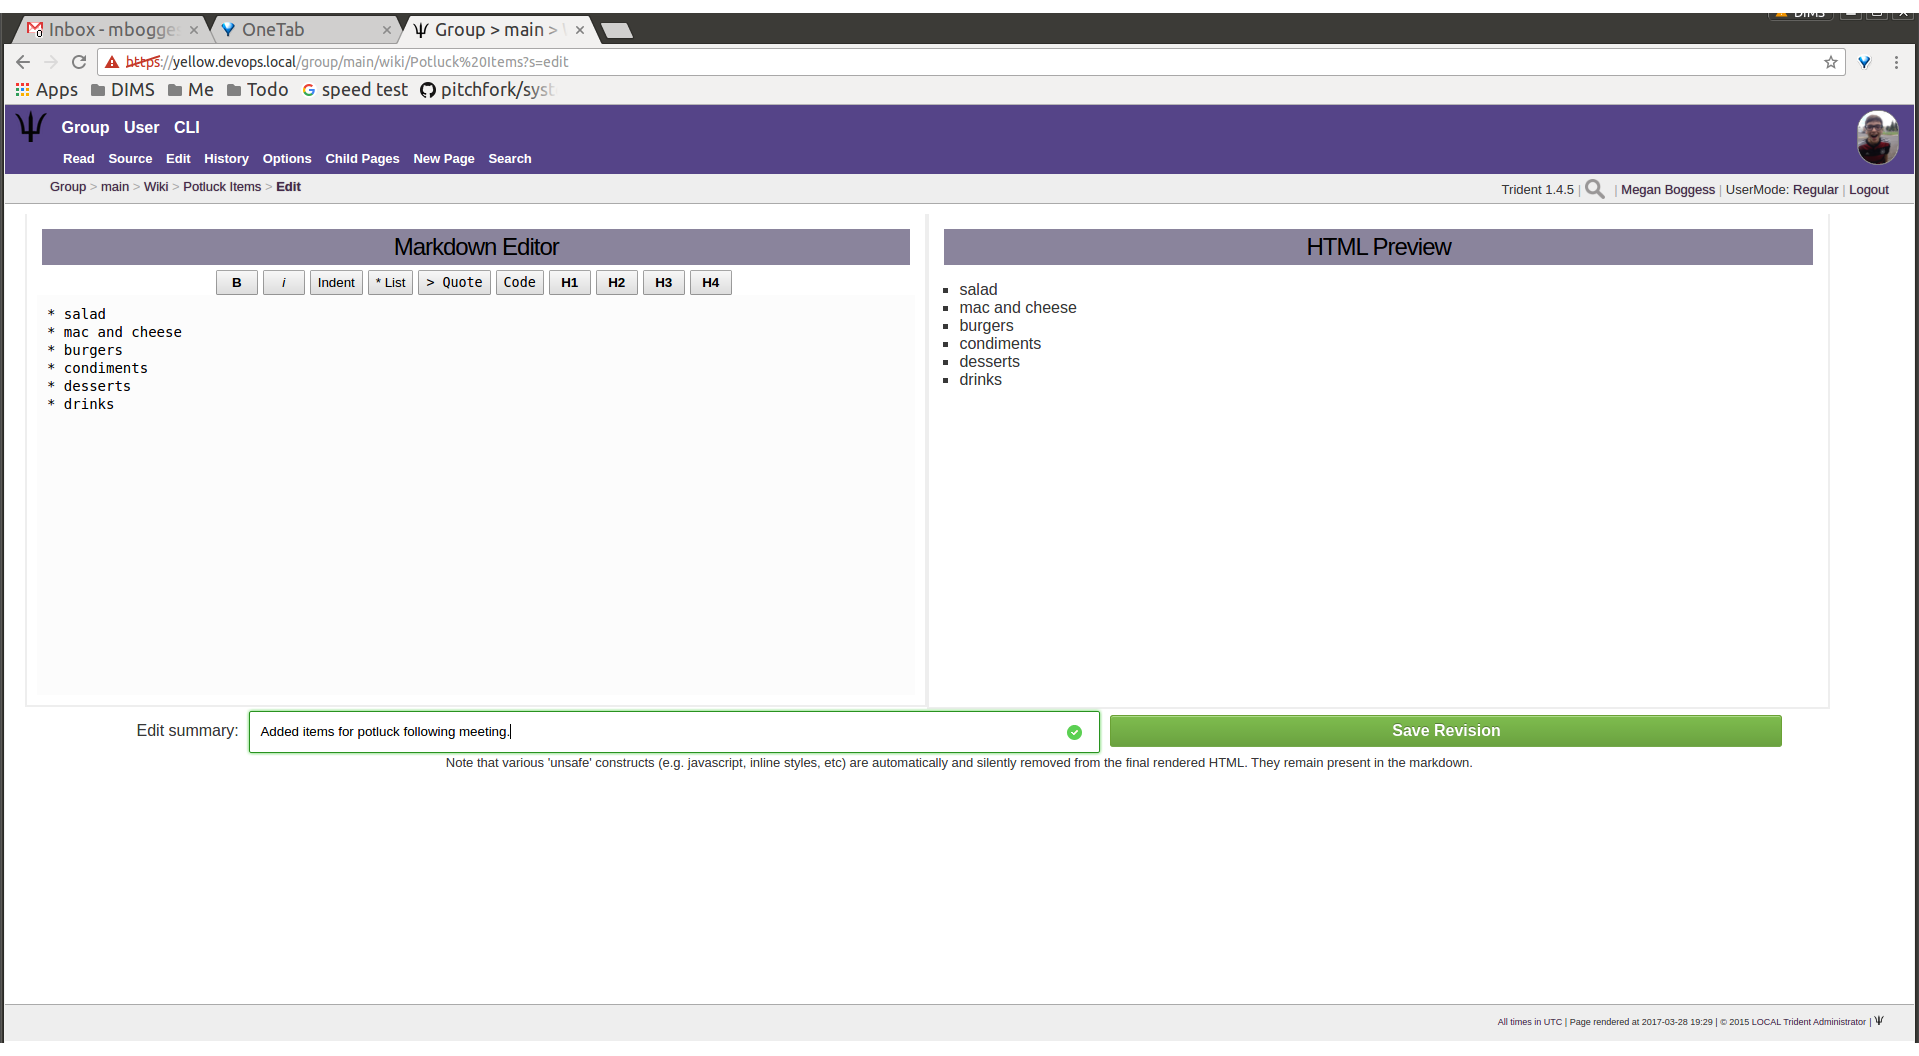
Edit a new page
Once edits are complete, give a summary of the edits in the
Edit
Summary
field, and click the Save Revision
button. This will open a new page, showing the new page
(Figure New wiki page).
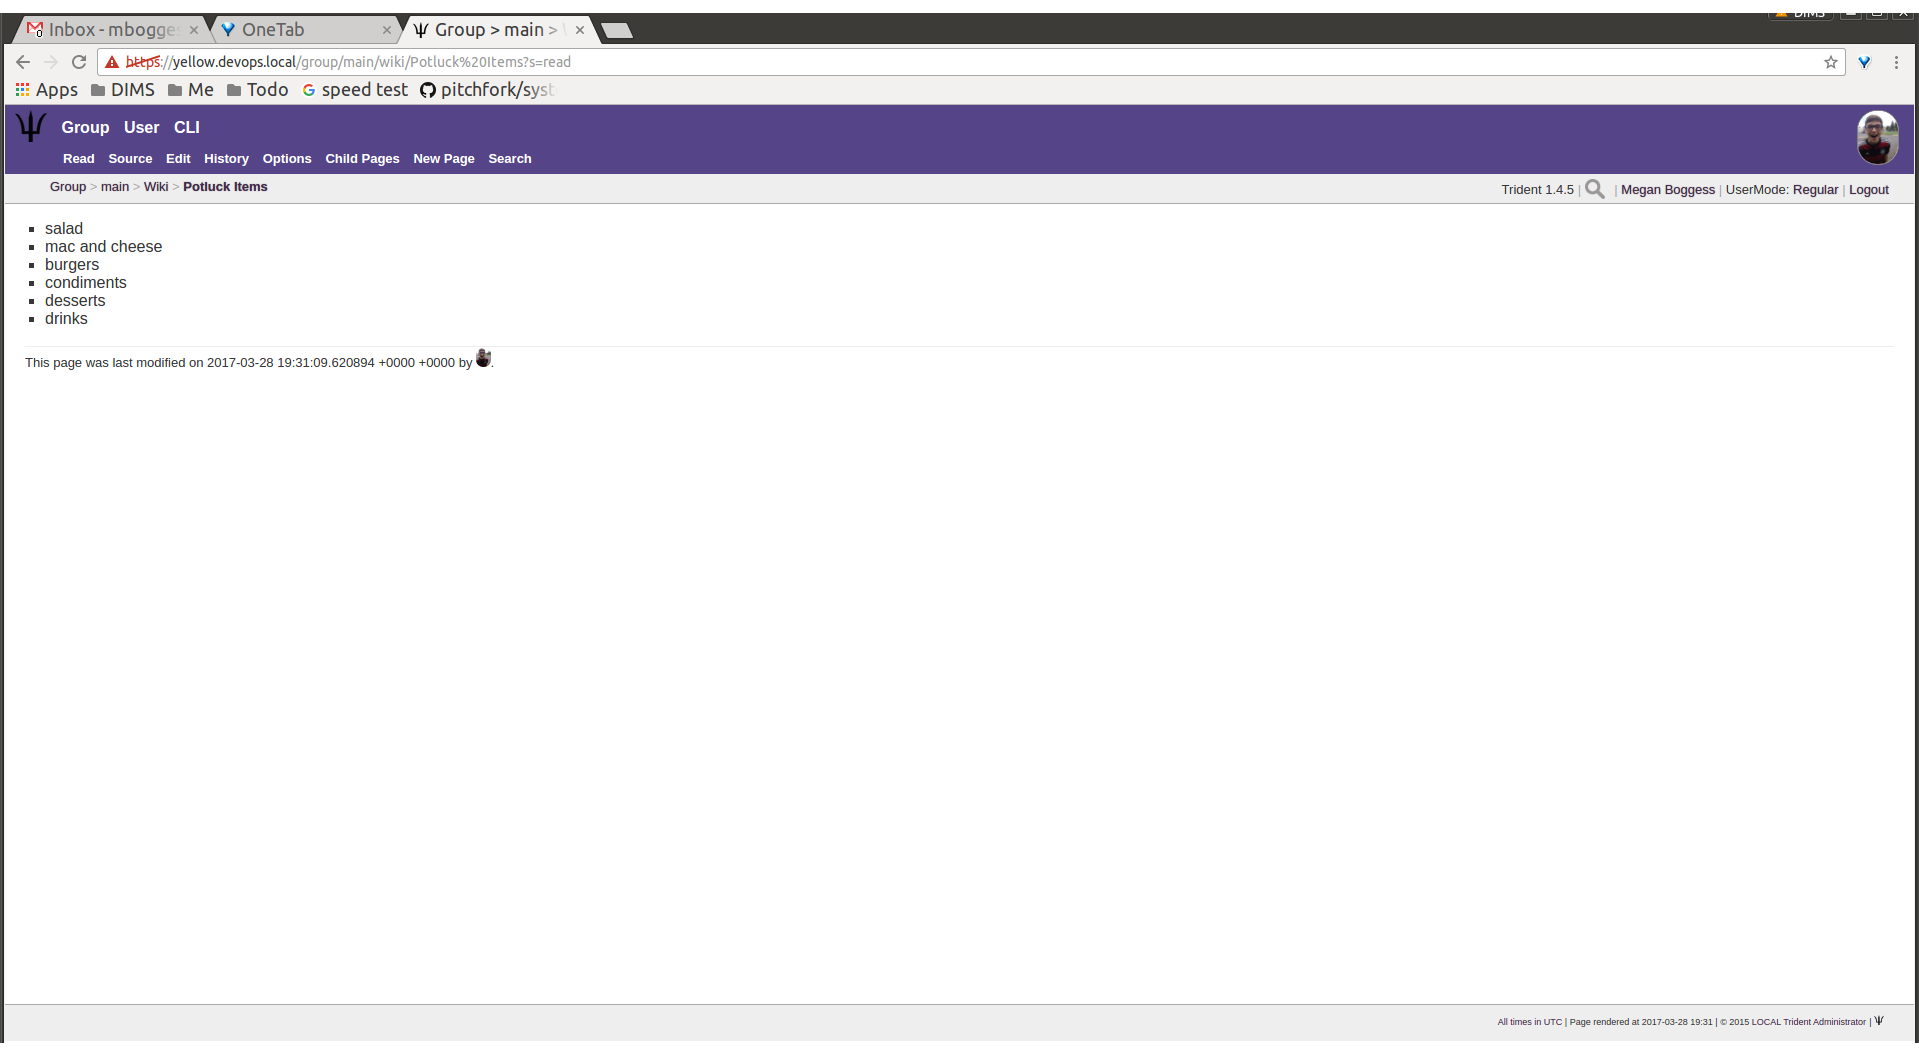
New wiki page
This automatically updates the list of child pages found on
the Child Pages page (Figure Child pages list updated).
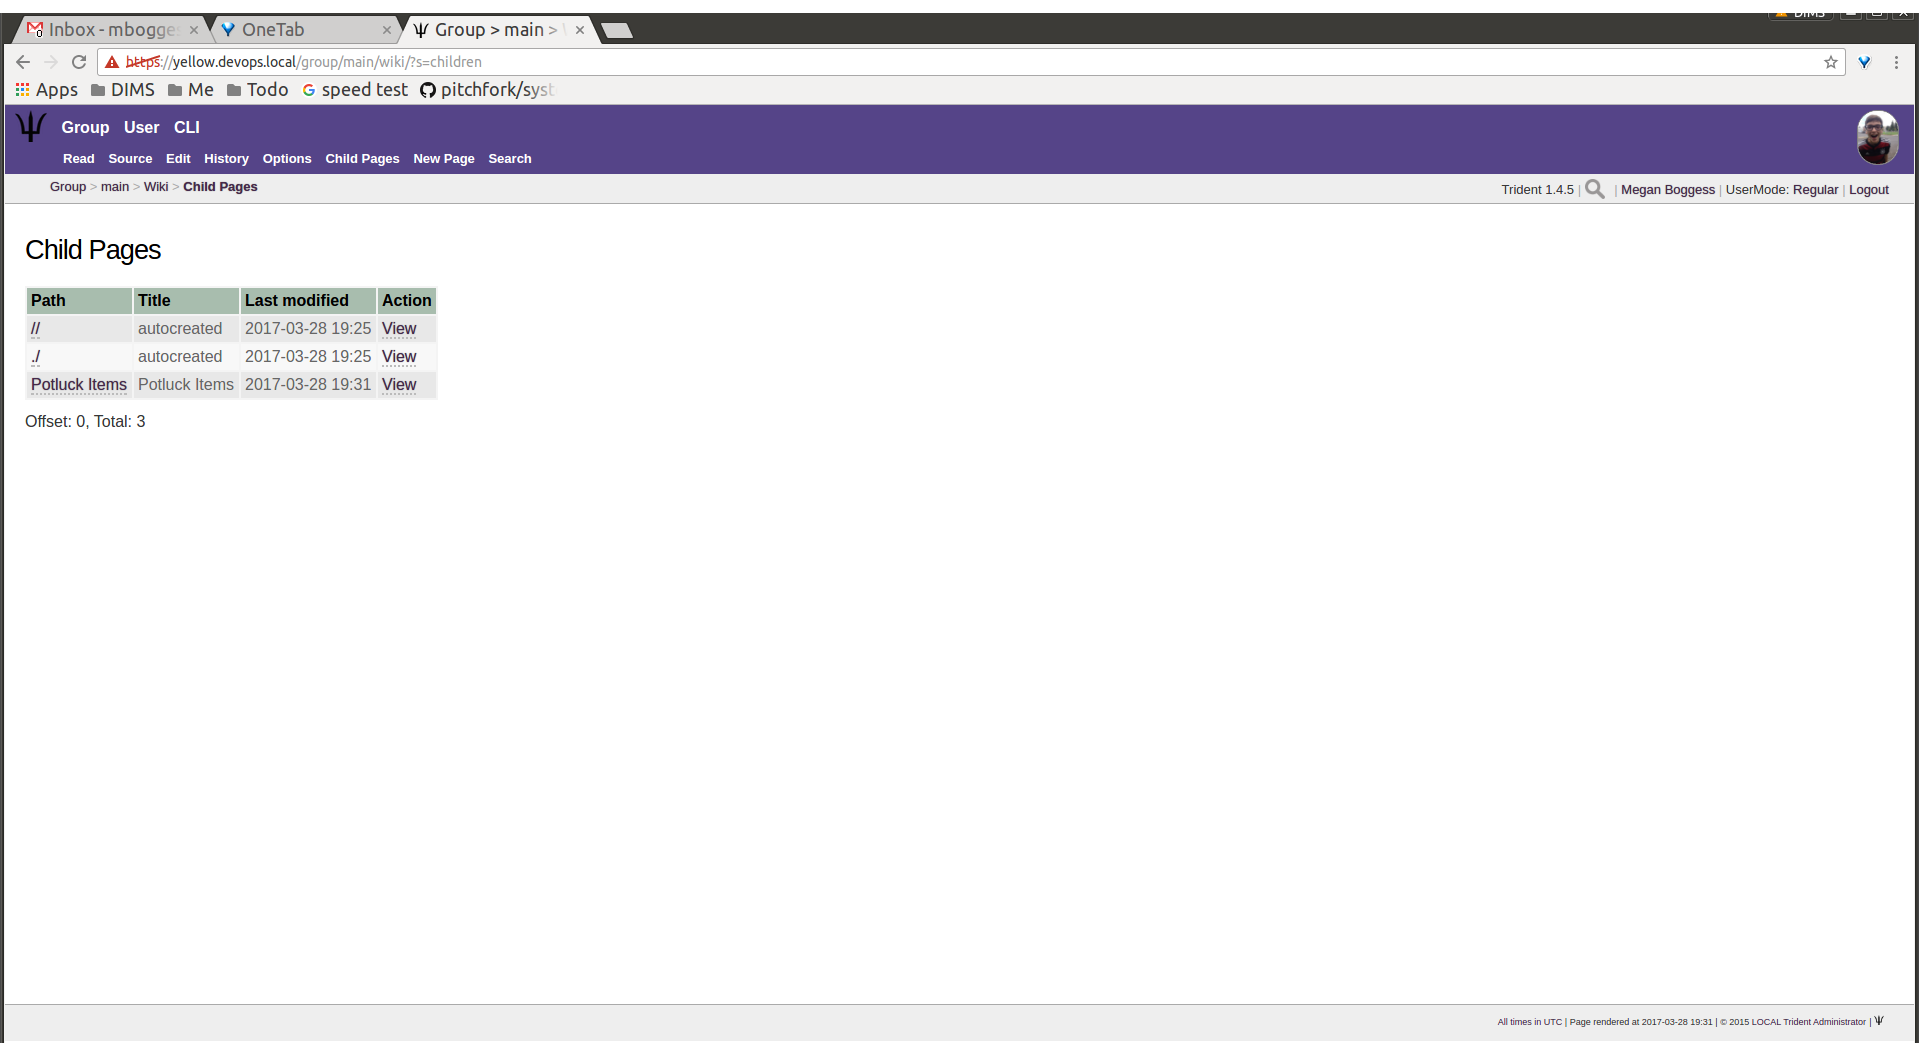
Child pages list updated
Searches through all the wiki pages available to the current trust group is possible (Figure Wiki search).
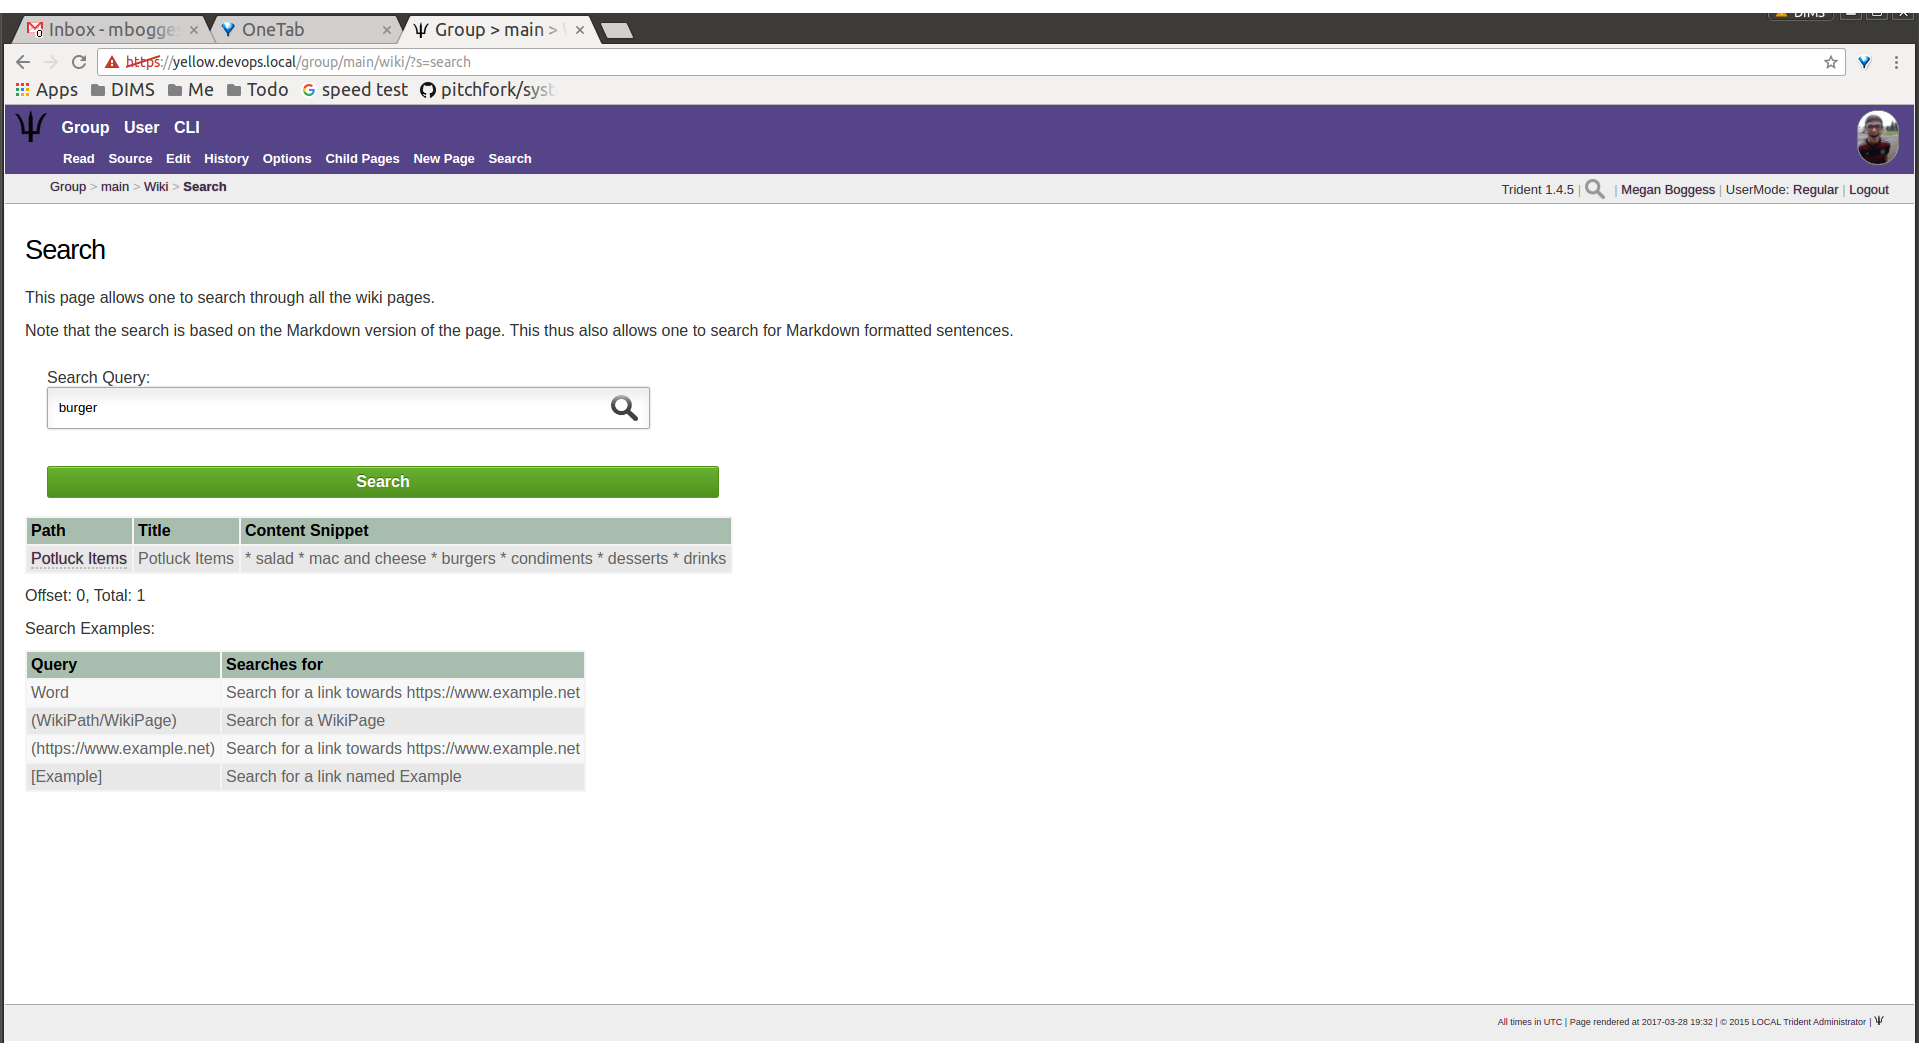
Wiki search
When done editing the wiki, to return to either the user or
group perspective, click the User or Group tabs in
the top row of the page. If returning to a group, chose the
group from the list of available trust groups.
The Files link or tab (Figure Files home page)
organizes files for the current trust group. Members can add
both directories and files, view a list of available
artifacts, and view the available artifacts. If no files or
directories have been added, the Files home page will
only show two buttons, an Add a new file button and an
Add a new directory button. Otherwise, it will show a
list of available directories, as well as the Add buttons.
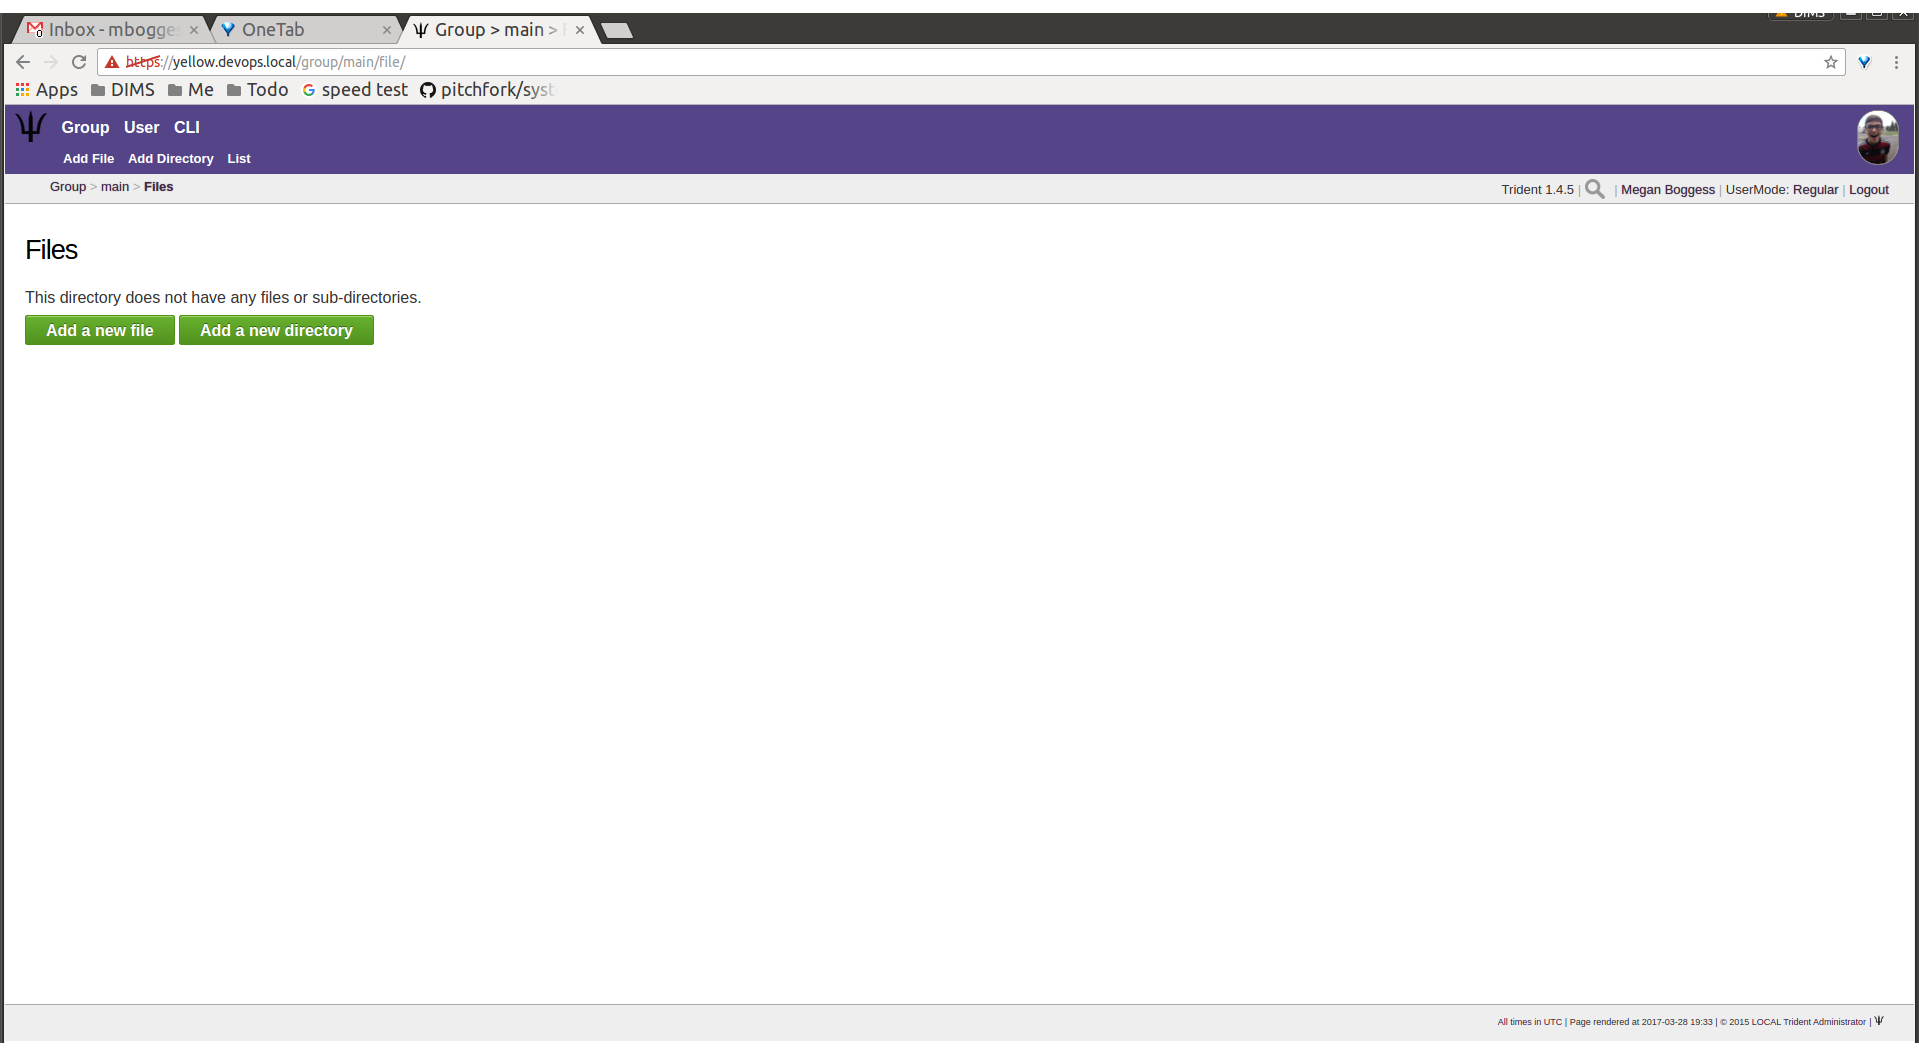
Files home page
To add a directory, use the Add Directory tab
(Figure Add directory) in the second row at the top of the
page, or the Add a new directory button from the
Files home page.
To add a new directory, the filepath of the new directory is
required and a brief description of the directory is
optional. Then click the Create new directory button.
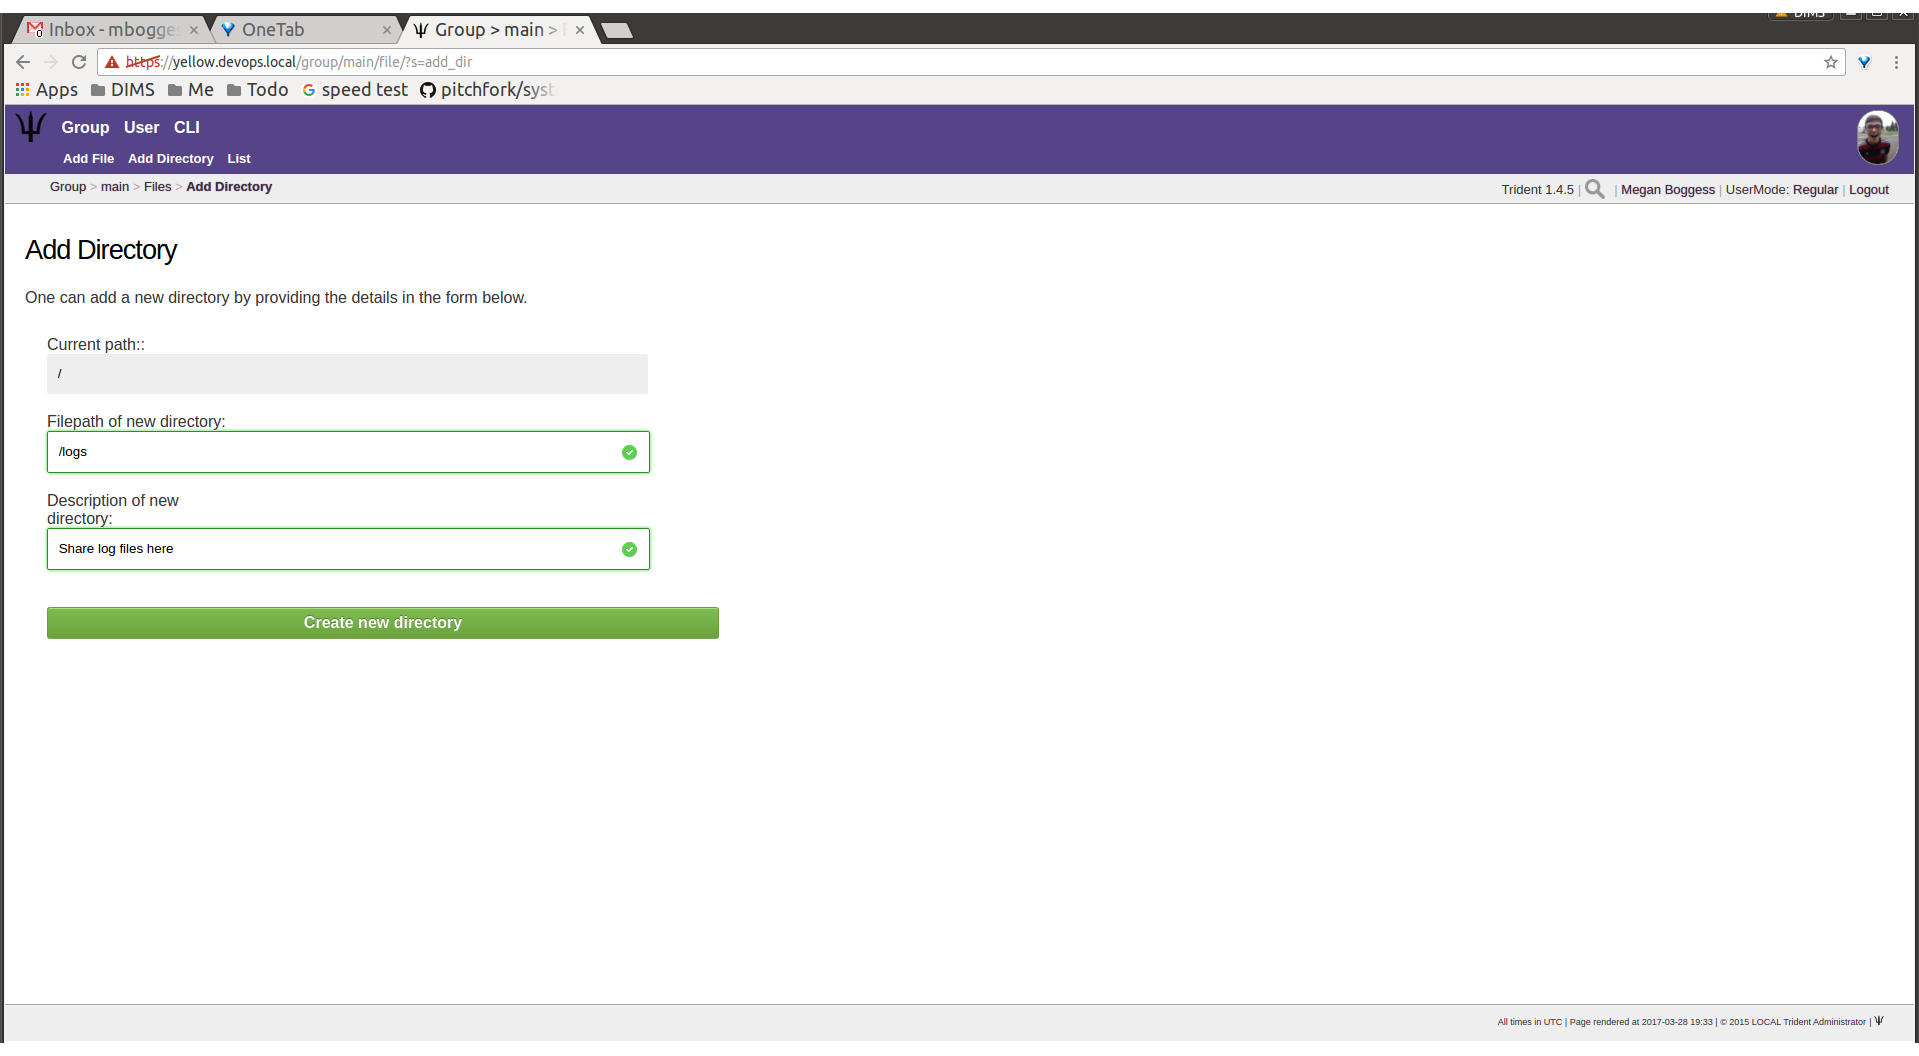
Add directory
The home page list of directories will be updated accordingly (Figure Available directories updated).
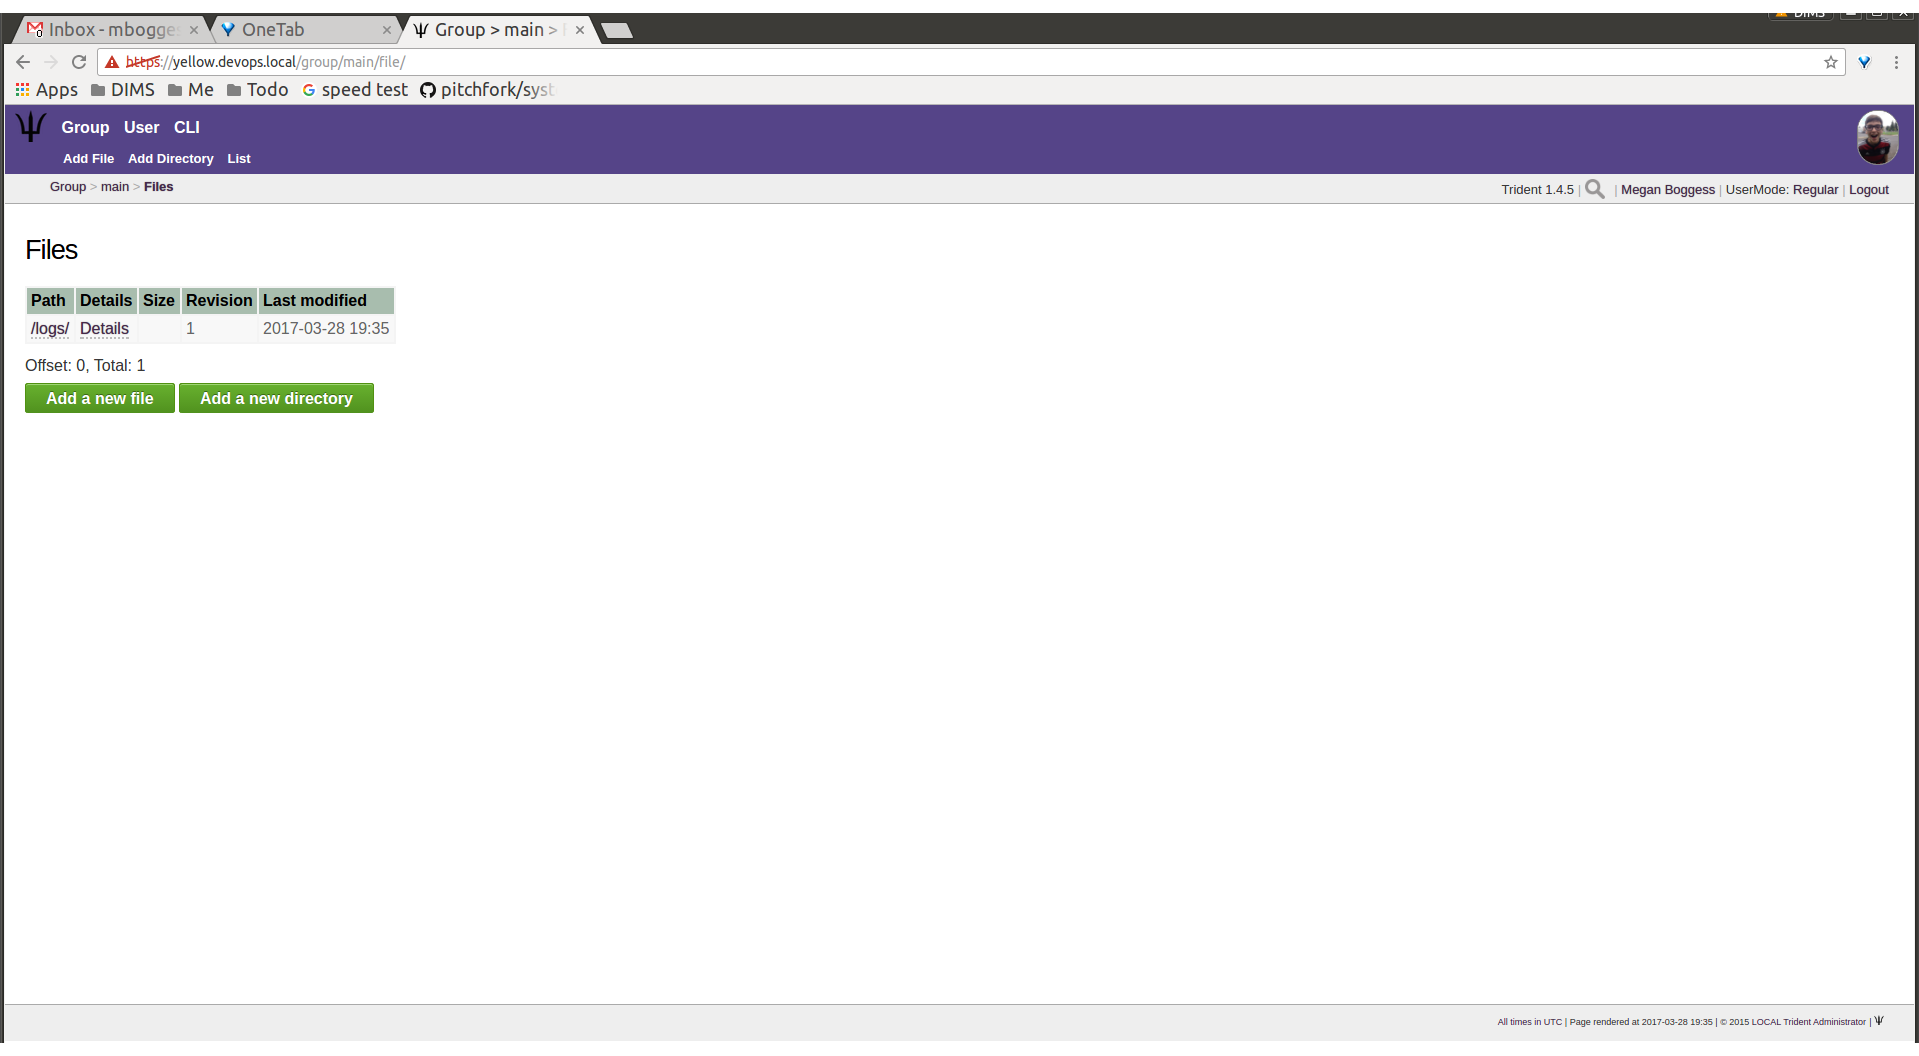
Available directories updated
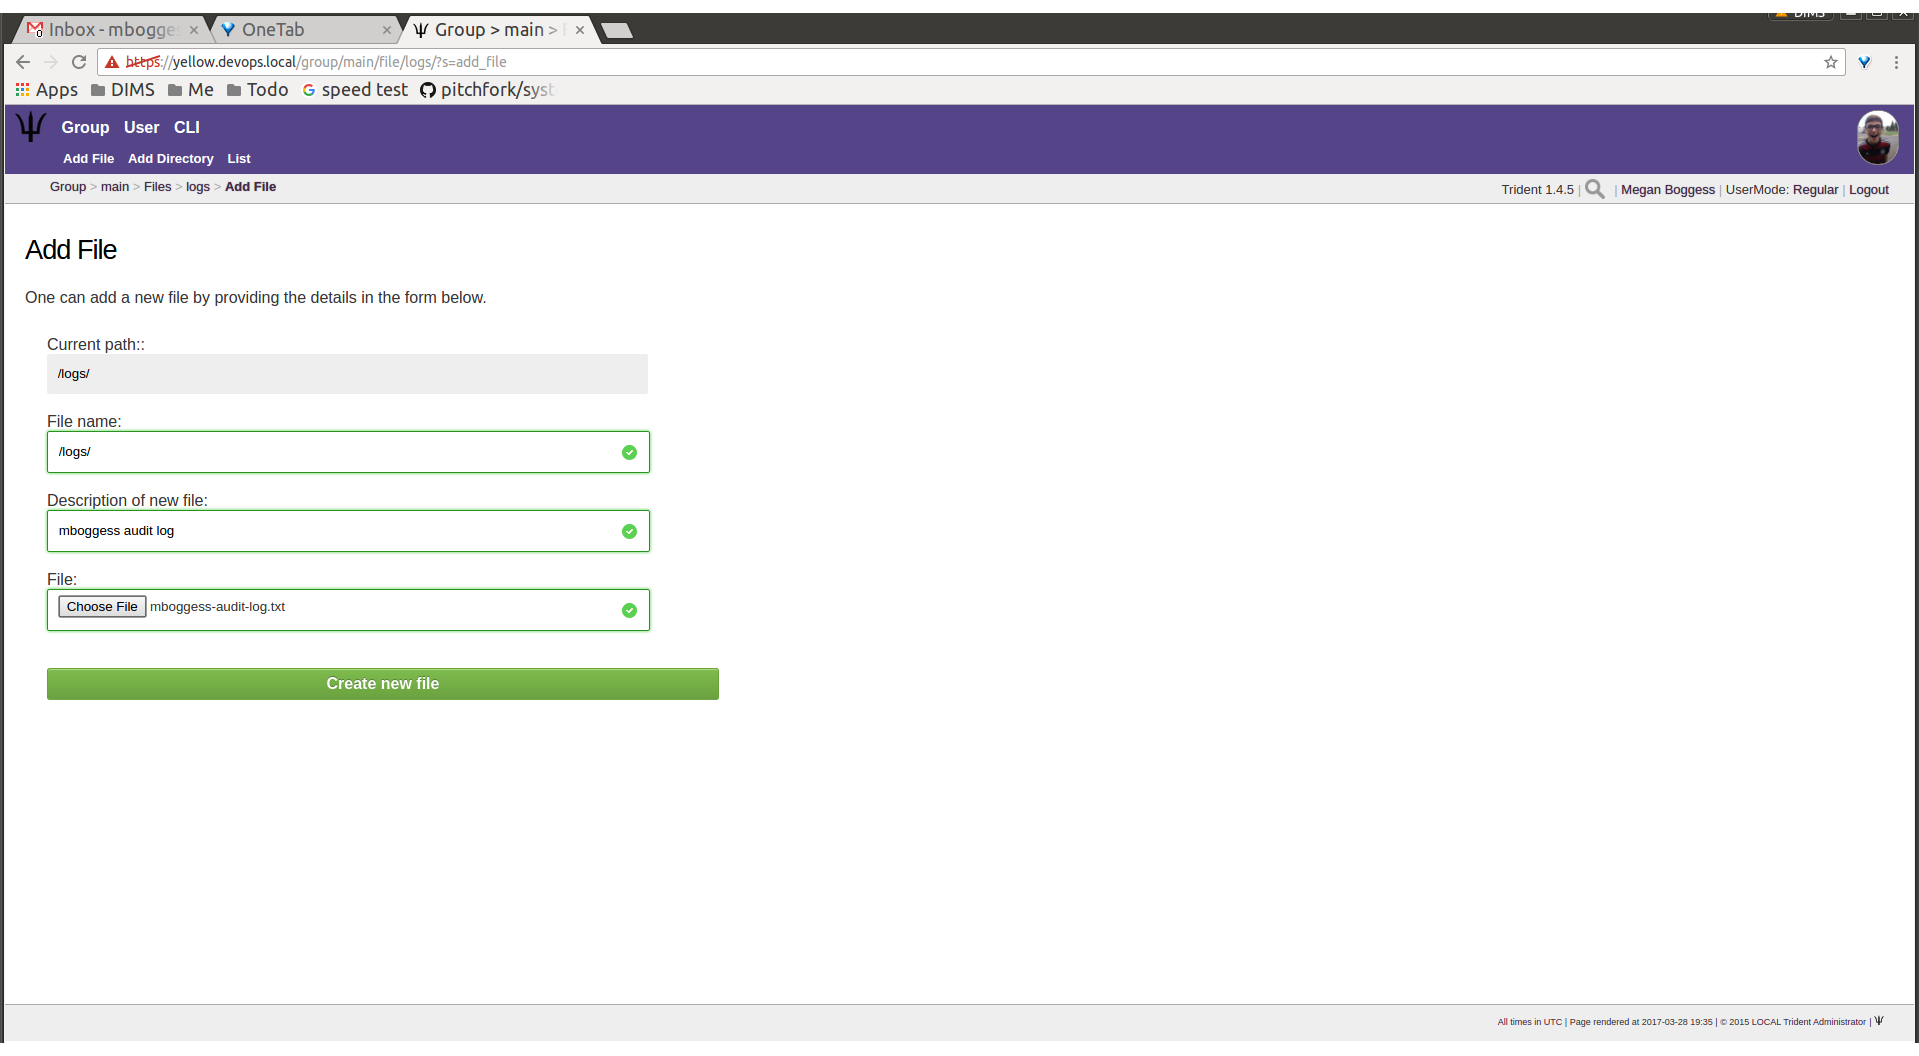
To add a file, click either the Add File tab or the
Add a new file button from the Files home page. This
takes opens a new page. Name the file, give a description,
and choose the file from the local filesystem. Then, click
the Create new file button (Figure Add a new file).
Add a new file
Once submitted, a new page will show that the file has been uploaded and to which path. It also gives some statistics about the current directory and files (Figure Confirmation of a new file).
Confirmation of a new file
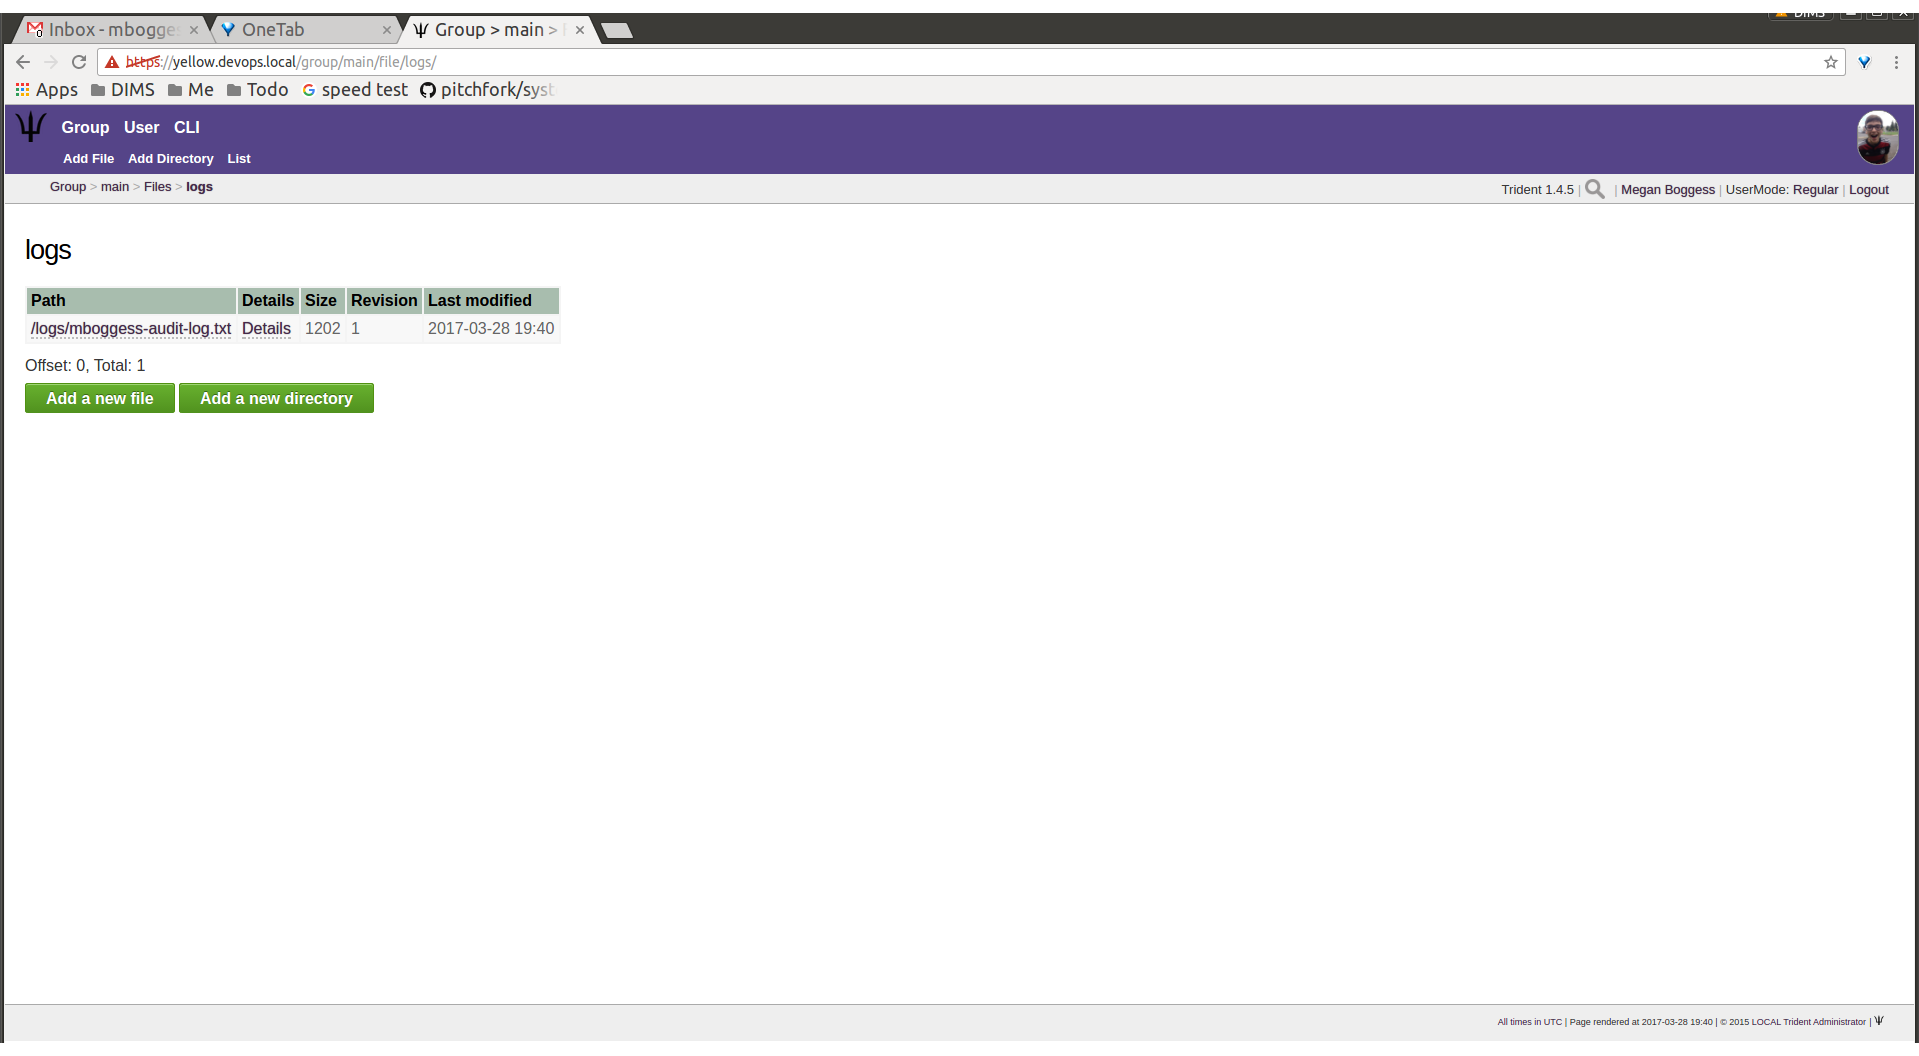
The Files home page is also updated, but it is a little
subtle when only a file has been added
(Figure Home page file add confirmation).

Home page file add confirmation
The only difference is that the ‘Total’ count has gone up by
one. If a new file is added to the root path, the file
itself would show up, and the count would increase. Since
the added file is stored in the logs directory, it is
hidden on this page. Click the Path link for any
subdirectories to get a list of files or more subdirectories
in that directory.
The List tab opens the Files home page, listing
available directories and files.
Again, to return to group or user settings, click the Group
or User tabs in the top row of the page.
2.3. Vouching for Trust Group Members
For a new user to become a member of a trust group, she must be vetted by existing members of the trust group. This is accomplished by other vouching for the prospective new user.
Caution
In a trust group where very sensitive information is shared, the vouching process is a serious matter that is not to be taken lightly. When you vouch for someone, that should mean that you personally know the person, have met them in person, have worked with them on a project demanding trust so you have first-hand experience with them and you believe trust is warranted in that person. If this person should violate the trust of the group by improperly sharing or exposing extremely sensitive information, not only could they be kicked out of the trust group, but anyone who vouched for them could also be removed (if the violation was severe enough.) A breakdown in trust in a group that shares highly sensitive information can potentially damage the trust fabric of the group such that the effectiveness of the group is lost.
Each trust group may have unique requirements about the number of vouches a user must obtain before she will be permitted to become a member of the trust group. For our training guide, only one vouch is required for membership. Most groups will have more significant requirements.
Vouching is not required only for member admittance, but vouches are recorded and available for visualization or for network analysis to identify cliques, strength of the trust network, etc.
There are three ways for a trust group member to vouch for
another member: vouch for a member through the member’s
profile, nominate a user through the group’s profile, and
use the Vouching Control Panel.
The first way to vouch for a member is through the member’s profile. This means the user must already be a member of the trust group, and has already been vouched for enough times to meet the current trust group’s requirements for membership.
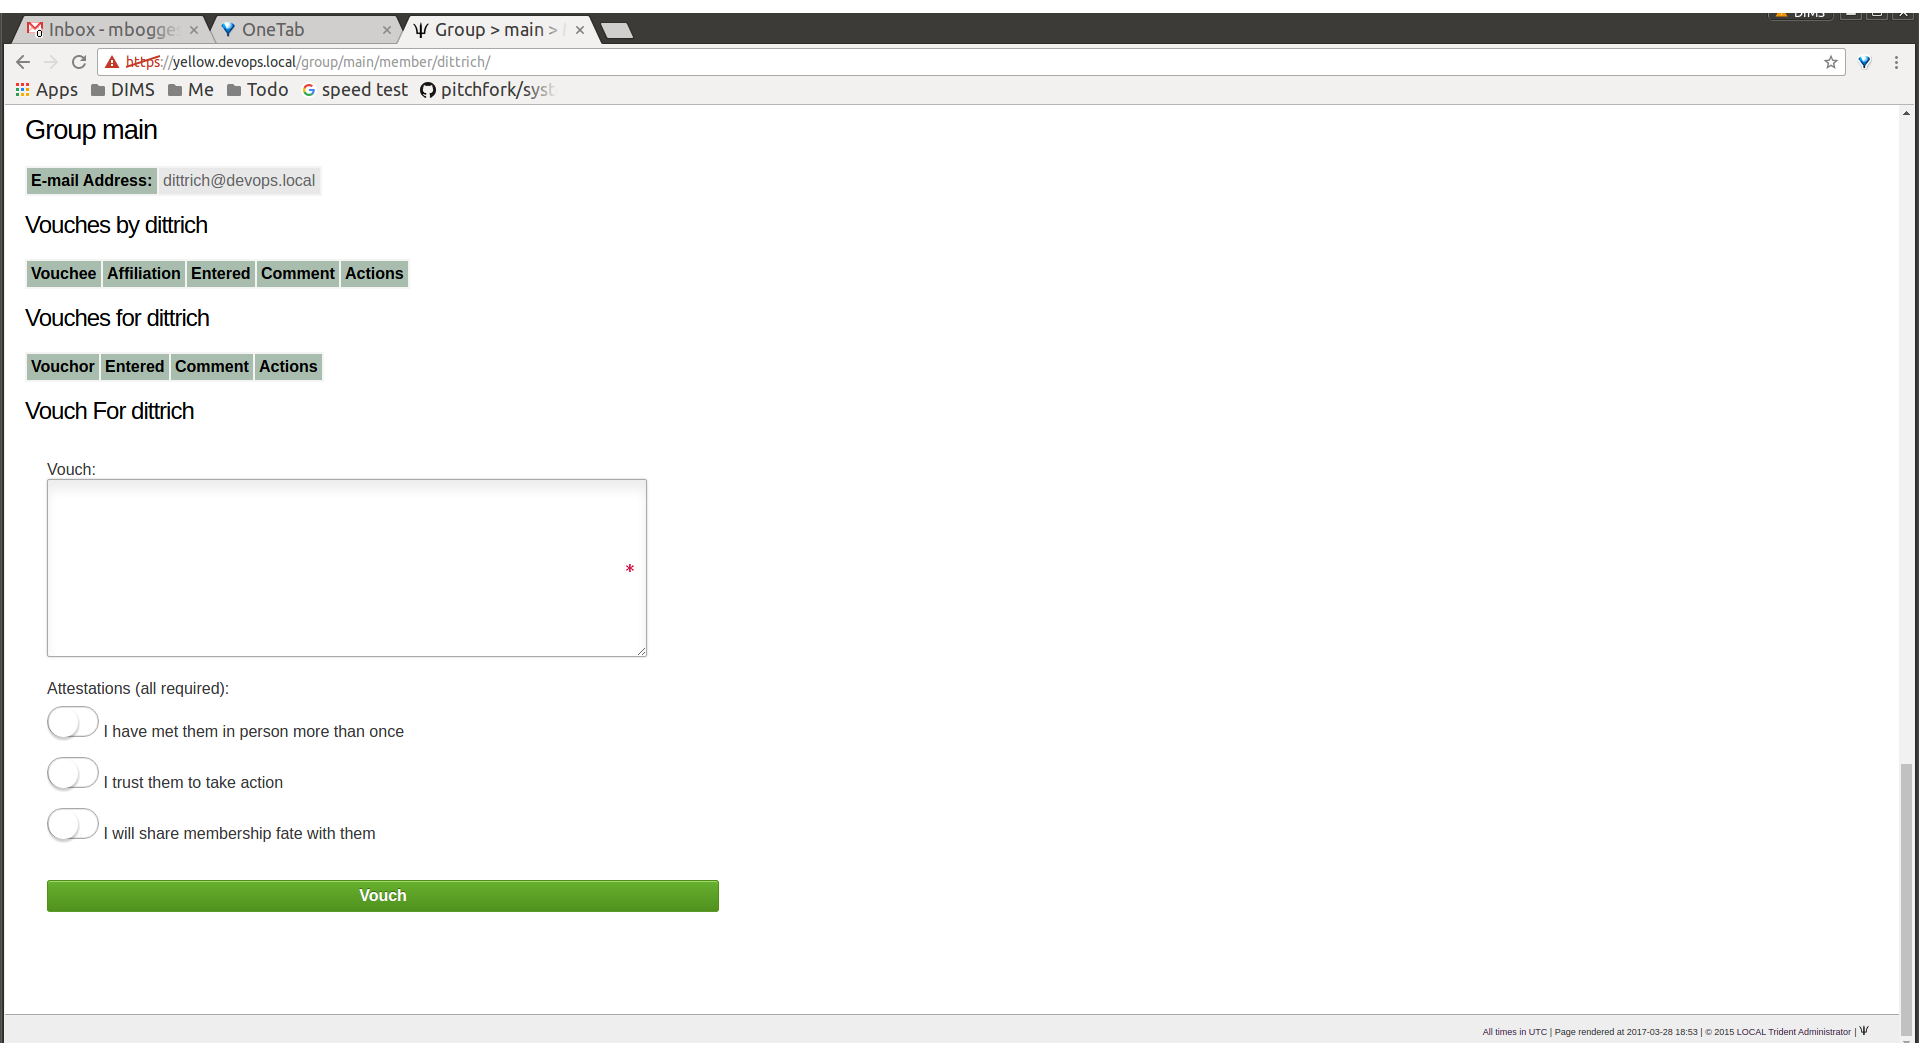
To see what vouches have already been made, go to a trust
group’s main page and click the Vouches tab. To start
vouching for a member, click the Members tab or link,
then choose the user. This opens his profile page. Scroll
all the way to the bottom of the profile, and there is a form
section where a comment can be written regarding the vouch
to be made and attestations about relationship with the
member (Figure Member profile, blank vouch section).
Member profile, blank vouch section
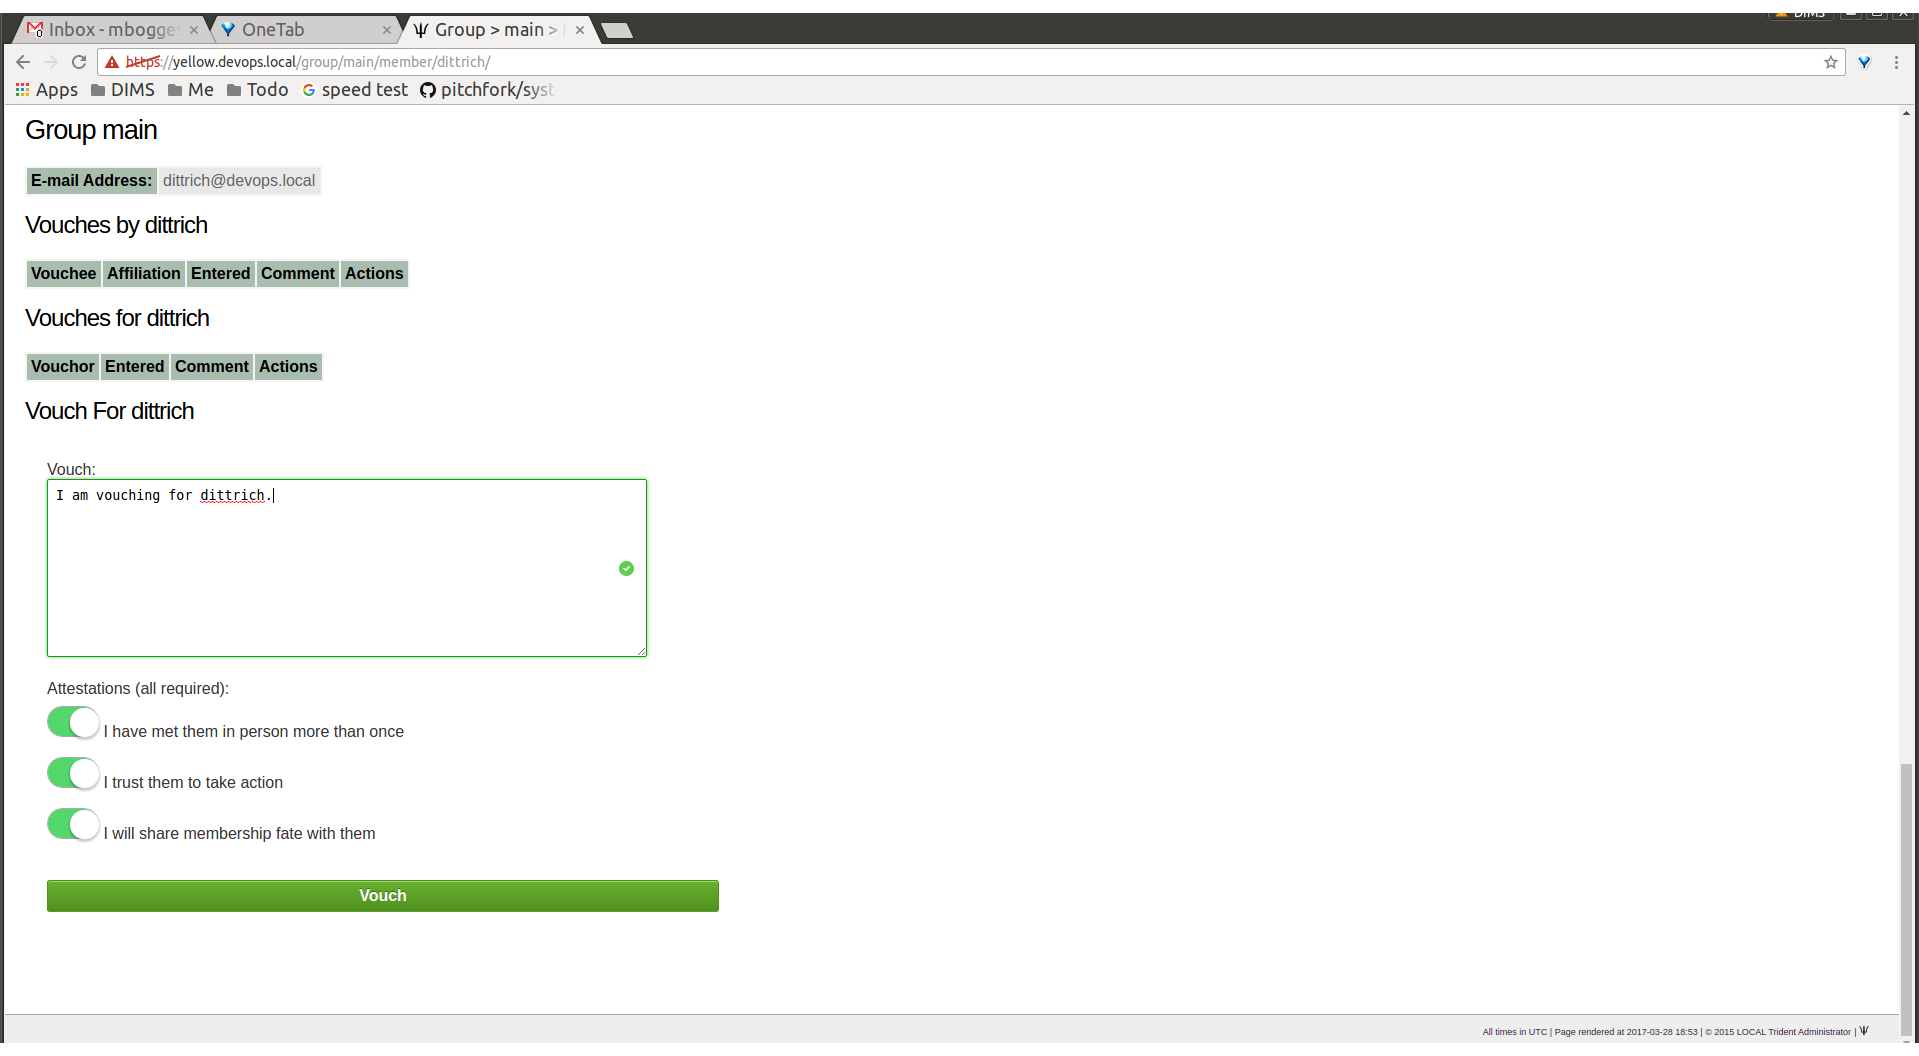
Fill in the form, then click the Vouch button
(Figure Member profile, filled-in vouch section).
Member profile, filled-in vouch section
Once a vouch is recorded, it will be visible on that member’s profile forever (though vouches can be updated, or deleted it, if necessary). Outbound vouches from the member are listed right above inbound vouches to the member (Figure Member profile, vouch made).
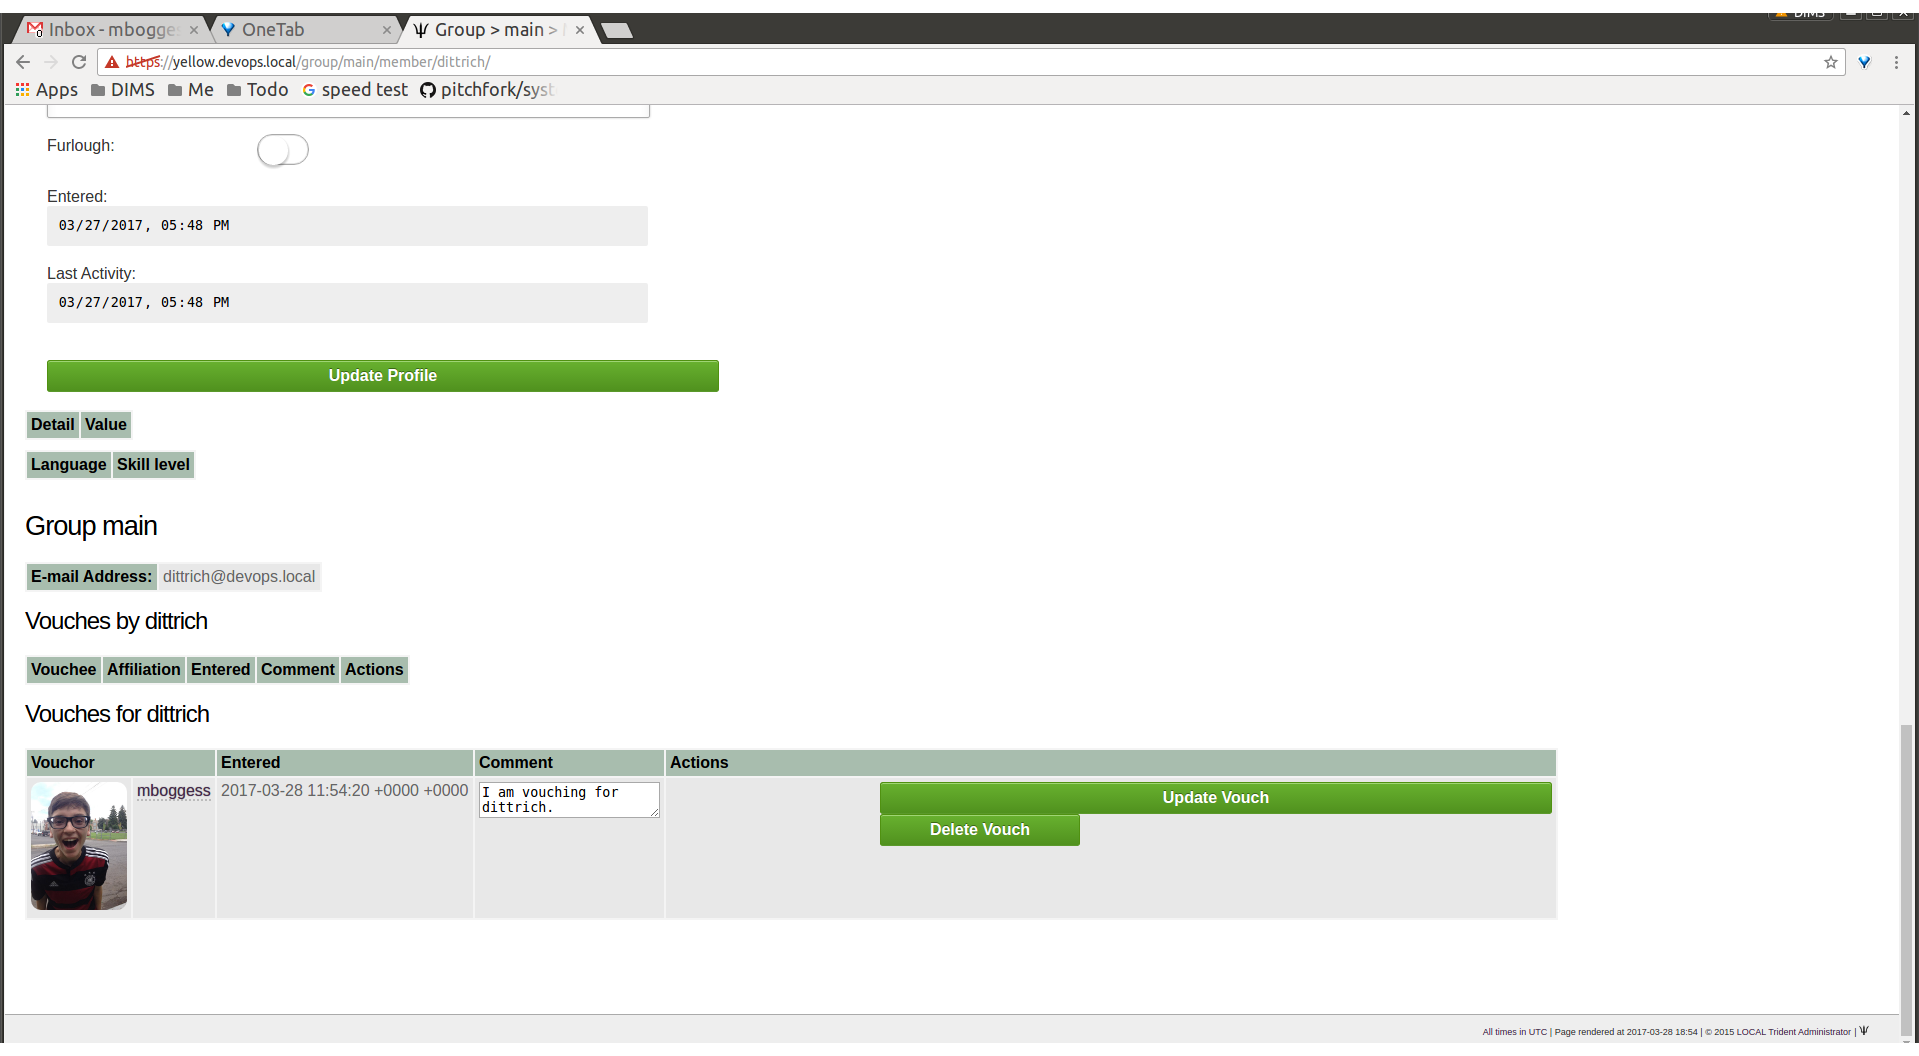
Member profile, vouch made
The typical way to start the process of onboarding a new trust group member
is to nominate them. Go to the home page of the group to which the user
should be nominated. The Nominate tab opens a page which to start the
process of nominating a user to the trust group. First, the user must exist in
the system. Then, search for the user by the email address associated with
their account.
Attention
Standard practice is to not mention the existence of the trust group to the prospective member before you nominate them. Should they not receive sufficient vouches to be added to the trust group, it will be an uncomfortable conversation trying to explain why you were not able to get them into the group. Some in the trust group may feel like a degree of breach of trust may have occured from disclosing the existence of the trust group to the public. If someone in the group negatively vouches (i.e., raises a red flag about the trustworthiness of the nominee), it may necessitate an internal policy discussion to adjudicate the situation, which can make the nominee feel slighted and cause a great deal of consternation or bad feelings.
Fill in the email in the Search email field, and click
the Search button (Figure Search for a user to nominate).
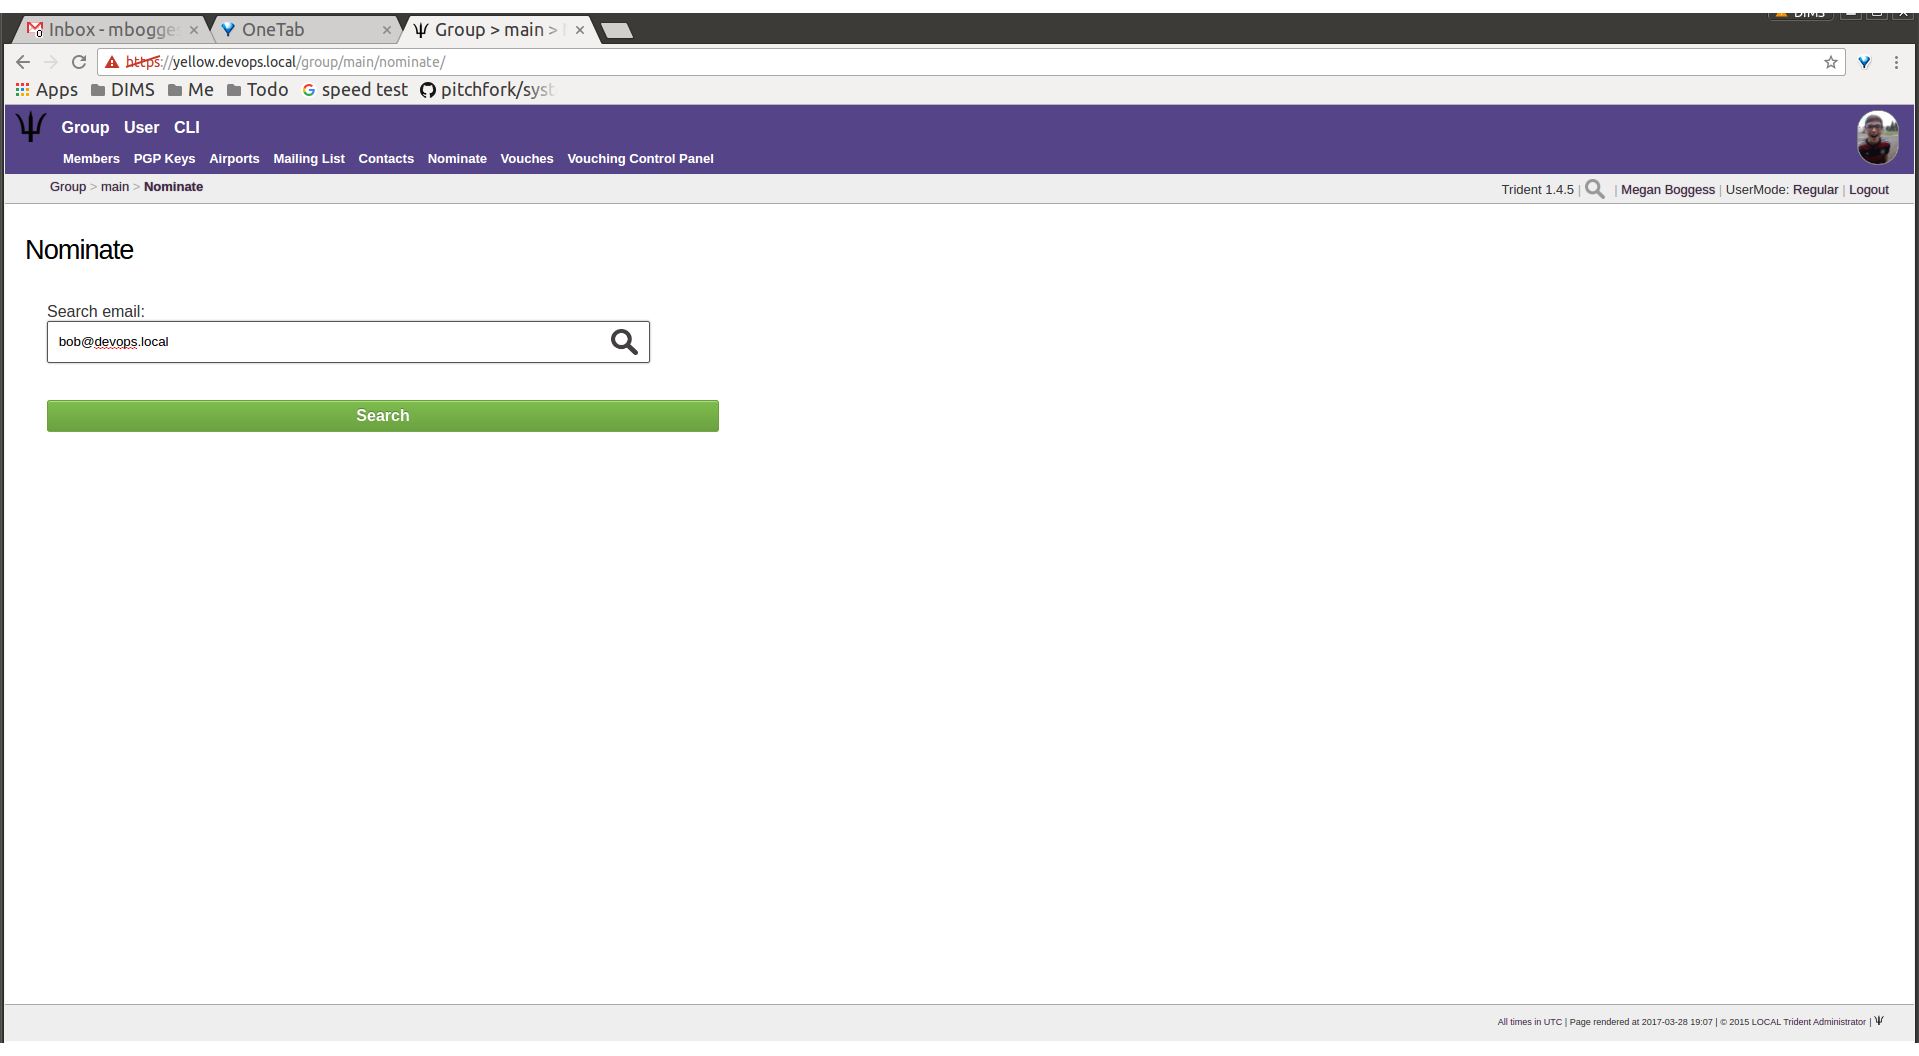
Search for a user to nominate
If there is a user tied to the given email address, the user
will show up in a list on the next page. Click the Select
button to continue (Figure User search results).
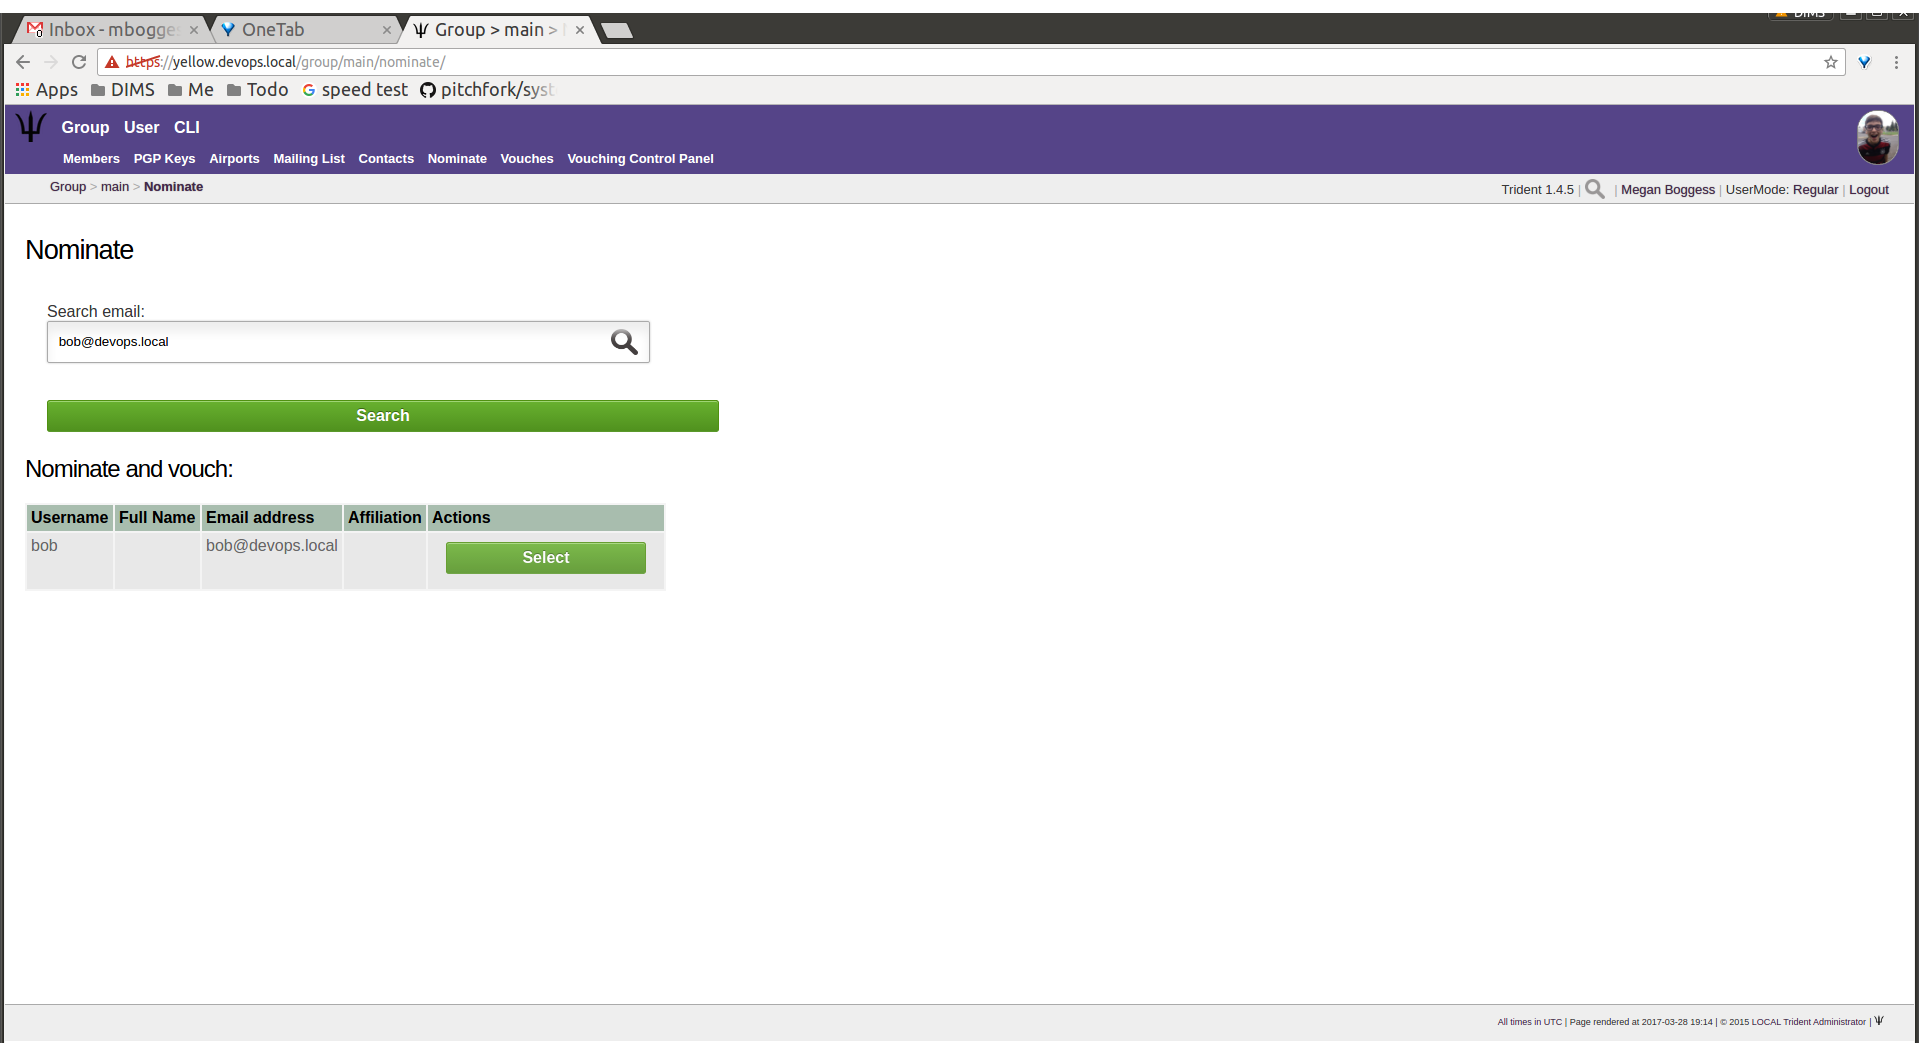
User search results
Part of the nomination process is vouching for the user. A trust group will have its own requirements, but, in general, any given trust group will require a user to obtain a certain number of vouches in order for them to be vetted into the trust group.
A vouch form opens in the page that follows the selection of
a user to nominate. Write a comment about the reason for
vouching for the user, then toggle the three attestations to
confirm relationship with the user. Then, click the Nominate
button (Figure Vouch for a user).

Vouch for a user
If the submission goes correctly, it is indicated at the bottom of the page (Figure Successful nomination).
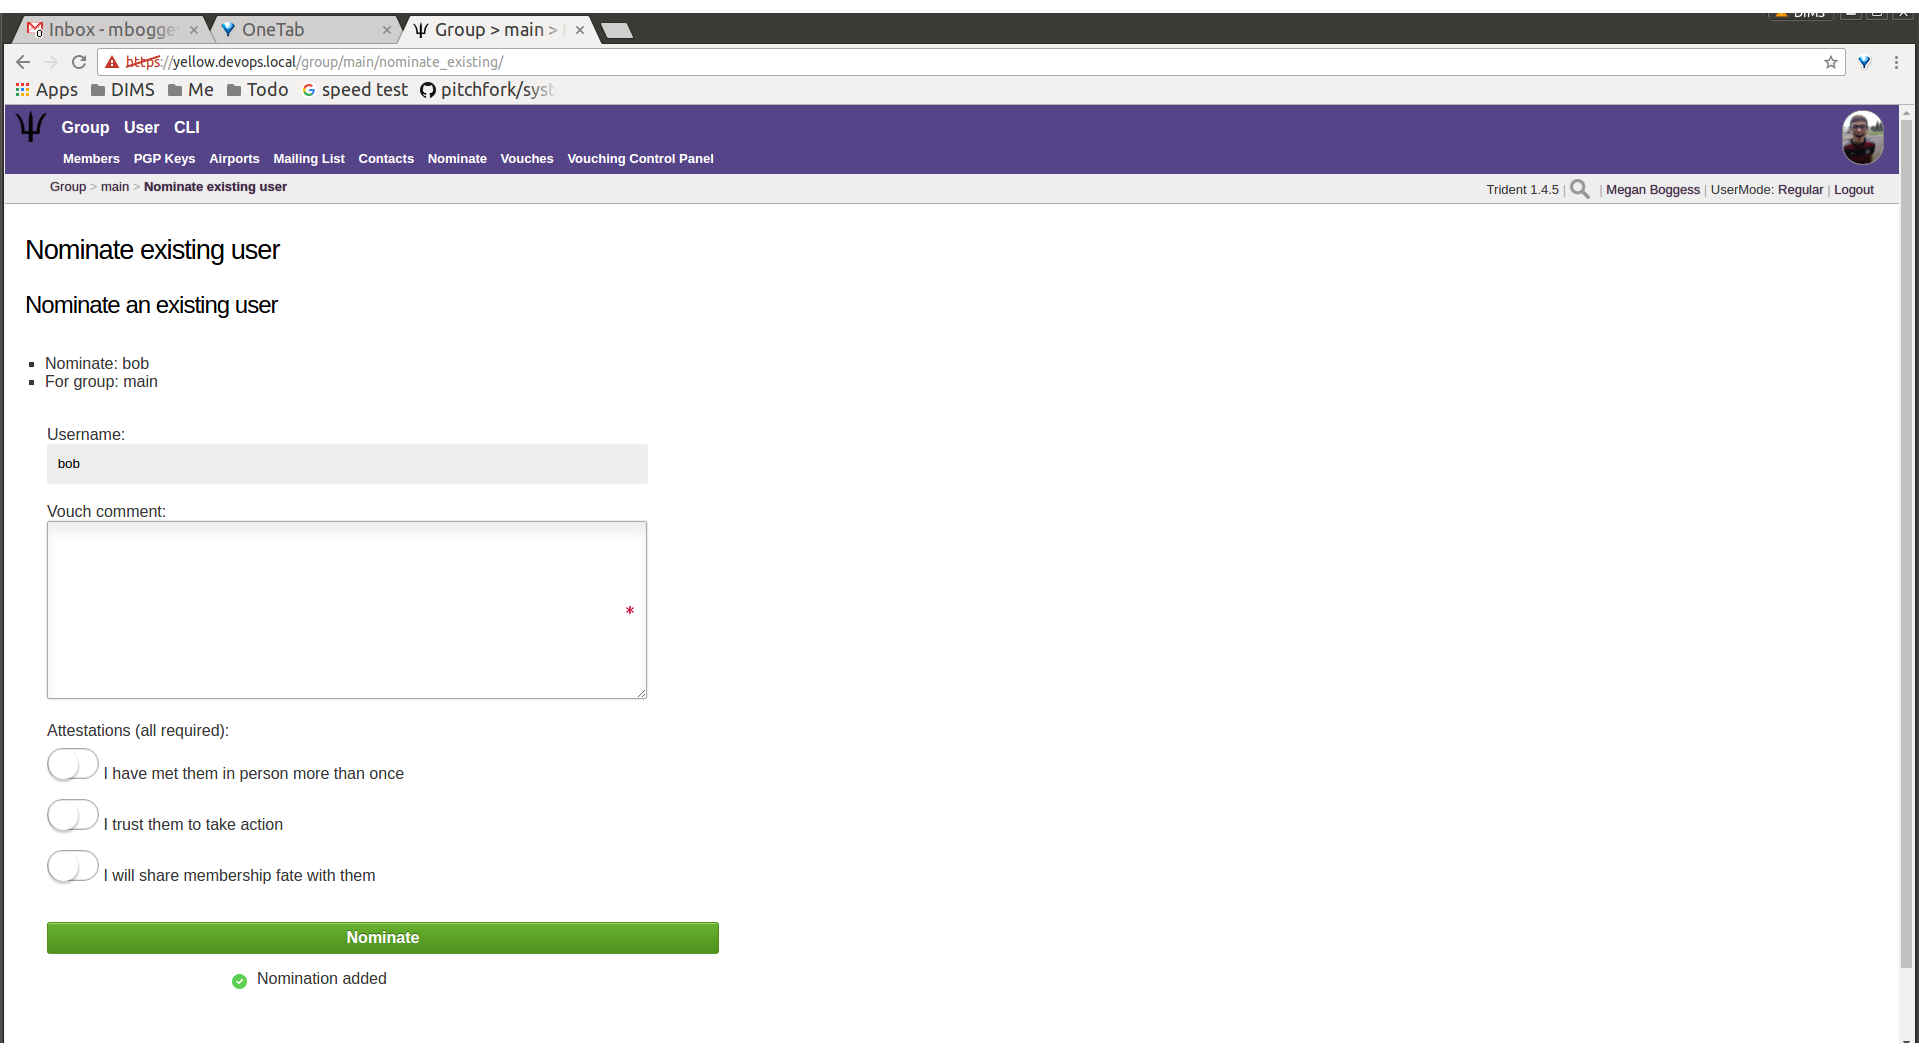
Successful nomination
Return to the Members page for the current trust group.
The list of members is updated. The user bob had
previously not been on the list of members, but now that
member is there. The user’s Vouches column is also
automatically updated (Figure Updated trust group members).

Updated trust group members
The final way to vouch for members is to use the Vouching
Control Panel found in a tab or link of the same name
within the group perspective. This panel allows vouches to
be submitted in batches (Figure Vouching control panel).
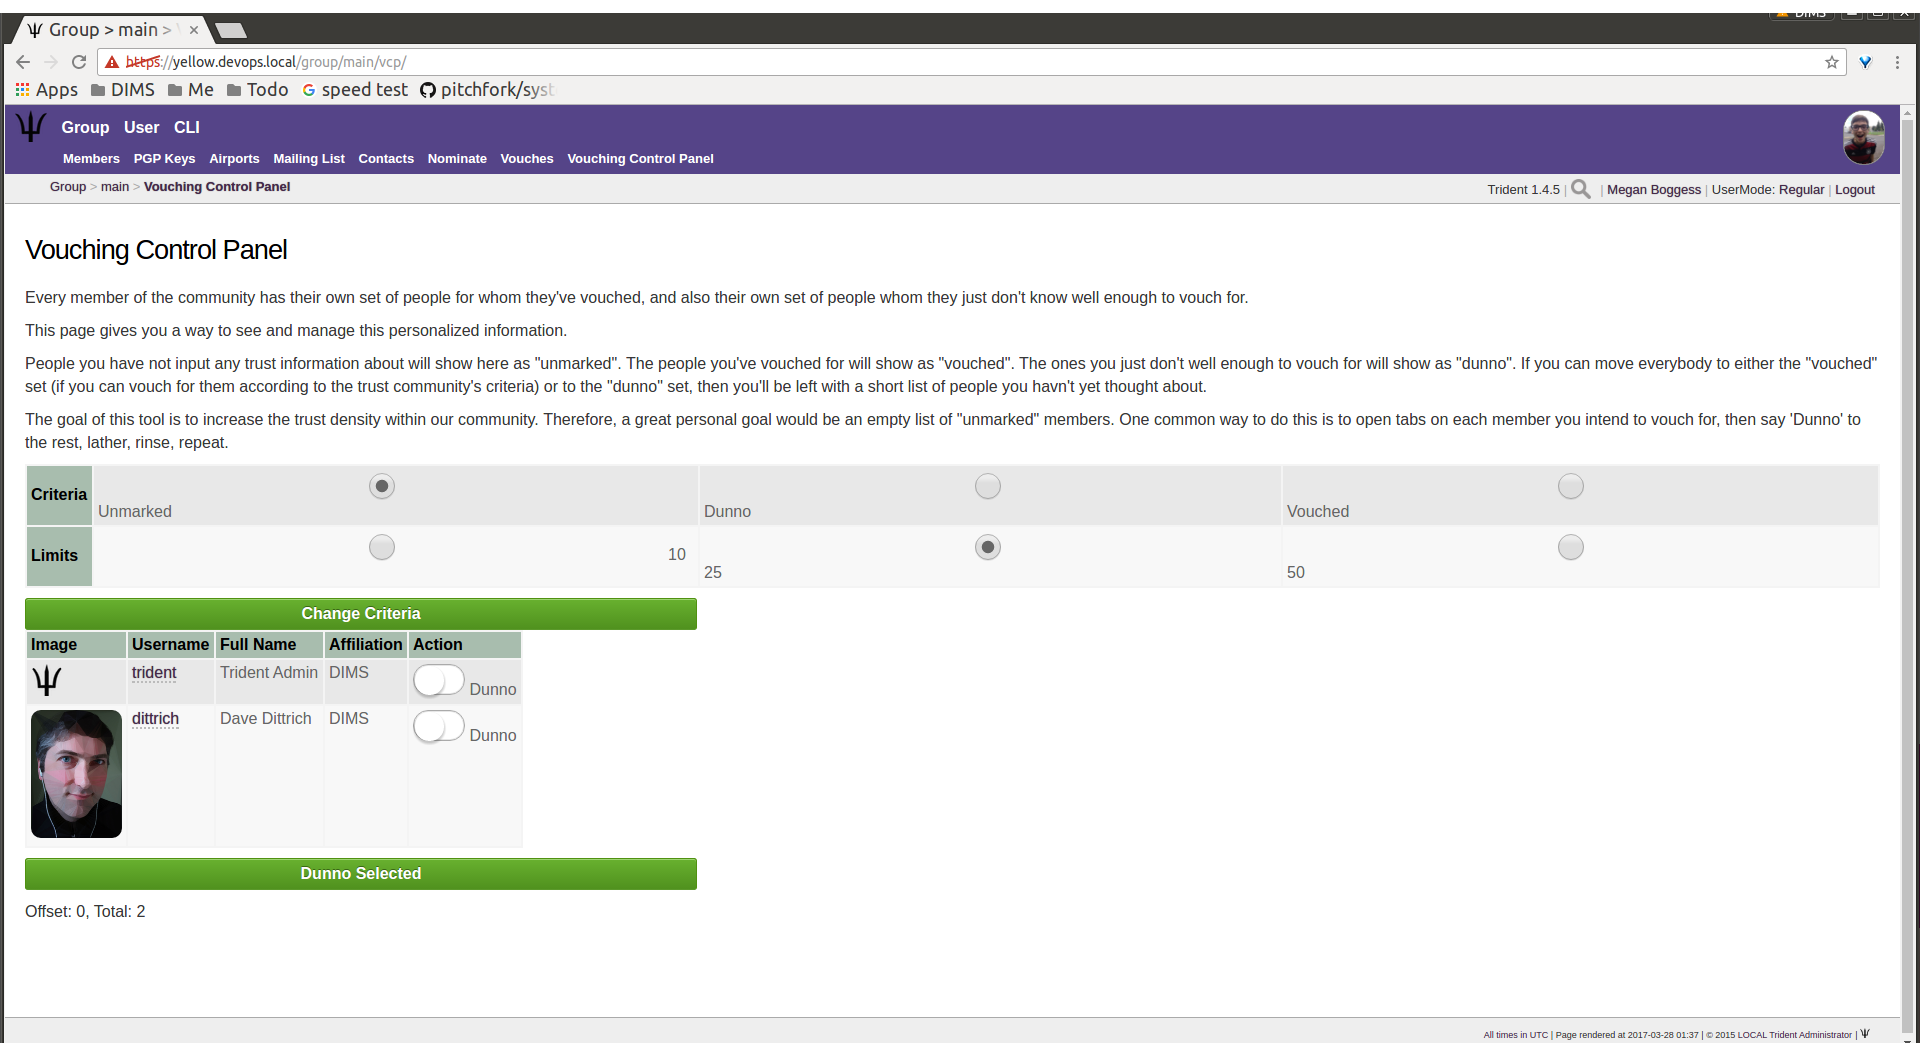
Vouching control panel
There are two selections to make to form groups of members
which can then be acted against all at one time. Choose a
criteria (Unmarked, Dunno, or Vouched).
Unmarkedmeans there is no vouch established to date for those users.Dunnomeans there is no existing relationship or experience with the user.Vouchedmeans the user already has a recorded vouch.
Then choose a limit to create the actual batch. To se the criteria, click the
Change Criteria button.
Walk through the batch, and apply an action against each member
by toggling the button in the Action column. Once all
actions have been applied, click the button at the bottom of
the list. Its name changes, depending on which action is
being applied.
Those are all the tasks a member of a trust group can perform. To see tasks for admins of trust groups or for system administrators, please see the other chapters in this document (Section Trust Group Administration Activities and Section System Administration Activities, respectively).